

Home Decor
Cold Weather Coving: How to Fit It Properly in Winter

Oct
You can fit coving in cold weather, but only if the room is warm enough, dry enough and stable for long enough for the adhesive to bond. As a working rule, the room should be at least 5°C and rising, the walls and ceiling should be free of condensation, and the coving needs temporary support for longer than it would in summer. Get those three things right and a November fit will last as well as a July one.
This guide covers the temperatures the manufacturers publish, why cold, damp rooms catch people out, how to prepare, and when it is sensible to wait.
TL;DR
- Orac Decor advises a room temperature of 5°C and rising, with humidity between 40% and 70%. In freezing conditions, adhesives fail.
- Cold slows curing. A common coatings and adhesives rule of thumb is that every 10°C drop doubles the reaction time.
- Condensation on a cold wall or ceiling is the hidden cause of most winter bond failures. Never apply adhesive to a damp surface.
- Keep the heating steady and avoid airing the room to “speed things up”. Stability matters more than airflow.
- Allow extra time before painting, and keep the coving supported until the bond is fully cured.
Table of Contents
- Why cold weather matters for coving
- What temperature is too cold to fit coving?
- The condensation problem
- Do not open the windows to dry things faster
- Prepare the materials as carefully as the room
- Surface preparation in a cold house
- Fitting step by step when it is cold
- How long should you wait before painting?
- Carl’s Installer Tip
- When it is better to wait
- Our view: winter fitting is a planning job
- Choosing the right profile for a colder, older home
- Get the right products for a winter fit
- FAQ
- Sources
Why cold weather matters for coving
Coving is held in place by adhesive, and adhesive is a chemical reaction. Cold slows that reaction down. The coatings industry guidance we have relied on says that every 10°C fall in temperature doubles the time needed for an adhesive or paint to cure fully. In practical terms, a room at 10°C will take far longer to reach full bond strength than the same room at 20°C.
That has two consequences for a ceiling job. First, the length of coving can sag, slip or pull away from the wall before the adhesive has grip. Second, if you paint or fill too early, you can disturb a bond that has not finished forming.
There is also a third issue that is less obvious: cold rooms are damp rooms. Which brings us to condensation.
What temperature is too cold to fit coving?
There is no single number for every product, so check the data sheet for the adhesive you are using. These are the figures we can point to:
| Source | What it says |
|---|---|
| Orac Decor coving installation instructions | Room temperature of 5°C and rising; humidity 40 to 70%; adhesives fail when fitted in freezing conditions |
| Everbuild Coving Adhesive and Joint Filler data sheet | Ambient air temperature of +5°C to +35°C; curing time may be significantly extended in damp, cold or humid conditions; keep temporary support in place until fully cured |
Both point to the same floor: 5°C. We treat that as the absolute minimum, not a target. In our experience, a room that is only just scraping 5°C is a room where you will be waiting a long time, so we would rather see 10°C or more in the room, with the heating on for a day or two beforehand.
Note the phrase “and rising” in the Orac guidance. A room that is 6°C at noon and heading to 2°C by night is not the same as one that is warming. Think about what the temperature will do over the next 24 hours, not just what the thermometer says as you open the box.
One more point from the Everbuild sheet: its coving adhesive is not intended for polyurethane coving. The sheet points polyurethane users to a different product type. Whatever the season, match the adhesive to the material. Our guide to choosing the best adhesive for coving explains how.
The condensation problem
The air temperature is only half the story. In cold, damp weather, the surface of an external wall or a ceiling below an unheated loft can be colder than the air in the room. Warm, moist air meets that cold surface and leaves a film of moisture you may not see or feel.
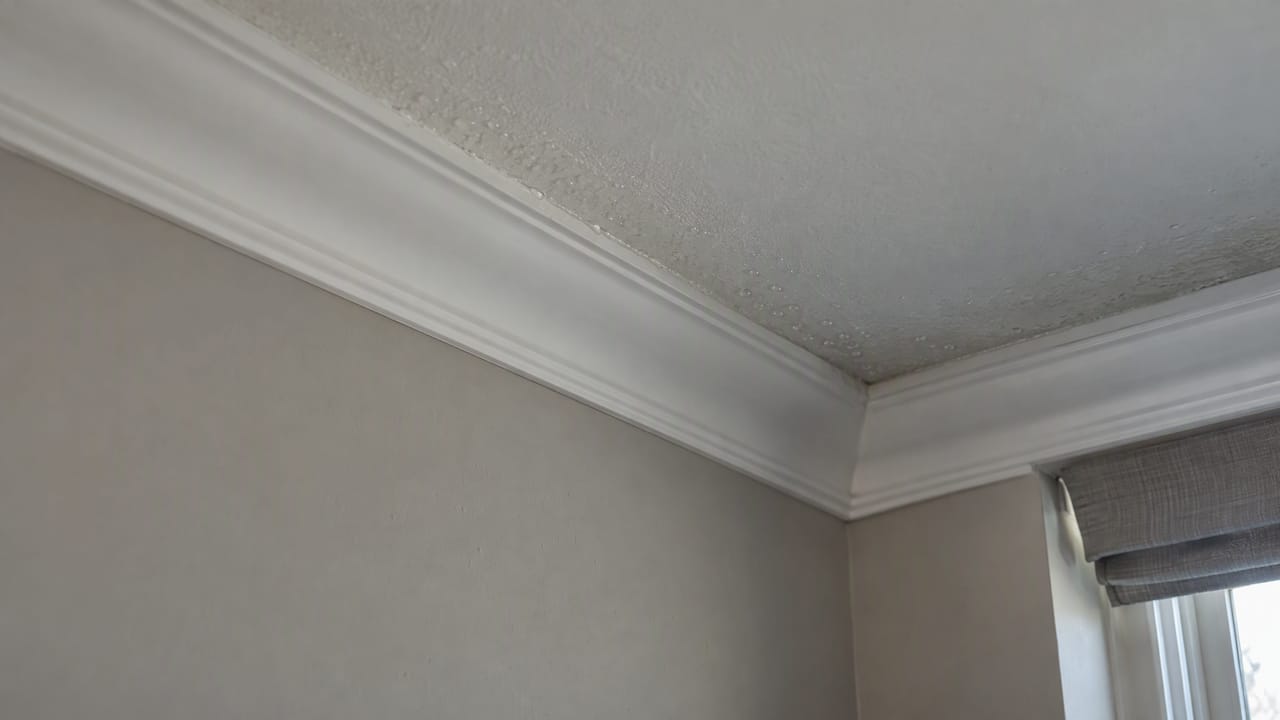
The guidance we follow is clear that surfaces must be free from condensation and frost before you apply adhesive. It adds that adhesive put onto a damp surface will cause bond failure and possible peeling later.
A simple check before you start
- Run your hand along the wall-to-ceiling junction where the coving will sit. Cold, clammy or slightly tacky to the touch means wait.
- Look along the line with a torch held flat to the surface. Condensation shows as a faint sheen.
- Check the corners above windows and on external walls first. These are usually the coldest spots.
- Press a piece of dry kitchen paper against the area for a few seconds. If it comes away damp, the surface is not ready.
If you find moisture, deal with the cause before you fit anything. Persistent damp from a leak or a failed seal is a building problem, not a fitting problem, and a builder or damp specialist should look at it.
Do not open the windows to dry things faster
It is tempting to throw open the windows to help the adhesive “breathe”. In cold, damp weather it usually backfires. The paint specialists we have drawn on explain that bringing in cold, moisture-laden air can lower the room temperature and raise humidity, which stalls the curing of water-based products. Stability is the goal.
So the better routine is:
- Heat the room steadily for 24 to 48 hours before you start.
- Keep it heated through fitting and for at least a day afterwards.
- Ventilate gently and briefly, not by leaving windows wide open overnight.
- Avoid paraffin or portable gas heaters, which release moisture into the air as they burn. A dry heat source is better.
If the room has a poor air flow and humidity stays high, a dehumidifier is far more useful than an open window. Aim for the 40 to 70% humidity range Orac Decor recommends.
Prepare the materials as carefully as the room
The room is not the only thing that has to be warm. Adhesive stored in a freezing van, garage or shed can behave differently from adhesive kept indoors. The Everbuild sheet says to store its product in unopened containers between 5°C and 25°C and to protect it from frost. Most manufacturers say something similar, so check the label.
Our routine for winter jobs is simple:
- Bring the adhesive and the coving into the room to be fitted at least a day beforehand, so everything reaches room temperature.
- Unwrap the lengths and let them lie flat. Polyurethane and other polymer mouldings can be slightly stiff when cold and relax as they warm.
- Check the date and the batch on the adhesive, and discard any tube that has been frozen.
Surface preparation in a cold house
Preparation is where cold-weather jobs are won. A bond needs a clean, dry, sound surface, and a cold house makes all three harder to achieve.
- Dust and loose paint. Scrape away flaking paint and wipe the surface down. Loose material below the adhesive will fail first.
- New plaster. The Everbuild sheet says new plastered walls must be a minimum of four weeks old. Fresh plaster in a cold, damp house dries even more slowly, so give it longer.
- Wallpaper. Coving needs to be bonded to a sound surface, not to a paper layer that may lift. See our two installer methods for fitting coving over wallpaper.
- Uneven walls and ceilings. Old houses that are cold are often old houses that are out of true. Our guides on coving for uneven walls and surface preparation on uneven walls show how we work to a level line.
If your project is in a space that was never meant to be heated, such as a converted garage, the substrate may stay cold and damp for much longer. Cold concrete floors suffer from freeze-thaw damage, and a garage that has not yet been properly dried and heated is a poor place to be gluing anything to the ceiling. Get the space warm, dry and stable first.
Fitting step by step when it is cold
The method is the same as in summer. The difference is in the pace and the support.
- Mark your lines. Mark the ceiling and wall lines accurately, using the coving’s projection and drop. Work in good light.
- Cut your mitres and test fit. Dry fit every length. Cold does not change the geometry, but you will be less forgiving of mistakes because adhesive will not give you the same open time to adjust.
- Apply adhesive evenly. Run a continuous bead along both contact edges. Do not skimp: a thin, broken bead is the usual start of a gap later.
- Press and hold. Push the length firmly into position and hold. Wipe away squeezed-out adhesive.
- Support it. Cold adhesive has less initial grab. Use temporary props, masking tape across the wall and ceiling, or small panel pins, and leave them in place longer than you would in summer. The Everbuild guidance says to always provide temporary support until the adhesive has fully cured.
- Treat joints with care. Orac Decor recommends using its DecoFix Extra on every joint, applied to each end of the moulding and pressed together firmly. Wipe off the residue straight away so the joint sits flush.
- Fill and finish later. Do not rush to fill and paint.
For the basic technique on awkward rooms, our walkthrough on how coving is installed on uneven walls and ceilings covers the details.
How long should you wait before painting?
Longer than the label suggests, if the room is cold. Orac Decor says its DecoFix Extra joint adhesive is paintable after hardening, with a minimum of 24 hours. That is under the manufacturer’s test conditions. At low temperatures, we would add a margin.
For a fuller picture of timings, see our article on adhesive drying time for UK coving, which explains why some bonds need 24 hours.
A practical guide:
- Keep the room heated throughout, not just on the day of fitting.
- Check the bond by gently pressing along the length. If anything moves, it is not ready.
- Wait until joint filler has formed a good skin before you paint over it. Cold and damp extend that time.
- Use a water-based paint only when the room is warm enough for the paint to dry. Paint has its own minimum temperature, which is on the tin.
Carl’s Installer Tip
Carl’s Installer Tip: In our experience, the most common cold-weather failure is not the adhesive. It is the wall. We’ve found that a coving length goes on beautifully in a chilly room, looks perfect for a day, and then lets go a few weeks later because it was glued to a surface carrying a film of condensation. Before you open a tube, run a dry hand along the line and check above windows and on external walls first. If the wall feels cold and clammy, heat the room and wait. Then fit with tape or props across the joint line and leave them on for at least a full day, longer if the room is below 10°C.
When it is better to wait
Sometimes the sensible decision is to postpone. We would hold off if:
- The room is unheated and likely to stay below 5°C.
- There is visible condensation, mould or damp that you cannot trace and fix.
- The plaster is new and not yet fully dry.
- You cannot keep the heating on for at least a day after fitting.
- A cold snap or frost is forecast within the next 24 hours and the property is unoccupied.
A week’s delay costs nothing. A failed bond means taking down coving, cleaning up old adhesive and filling holes.
Our view: winter fitting is a planning job
We are often asked whether winter is a bad time to fit coving. It is not, but it does reward planning. Homeowners tend to renovate in autumn and winter, ahead of Christmas or while the house is quiet, and a lot of good coving goes up in cold months. What separates a lasting job from a disappointing one is a warm, dry room, the right adhesive for the material and patience with curing.
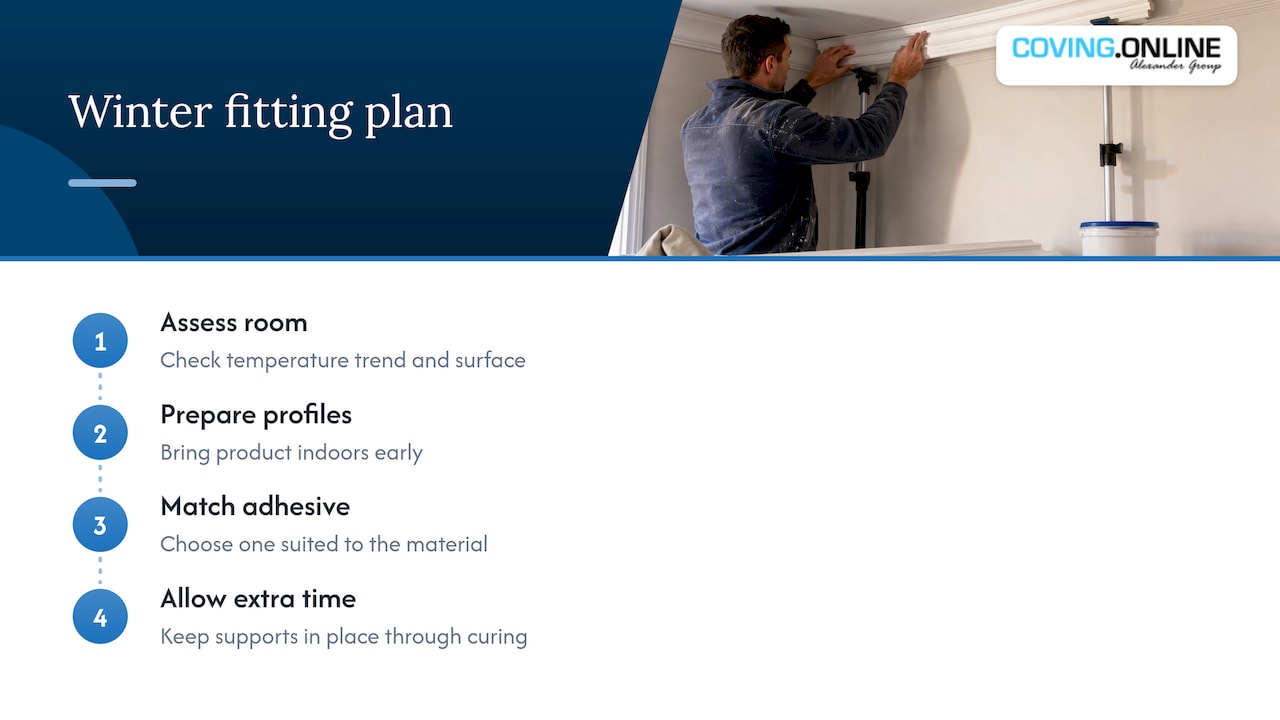
Our approach with polyurethane mouldings from Orac Decor and NOËL & MARQUET is to treat the room’s conditions as part of the job spec. We look at the temperature trend, check the surface, bring the product indoors early and allow extra time for supports and finishing. Polyurethane profiles are light and easy to handle, but light does not mean the bond can be rushed.
If you would rather not take on the risk yourself, our Elite Decor UK national installer network can arrange professional fitting, and an installer will judge the room’s conditions on the day.
— Carl
Choosing the right profile for a colder, older home
Cold homes are often period homes, and they usually have taller ceilings and more detail to match. A few thoughts:
- Traditional rooms. A classic cornice profile suits Victorian and Edwardian ceilings. Browse our cornice and coving range and our guide to coving and cornice styles for British homes.
- Modern spaces. Simple, clean profiles work well when the ceiling is lower.
- Lighting. If you want to add a soft glow, LED coving hides the light source in the profile. Our guide on LED lighting in coving explains the options.
- Ceiling features. A ceiling rose fitted at the same time keeps the work to one heated window.
- The wall below. Matching skirting completes the look, and our guide to skirting board styles helps you decide.
Get the right products for a winter fit
Coving.Online supplies over 500 Orac Decor and NOËL & MARQUET products, including coving, cornices, ceiling roses, skirting, panelling and LED profiles, with fast UK delivery. If you are planning a winter project, you can order the profiles and the matching adhesives together, so everything is on site and acclimatising before you start. If you would like the work done for you, find out more about our installation service.
FAQ
Can you fit coving in winter?
Yes, provided the room is warm, dry and stable. Orac Decor advises a room temperature of 5°C and rising. We would prefer to see the room comfortably above that, with the heating on for a day before and after fitting.
What happens if you fit coving in freezing conditions?
The adhesive may not cure properly. Orac Decor states that adhesives will fail in freezing conditions. You can end up with gaps, sagging lengths or coving that comes away weeks later.
Should I open a window to help the adhesive dry?
Not in cold, damp weather. Cold, moist air from outside can lower the room temperature and raise humidity, which slows curing. Keep the heating steady and ventilate only briefly.
How long should I leave coving before painting in cold weather?
At least the minimum on the adhesive and filler data sheets, and longer if the room is cool. Orac Decor gives a minimum of 24 hours for DecoFix Extra before painting. Our adhesive drying time guide has more detail.
Sources
- Technical Paint Services: advice for paints and coatings in cooler or damper weather
- Orac Decor: coving installation instructions
- Everbuild Coving Adhesive and Joint Filler product data sheet
Recommended
- The Ultimate Guide to How to fit Coving around a bay window
- Coving Maintenance – Tips for Long-Lasting Elegance
- Install Coving on Uneven Walls
