

Home Decor
Coving.Online: 2 Installer Ways to Fit Coving Over Wallpaper UK
Sep
Fitting coving over wallpaper is generally not advisable, though it can work with the right preparation, adhesives and lightweight profiles. If you want the safest, longest-lasting result, strip the paper back from the coving’s footprint before fixing anything. If you’d rather keep the paper intact, prepare the surface properly to improve adhesion rather than skipping straight to adhesive and hoping.
TL;DR:
- Fitting coving directly onto wallpaper risks poor adhesion and eventual detachment, especially if the wallpaper’s old adhesive weakens over time.
- Preparing the wall by scoring and removing wallpaper within the coving footprint creates a solid plaster surface for stronger, longer-lasting fixing.
- Fully stripping wallpaper before coving installation avoids future lifting issues and results in a flatter, more stable surface for the adhesive.
- Use lightweight polyurethane coving with high-tack adhesive and proper tools to ensure a secure fit over prepared surfaces, especially in imperfect walls.
- Proper finishing, including caulking and painting, is essential for a seamless look, with level lines and careful gap filling preventing visible flaws.
Table of Contents
- Why fitting coving over wallpaper often fails
- How to prepare wallpaper before fitting coving without stripping it
- When and how to strip wallpaper first for the best result
- Materials and tools that make installation reliable
- Finishing: gap-filling, sanding and painting for a professional result
- Carl’s installer tip and common mistakes
- Coving.Online products and installation you can trust
- Sources
- FAQ
Why fitting coving over wallpaper often fails
Coving adhesive is designed to grip plaster, not printed paper. When you fix coving directly onto wallpaper, the adhesive bonds to the paper’s surface layer rather than the wall behind it. That bond is only ever as strong as the paper’s own attachment to the plaster, which was never intended to carry the weight of a moulding.
The industry-standard sequence is to fit coving onto bare or prepared plaster first. Then paper or paint up to the edge. Working in reverse order introduces several problems:
- The wallpaper can lift or peel away if you ever need to remove the coving, taking chunks of paper (and sometimes plaster) with it.
- Old adhesive underneath the paper can weaken over time, especially with damp or heat, causing the coving to sag or detach months later.
- Uneven wallpaper seams and overlaps create a lumpy substrate, so the coving sits slightly proud in places and the finished line looks wavy rather than crisp.
None of this means the job is doomed. It means you need to treat the wallpaper as a problem to manage, not ignore.
How to prepare wallpaper before fitting coving without stripping it
If stripping the whole room isn’t practical, you can still get a durable fix by treating the area behind the coving differently from the rest of the wall. The goal is to expose solid plaster wherever the adhesive needs to grip.
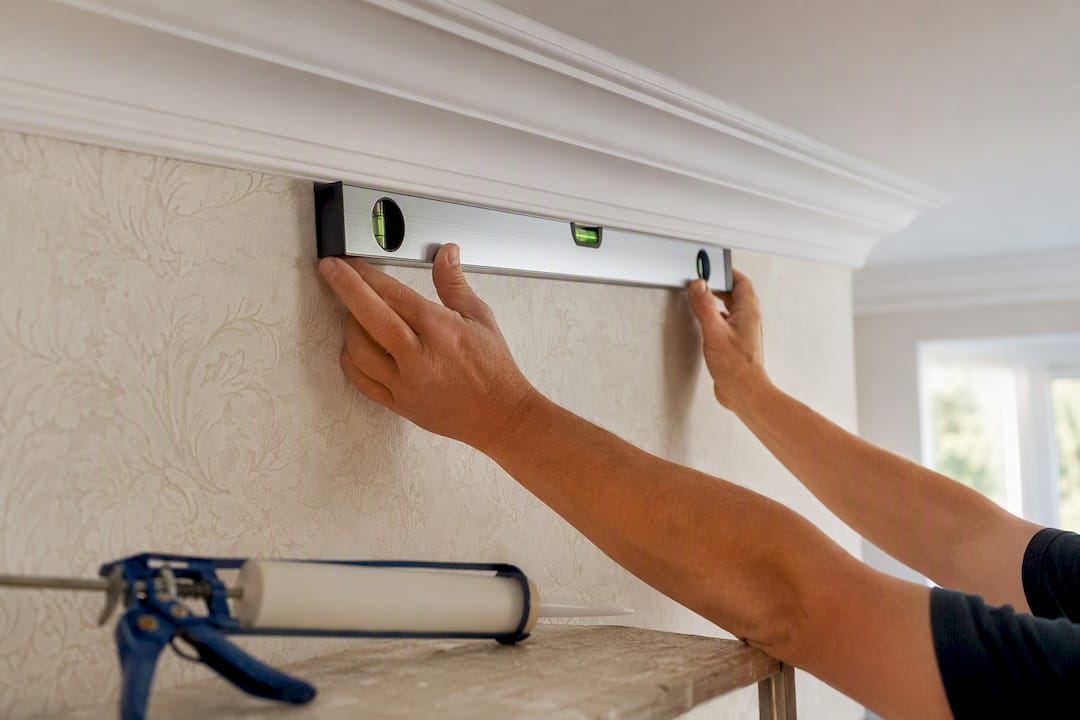
- Mark the coving line. Use a spirit level to draw a true, level guide along the wall and ceiling, ignoring any dips or bows in the plaster itself, exactly as Toolstation’s fitting guide recommends.
- Cut back the wallpaper. Score along the coving’s footprint with a sharp blade and peel away the paper, exposing a clean strip of bare plaster on both the wall and ceiling side. Trade discussion on attaching coving without removing ceiling paper backs cutting back to at least the coving’s width, not just a sliver at the edge.
- Score the exposed plaster. Lightly key the surface with a scraper or coarse sandpaper so the adhesive has something mechanical to grip, not just a smooth painted or skimmed finish.
- Apply adhesive to both surfaces. Run a bead along the wall edge and ceiling edge of the coving, avoiding a thick blob in the centre of the back, and press the length firmly onto your level line, following the technique set out by DIYDoctor’s coving guide.
- Support until cured, then caulk. Use masking tape, temporary pins or props to hold the coving in place while the adhesive sets, then run decorators’ caulk along both edges to disguise any hairline gaps.
Pro Tip: In our experience, the biggest mistake DIYers make at this stage is cutting back too narrow a strip of paper. Give yourself a small clear strip of plaster beyond the coving’s edge on each side, so the adhesive never has to rely on the paper at all.
When and how to strip wallpaper first for the best result
Removing the wallpaper entirely, rather than just cutting back around the coving line, remains the more reliable route. Adhesive bonds directly to plaster across the whole run, there’s no risk of paper lifting later, and you get a genuinely flat surface to work with.
A sensible workflow looks like this:
- Strip the paper across the whole room, or at least the full height where coving will sit, using a steamer or scoring tool and stripping solution.
- Patch any damaged plaster and let repairs dry fully before fitting.
- Apply a coat of lining paper or a mist coat if you plan to paper again afterwards, but do this after the coving goes up, not before.
- Fit the coving onto bare, sound plaster, then decorate up to the finished edge.
For a typical box room, stripping and patching can realistically take a weekend on top of the coving install itself, longer if the plaster underneath needs significant repair. If you’re finding large areas of blown plaster, damp staining, or walls that are badly out of true, it’s worth booking a professional rather than pushing on. Coving.Online arranges fitting through the Elite Decor UK installer network for exactly this kind of job.
Materials and tools that make installation reliable
Your choice of coving material matters just as much as your wall preparation. Homebuilding’s fitting guide lists the main options, and each behaves differently over a papered or prepared wall:
- Polyurethane is the preferred modern choice: lightweight, moisture-resistant, pre-primed, and forgiving on walls that aren’t perfectly straight. Orac Decor’s ranges, available through Coving, fall into this category.
- Polystyrene is the budget option, useful for low-traffic rooms, but it dents easily and shows every imperfection in the wall behind it.
- Plaster coving gives the most authentic period look but is heavy, brittle, and far less forgiving if your wall preparation is imperfect, since it needs a very solid fix.
Whichever profile you choose, use a high-tack adhesive matched to that material. Coving.Online recommends manufacturer-specific adhesives for its Orac Decor and NOËL & MARQUET ranges, since generic adhesives don’t always suit lightweight polyurethane profiles the same way they suit dense plaster ones. Deeper, more ornate period-style profiles are also better placed on a fully stripped wall, since their larger footprint magnifies any unevenness beneath.
You’ll also want a mitre box for internal and external corners, a spirit level, a fine-tooth saw, a caulking gun, and a sanding block for tidying joints once the adhesive has cured.
Finishing: gap-filling, sanding and painting for a professional result
Let the adhesive cure fully before you caulk, typically 24 hours, though always check the manufacturer’s guidance for your specific product.
- Apply decorators’ caulk in a thin, continuous bead along both edges of the coving, then smooth it with a wet finger or a caulking tool rather than leaving ridges.
- Avoid overfilling gaps in one pass. Thick caulk shrinks as it dries and can crack, so two thinner passes usually beat one thick one.
- Prime any bare filler or plaster patches before painting, so the finished junction between coving and wall reads as one crisp, continuous line rather than a patchwork of textures.
Pro Tip: We’ve found that painting the coving in a slightly different sheen to the walls, even in the same colour, helps disguise minor unevenness in the join far better than matching the finish exactly.
Carl’s installer tip and common mistakes
Install to a true level line, not to whatever bow or dip the wall happens to have. Chasing a crooked wall with the coving only creates worse gaps further along the run. Caulk the small discrepancies instead of forcing the coving to twist into a bad fit, and you’ll get a straighter result over the whole wall.
The mistakes I see most often are the same three: using a generic adhesive that isn’t rated for the profile weight, skipping the cut back step entirely and fixing straight onto old wallpaper, and forcing mitres to close up gaps on walls that were never square to begin with. Any one of these shows up as a crack or a gap within a few months.
If your walls are badly out of true, or you’d rather not gamble a weekend on it, booking a professional fitter can take that risk off your hands.
— Carl
Coving.Online products and installation you can trust
Coving.Online supplies the Orac Decor and NOËL & MARQUET ranges behind most of the preparation advice above, along with the compatible high-tack adhesives, caulks and accessories that make a fit like this hold. Whether you’re after a slim polyurethane profile for a modern flat or a deeper, more ornate design for a period property, the full coving and cornice range is built to suit walls that aren’t perfectly flat, which matters when you’re working around cut-back wallpaper rather than a pristine plastered surface.

If you’d rather not gamble a weekend on stripping, patching and fitting yourself, The Elite Decor UK installer network fits these decorative moulding products across the country, and getting a quote takes a few minutes. Browse the full range of coving and cornice profiles to see what suits your room, or head straight to the installation page to request a fitting quote from a local installer.
Sources
For step-by-step detail beyond this guide, Toolstation’s how-to covers levelling and adhesive basics, while DIYDoctor’s coving project page walks through application and caulking technique in more depth. Homebuilding’s guide is worth reading for material comparisons and pinning technique. For product specifics and compatible adhesives, Coving.Online’s Orac Decor and NOËL & MARQUET pages cover fitting instructions for each range.
FAQ
Do you wallpaper before or after fitting coving?
Coving should go up first, onto bare or prepared plaster, with wallpaper or paint applied afterwards up to the finished edge. Fitting coving onto existing wallpaper reverses this and increases the risk of adhesion failure.
Do I need to remove wallpaper before fitting coving?
Not entirely, but you do need to cut back the paper along the coving’s footprint and expose clean plaster underneath. Fitting straight onto unprepared paper risks the coving lifting away later.
What is the cheapest way to cover up old wallpaper?
A skim coat of lining paper or a coat of paint is usually cheaper than full stripping, though neither is a substitute for proper preparation where coving needs a solid fix. For coving specifically, cutting back and keying the plaster along the fixing line costs little beyond your time.
Do rooms look better with or without coving?
Coving generally softens the wall-to-ceiling junction and adds a finished, considered look, particularly in period-style rooms with higher ceilings. Whether it suits a specific room depends on ceiling height and existing proportions, but most homeowners find a well-fitted profile improves the overall finish.
What is the best way to cover up old wallpaper before decorating?
Stripping remains the most reliable method for a genuinely flat, durable surface, especially where you’re fitting fixtures like coving. If stripping isn’t feasible, lining paper over sound, well-adhered wallpaper is an acceptable middle ground for painting, though not for coving fixing points.
