
Home Decor
Orac LED Profiles: Choosing and Fitting Them Well
Oct
Orac LED profiles are polyurethane mouldings with a recess or ledge built in to hide an LED strip, so the light washes across the ceiling or wall and you never see the source. Orac makes the profile only: you buy the LED strip, aluminium channel and driver separately, and the electrical work should be done by a qualified electrician. This guide explains how the profiles work, how to pick between them and how to fit them so the finish looks deliberate rather than improvised.
TL;DR
- Orac LED profiles conceal a strip to give soft, indirect light. Orac does not supply the LED components, so plan the strip, driver and wiring separately.
- Choose an uplighter for a glow across the ceiling, a downlighter for wall washing, or a versatile profile if you want either.
- Never stick the strip straight into the moulding. Use an aluminium channel for heat management and an even light line.
- Fix indirect lighting profiles with a heavy-duty adhesive such as DecoFix Power (FDP700), and use a frosted or opal diffuser to avoid visible LED dots.
- We supply the profiles and can arrange fitting through our installer network.
Table of Contents
- What Orac LED profiles actually are
- Which profile suits which room
- How far from the ceiling should the profile sit?
- The parts list: what you need besides the profile
- Why the aluminium channel is not optional
- Avoiding visible LED dots
- Installing an Orac LED profile step by step
- Bathrooms and wet areas
- Keeping it safe and serviceable
- Our view: purpose-made profiles beat improvised ones
- Ready to choose your profile?
- FAQ
- Sources
What Orac LED profiles actually are
The phrase covers a family of mouldings rather than one product. Orac’s coving lighting range is built for ambient indirect lighting: the profile hides the strip and the surface it faces does the diffusing. The result suits modern and traditional interiors alike, because the profile itself can be as plain or as ornate as the room needs.
There are two broad ways to use them:
- Uplighting. The profile sits on the wall, usually near the ceiling, and the light travels upward and spreads across the ceiling surface. It makes a room feel taller and calmer.
- Downlighting. The light is directed down the wall. It graces texture, panelling or a feature wall, and works well for a more intimate, evening mood.
Some profiles, such as the C396, can be used in a variety of formats: coving, indirect lighting, downlighting, curtain profiles and borders. That flexibility is useful when you are not yet sure how the room will be used.
Our own range includes both styles, and you can browse it in the LED coving category.
Which profile suits which room
The best profile depends on ceiling height, the existing architecture and how much of the moulding you want to see. As a starting point:
| Situation | What to look for |
|---|---|
| Modern living room, plain walls | A clean, linear profile with a crisp shadow line |
| Period property with high ceilings | A larger, more ornate cornice-style lighting profile that reads as traditional coving |
| Small bedroom or hallway | A compact angular profile so the moulding does not dominate |
| Bathroom | A compact profile, with lighting zones and IP ratings checked first (see below) |
| Feature wall or panelled wall | A downlighting profile to graze the surface |
| Curtain wall | A profile that hides both rail and strip |
We have seen the same two mistakes again and again: choosing a profile too small for the ceiling height, so it disappears, and choosing one so deep that it crowds a low ceiling. Hold a length of the profile, or a cardboard mock-up, against the wall before ordering.
For a few examples, the Orac range includes the C373 and C381, both primed products with a smooth matt surface ready for painting, described by Orac as impact resistant, water resistant and lightweight. Smaller profiles such as the CX189 are aimed at neat uplighting or downlighting with LED tape and are positioned as an easy DIY job. For more ideas by room, see our 12 LED ceiling coving ideas and the room and style section of our full LED coving guide.
How far from the ceiling should the profile sit?
There is no fixed rule. A profile fitted closer to the ceiling creates a stronger, more focused wash of light, while dropping it further down the wall gives a softer, more diffused glow, according to Orac’s uplighter guidance.
In practice we suggest testing before you glue anything. Tape a length of profile with a temporary strip at two or three heights, switch it on in the evening and look at it from your normal seating position. A ceiling with a slight texture or uneven plaster will show more at a close distance, so it can be better to drop the profile a little. A smooth, freshly skimmed ceiling forgives a tighter fit.
The parts list: what you need besides the profile
Because Orac sells the moulding only, a complete installation needs:
- The profile (and enough length, plus spare for mitres and mistakes).
- An aluminium channel to house the strip.
- An LED strip suited to the length and brightness you want.
- A frosted or opal diffuser, if the channel does not include one.
- A driver, plus any dimmer or controller.
- Adhesive for the profile, and filler and paintable decorator’s caulk for the joints.
- Tools: mitre saw or fine-toothed handsaw, mitre block or corner guides, spirit level, tape measure.
The strip choice matters more than most people expect. Our guide on how to choose the right LED strip for coving covers colour temperature and brightness in more detail.
Why the aluminium channel is not optional
Orac’s guidance is clear: don’t glue the strip directly in the profile. Put it in an aluminium channel first, which dissipates heat and helps prevent premature LED failure, and also acts as a light guide for more uniform dispersion.
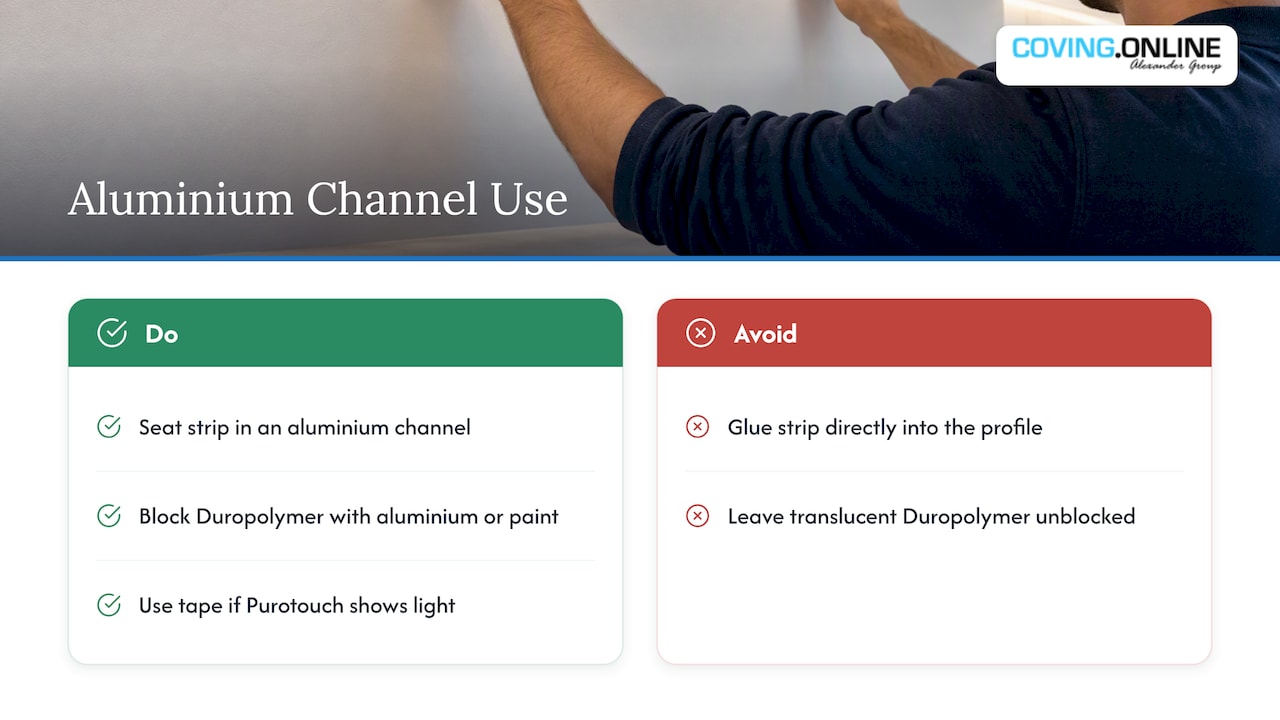
There is a second reason in some profile materials. Duropolymer profiles, such as the CX and SX series, are naturally translucent. To prevent light bleeding through the material, use an aluminium profile inside the cove, aluminium tape or light-blocking paint. Purotouch profiles are typically opaque, but if light still shows through, aluminium tape fixes it.
Avoiding visible LED dots
A row of bright dots along the ceiling is the quickest way to spoil an otherwise good job. Frosted or opal diffusers are recommended for indirect LED coving to remove hot spots and give a consistent light bar. The trade-off is that opal diffusers can reduce total light output by 20 to 30%, so choose a strip a little brighter than you think you need and dim it down.
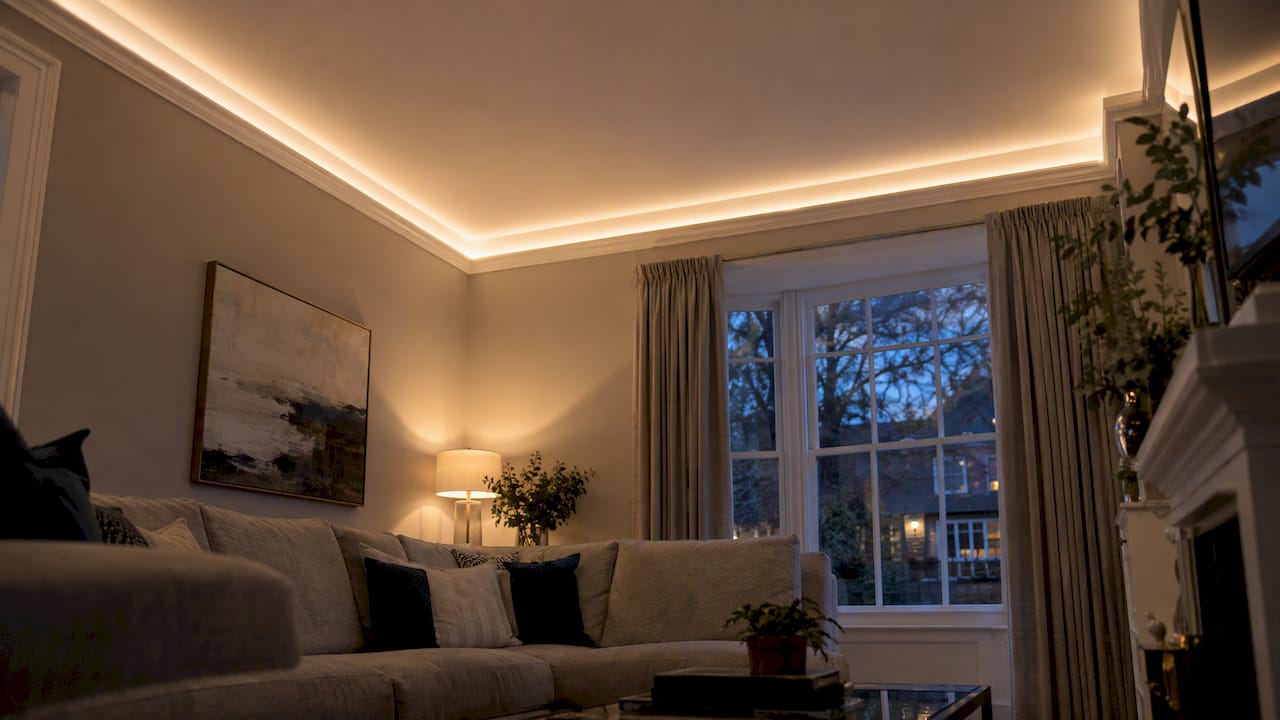
Also consider glare. It is easy to overlook until the system is switched on, and a properly diffused profile helps keep the Unified Glare Rating low, so the light stays comfortable in rooms where you spend long evenings. Our guide to seamless glow without LED dots goes deeper on spacing and strip density.
Installing an Orac LED profile step by step
This is the sequence we follow on site. Orac’s installation instructions for indirect lighting profiles should always be read alongside it, as details vary by profile.
- Acclimatise the product. Leave the profiles in the room for at least 24 hours, and make sure the surface is clean, dust-free and at room temperature.
- Mark your line. Use a spirit level and pencil, and check it against the ceiling at both ends of the longest wall. Ceilings are rarely level, so decide whether to follow the ceiling or the true level.
- Dry-fit and cut. Cut internal and external mitres on a saw. Polyurethane is lightweight and cuts cleanly with a mitre saw or hand saw.
- Bond the profile. Orac strongly recommends DecoFix Power (FDP700), an MS-Polymer adhesive, for indirect lighting, so the profile stays bonded without shrinkage. Orac’s C373 page says the same for heavy cornices, curtain profiles and 3D wall panels. Adhesives are available through our shop.
- Fill and finish. Fill joints, caulk to the wall and ceiling, and paint. Do this before the strip goes in.
- Fit the channel and strip. Position the aluminium channel, add the strip and diffuser, and leave a service loop at the driver end.
- Electrics. Have the driver and mains connection fitted and tested by a qualified electrician.
Our LED coving installation guide and the step-by-step section of our main LED guide cover this in more depth.
Carl’s Installer Tip. In our experience, the most common reason a lit profile looks poor is rushed corners. We’ve found it pays to dry-fit every mitre, then run the strip and diffuser through the channel before the adhesive sets, so you know the light line is continuous. Paint and caulk first, add electronics last: it is far easier to keep a clean finish when the strip is not in the way.
Bathrooms and wet areas
A lit profile can look superb above a bath or shower, but bathrooms have rules. Lighting is divided into zones, and the IP rating of every component has to suit the zone. A guide to UK bathroom lighting zones explains how those zones are measured from the bath or shower, including the 2.25m height. Keep the strip, driver and connections in the right zone, and ask an electrician to confirm the layout before fitting the profile.
Keeping it safe and serviceable
LEDs and drivers fail eventually, and a design that makes them impossible to reach turns a simple swap into a redecoration. Leave the driver somewhere accessible, and keep the strip removable from the channel. We cover this in the safety and servicing section of our LED coving guide.
Our view: purpose-made profiles beat improvised ones
We are often asked whether you can simply tuck a strip behind ordinary coving. You can, but it rarely looks as good. A purpose-designed profile is shaped so the strip sits at the right depth and angle, so the light spreads without dots or a hard edge on the ceiling, and the moulding still looks like architecture when the lights are off.
That is why we focus on Orac Decor and NOËL & MARQUET polyurethane profiles. They are lightweight, easy to cut and fix, and available in both traditional and modern styles, so lighting does not force a compromise on character. Our approach is to match the profile to the room first, then plan the electrical side with the right professional, rather than the other way round. For the longer argument, read why purpose-designed LED coving outperforms improvised strip-behind-standard-coving.
— Carl
Ready to choose your profile?
We supply the full Orac Decor and NOËL & MARQUET range and can arrange professional fitting through our Elite Decor UK national installer network. Start with our LED coving range, add traditional cornice and coving if you want a classic look elsewhere in the house, or talk to us about installation. Prices are shown on each product page.
FAQ
Do Orac LED profiles come with the lights?
No. Orac supplies the moulding profiles, but not the LED components. You need to buy the strip, aluminium channel, diffuser and driver separately, and have the electrics done by an electrician.
Can I fit Orac LED profiles myself?
The moulding itself is a realistic DIY job, as it cuts with a saw and bonds with adhesive. The wiring is not: use a qualified electrician. If you would rather not do any of it, we can arrange installation across the UK.
Which adhesive should I use?
Orac strongly recommends DecoFix Power (FDP700) for indirect lighting profiles. It is an MS-Polymer adhesive designed for heavy-duty bonding without shrinkage.
Why can I see light through the profile?
Some materials, such as Duropolymer, are translucent. Line the cove with an aluminium profile, aluminium tape or light-blocking paint to stop it.
Can I use them in a period home?
Yes. Choose a larger, more ornate lighting profile that reads as traditional coving, then add a ceiling rose or panelling to match. The lighting is hidden, so the character stays.
Sources
- Orac Decor: Coving lighting
- Orac Decor: Coving lighting, uplighter
- Orac Decor: Installation instructions for indirect lighting profiles (PDF)
- Orac Decor: C373
- Orac Decor: C381
- Design Scene: Specifying aluminium LED profiles, heat, glare and optics
- UK bathroom lighting zones guide
Recommended
- Orac Decor Coving: A Practical Buying Guide
- Lighting Profiles for Better Interior Design
- Orac Decor SX163F Coving
