

blog
Why Coving Joint Cracks and How to Repair Them
Oct
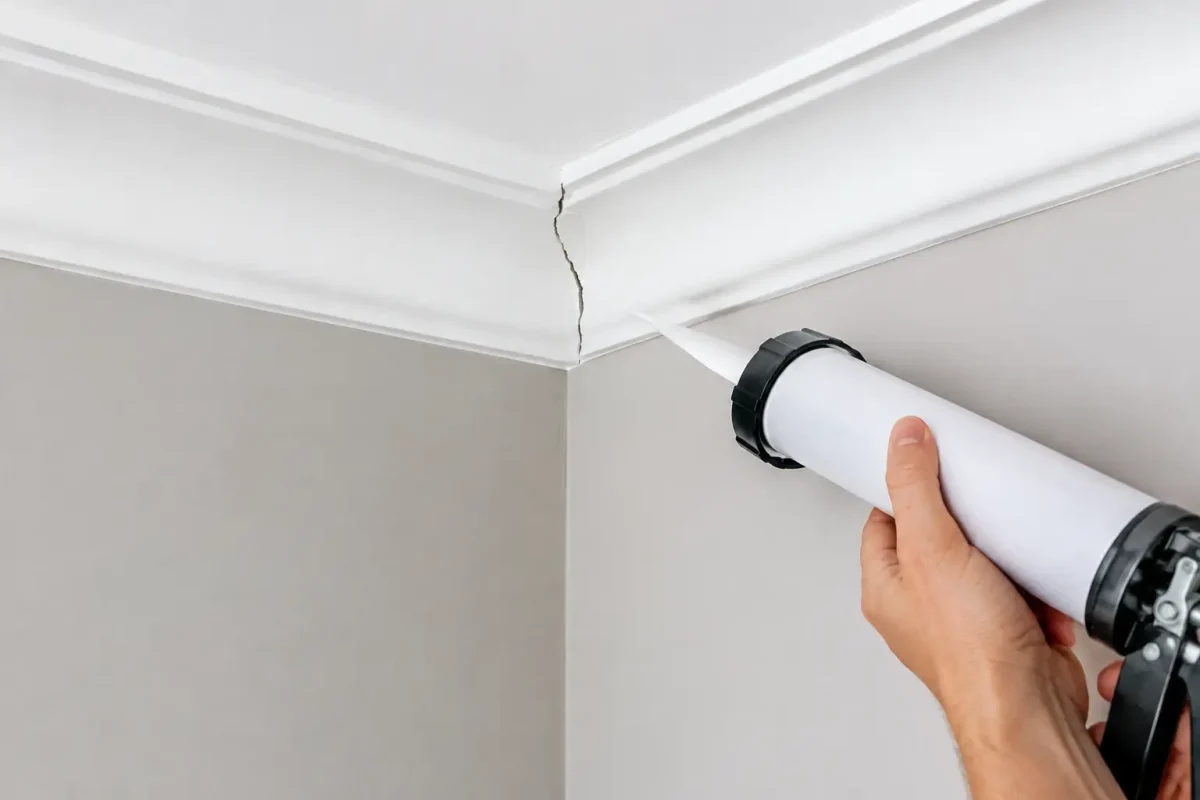
A fine line appearing across a finished cornice can draw attention far more quickly than the moulding itself. Coving joint cracks are common in both older plasterwork and recently completed decorating projects, but they are not all caused by the same thing. The right repair depends on whether the crack is in the joint, the surface finish, or the wall and ceiling behind it.
For homeowners, decorators and fit-out professionals, the aim is not simply to fill a visible gap. It is to identify why the joint moved, make the bond sound, and create a paint-ready finish that will stay neat through normal seasonal movement.
What causes coving joint cracks?
Most cracks occur where two lengths of coving meet. A mitred internal or external corner, a straight butt joint, and a long run joined in the middle of a wall can all be vulnerable if the materials, adhesive or preparation are not right.
The most frequent cause is movement in the building. Timber joists, plasterboard ceilings and masonry walls expand and contract slightly as temperature and humidity change. New-build homes can also experience settlement as materials dry and the structure adjusts. A rigid decorative finish may reveal that movement at its weakest point: the joint.
Poor adhesion is another common issue. Dusty, friable or previously wallpapered surfaces do not provide a dependable base for adhesive. Likewise, coving fixed only at the edges, without adequate contact along its rear faces, can loosen slightly over time. The joint may then open even if the individual lengths still look broadly secure.
With traditional plaster coving, weight is a significant factor. Heavy sections need a suitable substrate, correct adhesive and often mechanical support during installation. If a length sags or pulls away fractionally, the joint finish can crack. Lightweight polyurethane mouldings place far less load on the wall and ceiling, which is one reason they are often better suited to renovation work and long decorative runs.
Finally, some cracks are finishing failures rather than installation failures. Standard decorator’s caulk is useful for very small perimeter gaps, but it is not a substitute for a proper coving joint adhesive or filler. When used alone across a joint, it can shrink, split or leave a noticeable line beneath paint.
How to tell whether the crack is cosmetic or a fitting problem
Start by looking closely at the crack. A hairline line in the paint, with no visible separation between coving sections, may only need local preparation and repainting. Run a finger gently across it. If the surface feels flush and solid, the problem may be limited to the paint film or a thin layer of filler.
A dark line, open gap or step between the two pieces suggests movement at the joint itself. Press lightly on either side of the join. Any flexing, creaking or movement indicates that the coving needs to be re-bonded, not merely filled. Check the wall and ceiling edges at the same time. Gaps along these edges can point to a wider adhesion issue.
Be more cautious if cracks continue beyond the moulding and into the wall or ceiling. Diagonal cracks above doors and windows, rapidly widening gaps, or cracking combined with sticking doors may indicate building movement rather than a decorative defect. In that situation, seek advice from a qualified building professional before carrying out a cosmetic repair.
Repairing small cracks in a sound coving joint
Where the coving is firmly fixed and the crack is fine, a careful surface repair is usually enough. First, score the crack lightly with a sharp filling knife or scraper. This removes weak paint and creates a clean channel for the repair material. Avoid widening the line unnecessarily or damaging the profile.
Brush away dust, then apply a fine surface filler suitable for interior mouldings. Work it into the crack with a flexible filling knife and remove excess before it dries. Once fully cured, sand lightly using fine abrasive paper or a sanding sponge. The objective is to restore the profile, not flatten its detail.
Prime any bare areas if required by the filler manufacturer, then repaint the whole coving run where possible. Spot painting can leave a difference in sheen, particularly on ceilings with side light from windows. A full coat across the section produces the more professional result.
Repairing an open or moving coving joint
An open joint needs more than filler. Begin by carefully cutting out loose caulk, cracked filler and flaking paint from the join. If the joint has opened only slightly but both lengths remain securely bonded to the wall and ceiling, clean the gap thoroughly before applying a purpose-made joint adhesive or joint filler compatible with the moulding material.
For polyurethane coving and cornice, use the manufacturer-recommended adhesive system. A dedicated joint adhesive is designed to bond the ends of the mouldings together, while installation adhesive secures the moulding to the wall and ceiling. These products do different jobs, so using the correct one in the correct location matters.
If either length has come loose, it may be necessary to release a short section, remove failed adhesive and re-fix it properly. Prepare the substrate by removing loose paint, dust and residue. Apply installation adhesive to both contact surfaces on the back of the moulding, then press it firmly into place. Add joint adhesive to the cut ends before bringing them tightly together.
Wipe away surplus adhesive while it is still workable, following the product instructions. Hold the section securely until it has taken hold. For longer or heavier profiles, temporary pins or support can help maintain alignment while the adhesive cures, provided they are used appropriately and removed or filled afterwards.
Once the joint is stable and cured, fill any remaining fine line, sand carefully and paint. Rushing this sequence is a common reason repaired joints reopen. Adhesive needs time to develop strength before sanding, filling or decorating puts further stress on the area.
Corners need particular care
External corners are more likely to chip or crack because they are exposed to knocks from furniture, ladders and everyday traffic. Internal corners, meanwhile, often reveal subtle wall movement. Accurate cutting is essential in both cases. A joint forced together to disguise an inaccurate mitre carries stress from the outset.
For complex profiles, use a mitre box or suitable cutting equipment that supports the moulding properly. Dry-fit each piece before applying adhesive. This is especially worthwhile with patterned or large-scale cornices, where even a small mismatch can be obvious after painting.
Preventing cracks when fitting new coving
Good preparation does more to prevent future cracking than extra filler ever will. Walls and ceilings should be clean, dry, stable and free from loose paint or wallpaper. Fresh plaster must be fully dry. If the surface is highly absorbent or powdery, it may need sealing or priming in line with the adhesive guidance.
Choose a moulding suited to the project. Lightweight, high-density polyurethane coving is durable, moisture-resistant and easier to handle than traditional plaster. It is particularly practical for refurbishments, ceilings that are not perfectly level, and projects where installation speed matters. That does not mean it eliminates building movement, but its low weight and purpose-designed adhesive systems provide a more dependable starting point.
Allow mouldings to acclimatise in the room before fitting, particularly if they have arrived from a cold delivery vehicle or been stored in an unheated space. Keep room conditions reasonably stable during installation and curing. Extreme temperature changes can affect both the moulding and adhesive before the bond is established.
Plan joints carefully. Where possible, place them away from the most prominent sightlines and avoid creating very short pieces at the end of a run. Ensure every joint is properly bonded, every length has continuous adhesive contact, and excess adhesive is cleaned away before it hardens. At Coving.Online, this practical approach is central to achieving the crisp, durable finish premium decorative mouldings are designed to deliver.
When replacement is the better option
Repeated cracking, extensive water damage or sections that have pulled well away from the surface can make replacement more sensible than patching. This is particularly true where old plaster coving has become soft, fractured or difficult to secure safely.
Replacing a damaged length with a lightweight alternative can be a clean, manageable upgrade, but profile matching needs consideration. Measure the projection and drop of the existing coving, and assess the profile shape before selecting a replacement. If an exact match is unavailable, replacing the full run or the room’s coving may give a more consistent result.
A coving joint should disappear after preparation and paint, leaving the room’s proportions and detailing to do the work. Taking the time to repair the cause, rather than just covering the line, is what keeps that finish looking considered long after the decorating is complete.
