
Home Decor
How to Cope Skirting Joints for Tight Internal Corners

Oct
To cope a skirting joint, you fix the first board square into the corner, cut the second board at 45 degrees to reveal the profile, then cut along that profile with a coping saw and angle the blade slightly backwards. The second board then butts over the face of the first and follows every curve. Unlike an internal mitre, it stays closed when the walls are not square, which in most British homes they are not.
This guide covers when to cope rather than mitre, what you need, the cut itself, the order to fit a room, how to cope in place, and how to finish the small gaps that remain.
TL;DR
- A coped (or scribed) joint is the better choice for internal corners, because it tolerates walls that are out of square and keeps working if the wall moves a little.
- Fix the first board square into the corner, mitre the second at 45 degrees, trace the profile, then cut it with a coping saw using a slight back-cut.
- Always test-fit and refine with a file or sandpaper before you fix anything. Patience here saves filler later.
- Use a mitre for external corners, and finish any hairline gap with paintable decorators’ caulk, not silicone.
- Fit the room in a sensible order so every cope sits on the end of a board that meets the fixed board, not the other way round.
Table of Contents
- What a coped skirting joint is
- Cope or mitre: which joint goes where
- Tools and materials
- How to cope a skirting joint, step by step
- Which board gets coped: planning the order
- Can you cope skirting in place?
- Finishing small gaps after fitting
- Common mistakes with coped joints
- Does the profile change the technique?
- Our perspective: why we cope every internal corner
- Skirting, adhesives and fitting from Coving.Online
- FAQ
- Sources
What a coped skirting joint is
A coped joint is an internal corner where one board runs square into the corner and the other is cut to the exact shape of its face. The terminology varies. In the UK you will usually hear it called scribing, and scribing is the standard term outside the United States, where coping is also used. Trade, DIY videos and merchants use the two words for the same joint, so search for either.
The logic is simple. A mitred internal corner relies on two boards meeting at a perfect 90 degrees, with each cut at exactly 45. A coped joint relies on one board butting into the corner and the other wrapping its profile. Because the second board overlaps the first rather than meeting it edge to edge, there is room to adjust. Scribing lets the fitted board be adjusted forward or backward to keep a tight seal, which is why it works so well on walls that are not perfectly square, common in older homes.
Cope or mitre: which joint goes where
The rule most installers work to is straightforward: cope the internal corners, mitre the external ones.
| Corner type | Best joint | Why |
|---|---|---|
| Internal corner (the corner points away from you) | Coped / scribed | Copes with out-of-square walls and small movement |
| External corner (the corner points towards you) | Mitre | Two 45-degree cuts meet to wrap the corner cleanly |
| Internal corner in a perfectly square, plumb room | Mitre is possible | Only works when the angle is truly 90 degrees |
| Internal corner, very plain flat-faced board | Butt joint is possible | Square-cut board abutting the other, with little profile to follow |
One decorator-focused guide warns that many DIYers are tempted to use internal mitres, which only work in perfectly square, plumb rooms, whereas scribing remains the more robust technique. We agree with that, and it matches what we see on site. A mitre that looks perfect on the day can open at the top within a season.
External corners are a different job. If you are working on those, our guide to avoiding gappy external corners covers the mitre side in detail.
When a coped joint is worth the extra minutes
Coping takes longer than a mitre. It is worth it when:
- The house is older, or an extension meets original walls.
- The corner has been plastered by hand rather than lined with plasterboard and a tight bead.
- The skirting has a deep or ornate profile, where gaps show.
- You are painting rather than staining, but want the join to disappear.
- The board will sit in a room with changing temperature or humidity, such as a kitchen or an area with underfloor heating.
On a very simple, flat, square-edged board the difference is smaller, but the habit is still sound.
Tools and materials
You do not need a workshop. The basics, as listed by Homebuilding, are a pencil, a mitre saw or mitre box, and a coping saw. In practice we would add:
- A fine-toothed hand saw for removing the waste in straight sections before you start the curves.
- A half-round file or sanding block with fine paper (around 120 grit is a sensible choice) to tidy the cut edge.
- A tape measure and a sliding bevel if you want to check the corner angle.
- A drill, screws and nails or adhesive, depending on what is behind the plaster. Fixings differ between plasterboard, stud and masonry, as Homebuilding notes in the same guide.
- Dust sheets and a dust mask, because sawing MDF and timber is messy.
For adhesive choice and fixing method, see our guide to choosing skirting board adhesive.
Set up the coping saw properly
Most bad copes start with a loose blade. A tensioned blade cuts straight and follows the line. One technical guide suggests the blade should give a high-pitched note when plucked, like a guitar string, which is an easy test. Fit the blade with the teeth pointing back towards the handle, so the saw cuts on the pull stroke. That gives you more control on the thin sections of a profile.
How to cope a skirting joint, step by step
The sequence below follows the method set out in this coping saw guide. Work on an offcut first if you have never done it.
1. Fix the first board square
Cut the first board square at the end and push it fully into the corner. Fix it. This board is not coped, and it becomes the reference the second board is shaped to.
2. Cut the 45-degree mitre on the second board
Measure the second board to the corner and cut a 45-degree mitre on the end, angled so that the cut face reveals the profile of the skirting at the front. One installer describes the aim as taking away just enough material to reveal the profile. The edge where the mitre face meets the front of the board is your cutting line.
3. Mark the profile
Run a sharp pencil along that edge so the profile shows as a clear line. On a board with a deep profile, go over it twice. A pale board is easy to see. On a dark primed board, a white pencil helps.
4. Remove the straight waste
With a fine-toothed saw, remove the large, straight sections of waste, leaving a few millimetres outside your line. This saves the coping saw from doing all the work and makes the curves easier to follow.
5. Cope the curves with a back-cut
Now use the coping saw to follow the pencil line. The important part is the angle. Cut with the blade tilted so the cut travels behind the face, a 20 to 30 degree back-cut. The front edge of the cope then touches the fixed board tightly while the back has clearance. Another guide makes the same point: a slight back-cut lets the board tilt if the corner is out of square, without opening a large gap.
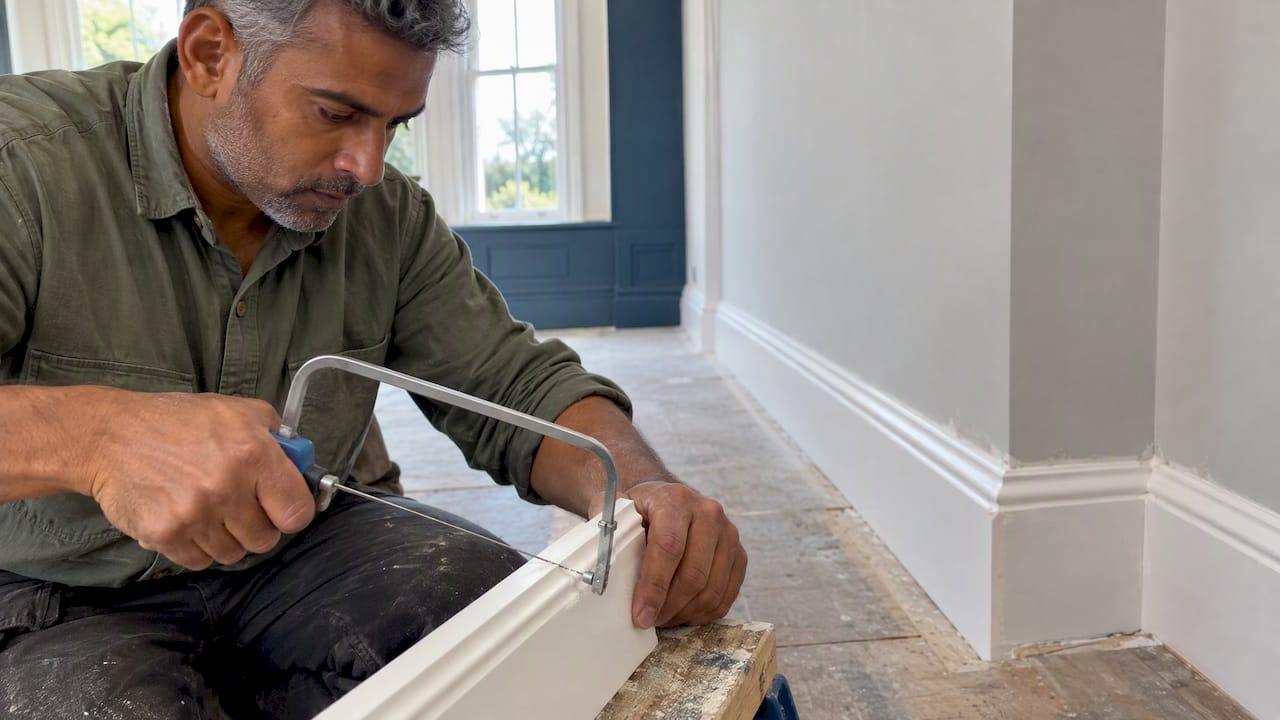
Go slowly on tight curves. Turn the frame of the saw, not the board, where you can. If the blade wanders, stop, back it out, and restart from the line.
6. Test-fit and refine
Offer the board up to the corner. Look for light or shadows along the profile. Mark any high spots in pencil and remove them with a file or sanding block. Test again. You may do this three or four times. It is normal, and it is the step that separates a joint you can paint over from a joint you need to fill.
7. Fix the board
Once it sits tight, fix the board along its length. Keep the end of the coped board in firm contact with the first, but do not drive the fixings so hard that you push the board off the wall.
Carl’s Installer Tip
In our experience, the most common reason a cope looks poor is not the saw work, it is the first board. If it is not pushed hard into the corner, or sits a few millimetres proud on a lumpy plaster corner, the coped board will never meet it cleanly. We’ve found it pays to check the corner with a straight edge first and knock off any plaster nibs with a scraper. Then take your time on the back-cut. A slightly generous back-cut always beats a tight one, because the front edge is the only part anyone sees. And when the floor is uneven, read our note on scribing the first skirting board to an uneven floor before you cut a single corner.
Which board gets coped: planning the order
The fitting order matters more than most people expect. Every internal corner needs one board that runs in square and one that is coped over it. The rule of thumb many installers share is to fit the longest or most visible run first and cope the shorter board to it. That way, if you need to adjust, the short piece is the one you recut.
A practical way to plan a rectangular room:
- Start on the wall you see first as you enter, or the longest wall, and cut both ends square into the corners.
- Work round the room, so each new board is coped at the end where it meets a fixed board.
- Where a board has both ends meeting fixed boards, cope one end, then measure carefully for the other.
- At external corners, cut slightly long on the mitre and trim back for a perfect fit.
- Leave your final board until last, and measure it directly from the room, not from a drawing.
This is the sort of detail that makes room-by-room jobs go quickly. In rooms with many corners, such as chimney breasts and alcoves, sketch the order before you start.
Can you cope skirting in place?
There is a common trick of coping a board while it is held against the wall, rather than on a bench. People ask this often. The reason is understandable: on awkward corners you can hold the board, mark the exact shape and avoid test-fitting repeatedly.
In our experience, it can be done, but it is the slower and riskier route for most DIYers. Cutting on a bench with the board clamped gives a steadier line and a safer saw. If you do mark the board in place, take it down to cut it. Never saw against a fixed board or a finished wall, because one slip scores the wall or the face of the board next to it. Use a pencil, a profile gauge or a small offcut of the same skirting held in the corner to transfer the shape, and then cut on a bench.
What to watch for:
- Dust and damage. Hand saws, files and sanding block edges all mark paint and plaster.
- Loose boards. If a board is only tacked, it can move and give a wrong mark.
- Skirting already fixed. If the first board is glued and nailed, any small movement while you press against it can break the bond.
If it is a one-off repair on a single corner, marking in place and cutting off the wall is perfectly sensible. For a full room, work on the bench.
Finishing small gaps after fitting
Even a well-made cope can leave a hairline gap, and walls move. The NHBC explains that thermal movement and moisture changes can cause minor cracks at joints and corners as materials respond to seasonal shifts. So a tiny line at a corner a few months later is not necessarily a bad cut. It is why a flexible filler is better than a hard one.
For finishing:
- Check the gap size. If you can slide a coin into it, recut the joint. Filler is for hairlines, not for fixing a poor cope.
- Use decorators’ caulk. It is paintable once dry, unlike silicone, which is mostly used for waterproof seals in bathrooms.
- Run a thin bead and smooth it with a damp finger or a caulk tool, then wipe away the excess.
- Let it dry, then paint. Two coats of the finishing paint blend the caulk into the board.
The gap along the top edge against the wall is a separate issue and has different fixes. For gaps at the bottom of the board, see our fixes for a gap under skirting. Where the board meets a hard floor, skirting with laminate flooring has its own considerations.
Common mistakes with coped joints
- Cutting the mitre the wrong way. The mitre must slope so the long point is at the back of the board. If you reverse it, the profile line you reveal is wrong. Check on an offcut.
- Sawing square to the face. Without the back-cut the whole thickness of the board touches, so any imperfection opens a visible gap at the front.
- Cutting to the line on the first pass. Leave a little material and refine with a file.
- Using a slack blade. It wanders and leaves a ragged edge. Retension it.
- Coping both boards. Only one board is coped per corner. The other goes in square.
- Forgetting the paint thickness. Two coats of paint add a fraction to each edge. Allow for this on tight joints, or paint before fitting and touch up afterwards.
- Filling instead of recutting. Filler hides a poor cope until the first cold snap.
Does the profile change the technique?
The method is the same for every profile, but the effort is not. A simple bullnose or pencil round is quick. A tall, multi-step Victorian-style profile has more curves to follow, so slow down and use a finer blade. A flat, square-edged contemporary board has little profile at all, so the cope reduces to a butt joint with a small back-cut, and the quality of the corner is down to how well you fit the first board. If you are weighing styles before you buy, our overview of skirting board styles and the decisions that go with them is a good place to start, and what skirting actually does on a wall explains the basics.
Painting and colour also affect how corners read. A darker finish shows shadows in a poor joint, and a light one is more forgiving. For colour decisions, see our note on skirting colour and VOC safety.
Our perspective: why we cope every internal corner
We supply the full Orac Decor and NOËL & MARQUET range, and we arrange installation through our Elite Decor UK installer network, so we see the same corner problems from both sides: the board on the bench and the finished room. Our view is simple. A skirting board is the one decorative moulding in a room that everyone sees at eye level every day, and the corners are where people look first.
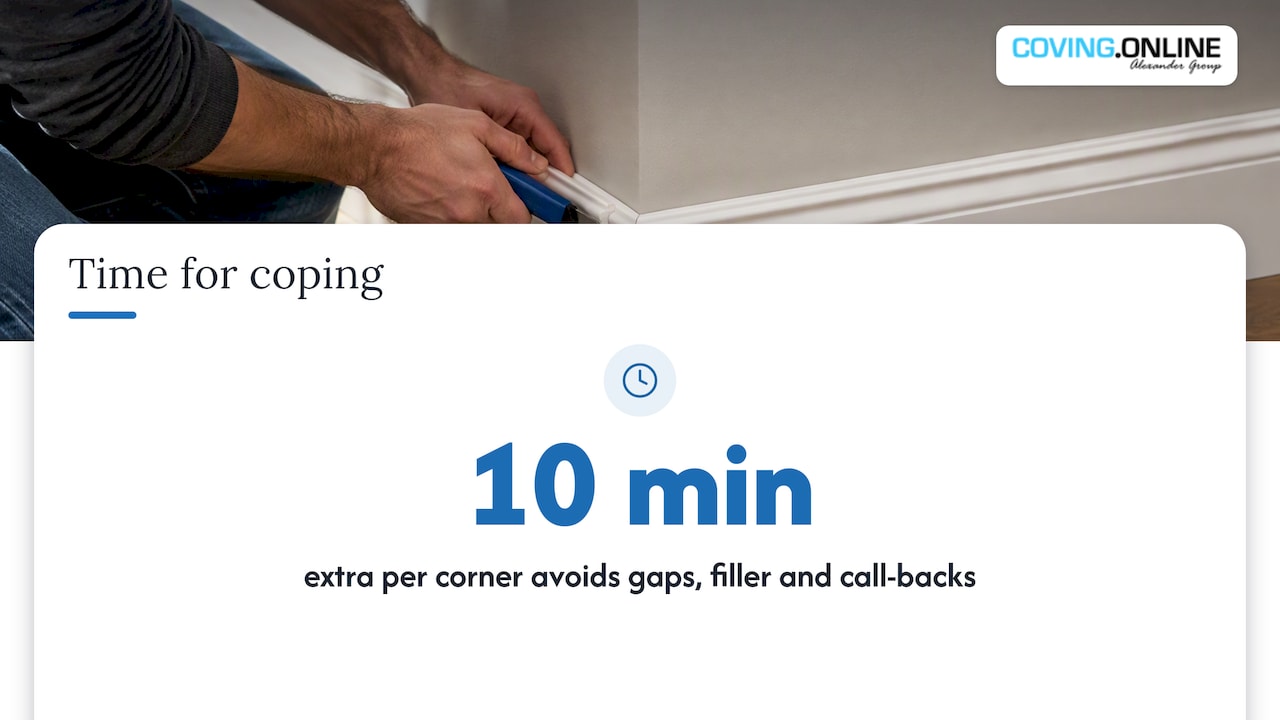
A mitred internal corner looks quick and tidy on the day. But walls are rarely square, plaster builds up in corners, and rooms expand and contract through the year. A coped joint is the only internal corner method we trust to take all three in its stride. It costs ten extra minutes per corner, and in return you avoid the open gap, the filler and the call-back.
The same logic applies to ceilings. If you are fitting cornice as well, the principles of accurate corners carry over, and we cover them in how to cut cornice corners and ceiling mouldings for uneven walls. Our advice to anyone starting: practise on offcuts, buy a little extra length for mistakes, and do not rush the test-fit.
— Carl
Skirting, adhesives and fitting from Coving.Online
If you are planning a room, our skirting range includes profiles from Orac Decor and NOËL & MARQUET in traditional and contemporary styles, so you can choose a board that suits the room and the amount of coping you are happy to do. Adhesives and related fitting accessories are on our shop page, and if you would rather leave the corners to a professional, we can arrange installation across the UK through our Elite Decor UK national installer network.
FAQ
What is the difference between coping and scribing skirting?
In practice, nothing. In the UK, scribing is the usual word for cutting one board to match the profile of another at an internal corner, and coping is the term used in joinery and in other countries. Both describe the same joint, made with a coping saw.
Should I cope or mitre an internal skirting corner?
Cope it. A mitre needs a perfect 90-degree corner and exact 45-degree cuts, and few rooms offer that. A coped joint adjusts to an out-of-square wall and stays closed better if the wall moves slightly. Keep mitres for external corners.
Do I need a coping saw, or can I use a jigsaw?
A coping saw is the better tool for most people, because it is easy to control on tight curves and cheap to buy. Some installers use a jigsaw with a fine blade for long or deep profiles, but it chips easily and needs a steady hand. Whichever you choose, include a slight back-cut and finish with a file.
What should I use to fill small gaps in a coped joint?
Use a paintable decorators’ caulk rather than silicone, which does not take paint well. Apply a thin bead, smooth it, let it dry and paint over. If the gap is wide enough to take a coin, recut the joint instead of filling it.
Which end of the board do I cope first?
Fit the longest or most visible board square into the corner first, then cope the shorter board to meet it. That way, if the fit needs adjusting, it is the shorter piece you recut, and you waste less material.
Sources
- How To Scribe Skirting Boards, Homebuilding
- How to Fit Skirting Boards, Homebuilding
- Coping (joinery), Wikipedia
- Skirting board tutorial: scribed and external mitre joints
- Coping Saws: How to Scribe Skirting Internal Corners
- Scribing internal corners on skirting boards
- Cracking in your home, NHBC
- How long does silicone take to dry?, Homebuilding
Recommended
- Avoid Gappy Corners: Trade Tips for DIY Skirting External Corners
- How to Cut Cornice Corners for a Clean Finish
- Preformed Coving Corners for Cleaner Finishes
- How to Cut Coving Corners – The Complete Beginner’s Guide
