

Home Decor
Scribe First Skirting for Uneven Floors in UK: Carl’s Installer Tip

Sep
Follow the floor, don’t fight it. Scribe your skirting boards to match major dips and humps in the floor, use flexible sealant for smaller gaps, and always start fixing from the highest point in the room after a full dry fit. In kitchens, bathrooms and utility rooms, finish gaps with flexible silicone rather than rigid filler, since moisture will find any weakness eventually. The full toolkit and method follow below.
TL;DR:
- Proper scribing is essential for floors with significant dips or slopes, requiring patience and precise marking from the highest point in the room.
- Using shims or a level line works for gentle undulations over long runs, but these methods are less effective for serious floor unevenness.
- Small gaps under 3mm can be quickly filled with flexible silicone in moisture-prone areas, while larger irregularities demand re-scribing for a neat finish.
- Accurate re-scribing involves marking along the floor’s contour before careful cutting and fixing, with internal coping joints for seamless corners.
- Professional help may be necessary if the floor shows extensive unevenness, movement, or damp issues that compromise a DIY skirting installation.
Table of Contents
- Skirting to uneven floors: tools and materials checklist
- Which method should you use: scribe, shim, fill or scotia?
- How do I scribe and fit skirting to an uneven floor?
- Troubleshooting: what to do when the fit still isn’t right
- Carl’s Installer Tip
- How Coving.Online can help with skirting and uneven floors
- Sources
- FAQ
Skirting to uneven floors: tools and materials checklist
Getting the right kit together before you start saves you two trips to the merchant and a lot of frustration halfway through a run. Here’s what you actually need.
- Measuring: a straightedge, spirit level, tape measure, pencil, and preacher or spacer blocks to hold boards in position.
- Marking and scribing: a compass or scribing block, plus a small offcut to carry the pencil line along the floor’s contour.
- Cutting and trimming: a jigsaw with a fine blade, a coping saw for internal joints, a hand plane, and a belt or orbital sander for final adjustments.
- Fixing: construction adhesive suited to plaster or brick, brad nails or panel pins, a nail gun if you have one, and screws with wall plugs for masonry.
- Sealing and finishing: paintable flexible silicone, decorator’s caulk, general-purpose filler, sandpaper, primer and matching paint.
- Safety: dust mask, eye protection, ear defenders if you’re using a nail gun, and a decent pair of work gloves.
None of this is exotic. Most of it is sitting in a well-stocked toolbox already, and the rest is a short list at any builders’ merchant.
Which method should you use: scribe, shim, fill or scotia?
The floor decides the method, not the other way round. Choosing the wrong one is the single biggest reason DIY skirting jobs end up with visible gaps six months later.
Scribing is the right call when the floor has genuine irregularities, large dips, or a slope that runs across several metres. It takes the floor profile and transfers it directly onto the back of the board, so the skirting follows every rise and fall while the top edge stays level. It takes longer and demands patience, but it’s the only method that copes properly with serious unevenness, and it’s the technique Fine Homebuilding’s guide to scribing baseboards sets out in detail.
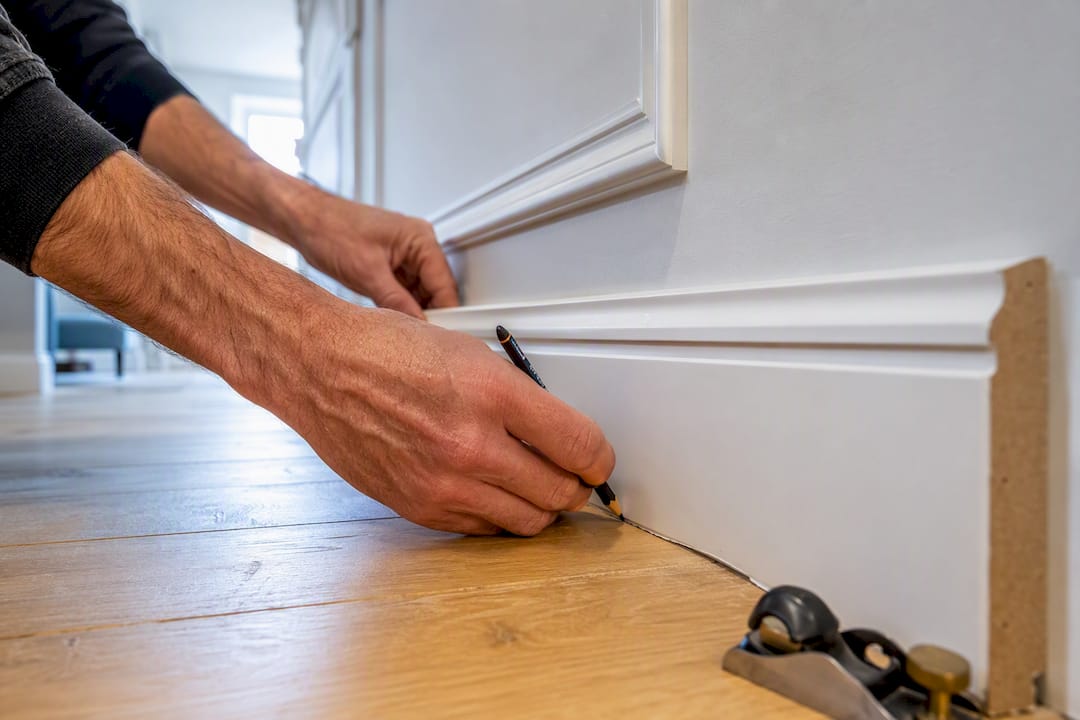
Shimming to a level line works well on long runs where the floor wanders gently rather than lurching. You set temporary shims or a preacher board to hold the skirting at the height you want, mark the profile against the floor, then scribe only where needed. Community installer advice on forums like Screwfix Community backs this approach for keeping a straight visual line without scribing the entire length.
Filling and sealing suits small gaps, generally 2 to 3mm or less. Rather than cutting anything, you close the gap with flexible silicone or decorator’s caulk after fixing. It’s fast, forgiving, and the right choice in kitchens or bathrooms where liquid protection matters more than a perfect mechanical fit, as Toolstation’s fitting guide points out.
Scotia or flexible trim is the simplest fix of all for cosmetic gaps that would otherwise need painstaking scribing. It sits over the join and disguises minor undulation, though it changes the look of the finished skirting line slightly.
| Method | Best for | Difficulty | Time per room |
|---|---|---|---|
| Scribing | Large or irregular gaps | High | Half a day plus |
| Shim and level | Long runs, gentle undulation | Medium | 2 to 3 hours |
| Fill and seal | Gaps under 3mm | Low | Under an hour |
| Scotia trim | Cosmetic, minor unevenness | Low | Under an hour |
How do I scribe and fit skirting to an uneven floor?
This method handles the majority of hard-floor installations where the unevenness is too significant for filler alone. Work through it in order and resist the urge to skip the dry fit.
- Find your starting point. Walk the room with a spirit level and identify the highest point of the floor. Professional installers consistently start here, since it controls the visual top line for the whole run and makes mitres far easier to align, a point echoed in installer advice on MyBuilder’s uneven floor thread.
- Dry-fit everything first. Cut your lengths roughly to size and hold them in place around the room before any adhesive comes near a wall. Check mitres and coped joints now, not after the glue has gone off.
- Set your shims. Prop each board with small shims or a preacher block so the top edge sits level while the bottom edge follows the floor. This keeps your sightline straight even where the floor genuinely isn’t.
- Mark the profile. Run a compass or scribing block along the floor with the pencil tip riding the contour, transferring every bump and dip onto the back face of the board. On long or curved runs, work in short sections and re-check the pencil line before moving the block further.
- Cut to the line. Hold the jigsaw so the finished face sits on the waste side, and take several light passes rather than one aggressive cut. A block plane or belt sander handles the fine shaping afterwards, reducing the risk of overcutting the line, a technique detailed in Fine Homebuilding’s scribing method.
- Fix the boards. Apply adhesive evenly along the back, then secure with brad nails into studs or noggins where you can find them. Masonry walls need screws and wall plugs instead of nails alone. Tape or clamp boards in place while the adhesive cures, particularly on any board you’ve had to bend slightly into a bow in the wall.
- Seal and finish. Run flexible silicone along the floor join in kitchens and utility rooms, and use decorator’s caulk elsewhere. Sand any rough scribe edges, prime bare timber, and paint once everything’s fully cured.
Coping internal joints rather than mitring them, using a coping saw or a jigsaw, gives a noticeably tighter finish where two runs meet in a corner, a technique RYOBI’s skirting guide recommends over a straight internal mitre.
Pro Tip: Cut your scribe line slightly generous rather than tight. You can always take another light pass with the plane or sander, but a board cut too short means starting the whole length again.
Troubleshooting: what to do when the fit still isn’t right
Even careful work throws up the odd problem. Most are quick fixes; a few are signs to stop and bring in help.
- Persistent gaps after fixing: re-scribe the affected section locally rather than removing the whole board, or backfill neatly with paintable silicone if the gap is under 3mm.
- Wavy-looking long runs: this usually means the top line wasn’t set from shims before scribing. Check your level line before re-fixing.
- Visible mitre or coped joint gaps: a light sand followed by caulk and repaint at the joint almost always resolves it.
- Paint cracking or lifting over silicone: use a paintable, decorator-grade silicone rather than a standard bathroom sealant, which often rejects paint entirely.
Call a professional if you’re seeing large level differences across a single room, if you suspect damp underneath the skirting or subfloor, or if the floor itself feels like it moves or creaks when walked on, which points to a subfloor issue that needs sorting before any skirting goes on. If nearly every run in the house needs precise scribing, that’s also a fair signal the floor has settled unevenly and a professional eye is worth the call-out. Ask any installer for a written quote and examples of finished work before booking.
Carl’s Installer Tip
In our experience, the fastest route to a clean scribe is minimal material removal, done in stages. Start at the highest point, undercut the back face only where the floor genuinely rises, and check the mitre fit again after every pass rather than at the end. The classic rookie error is over-scribing in one go, taking off far more than needed and leaving a gap you can’t get back. Take small passes, test the fit, repeat. For period profiles that need a precise scribe, we’d point you toward the Elite Decor range, which machines cleanly and takes a scribe line without splintering.
— Carl
How Coving.Online can help with skirting and uneven floors
If scribing eight rooms of skirting isn’t how you want to spend your weekend, or you’d simply rather have it done right first time, Coving.Online supplies the materials and the fitters. We stock Orac Decor and NOËL & MARQUET skirting profile in a wide range of styles and finishes, so matching your existing coving or cornice to a new skirting run is straightforward rather than guesswork.

For homeowners who’d prefer supply and fit in one, our Elite Decor UK installer network covers professional fitting nationwide, including the scribing work that uneven floors demand. It’s the option worth considering if your floor has more undulation than a weekend project can comfortably handle. Browse the current skirting range to see profiles and pricing, or head to our installation page to request a quote for supply plus fit. Either way, you’ll get boards cut to your floor, not fought against it.
Sources
- How to Scribe Baseboards to Uneven Floors for a Perfect Fit – Fine Homebuilding
- How to Install Skirting Boards | RYOBI
- Skirting boards on uneven floor – MyBuilder
- How to fit skirting board – Toolstation
FAQ
How do I fit skirting boards on an uneven floor?
Scribe the board to follow the floor’s contour using a compass or scribing block, starting from the highest point in the room, then cut carefully with a jigsaw and finish with a a plane or sander for a tight fit.
Does skirting need to match the floor?
No. Skirting is fitted to the floor’s contour so the gap stays consistent, but its colour, profile and material choice are independent decisions based on the room’s overall style.
How can I close the gap between my floor and skirting boards?
For small cosmetic gaps, flexible paintable silicone or decorator’s caulk gives a neat, durable finish; larger or irregular gaps need re-scribing rather than filling.
How much uneven floor is acceptable before I need to scribe?
Small cosmetic gaps of around 1mm are generally fine to seal rather than scribe, but anything beyond a few millimetres, or any visible undulation along a run, calls for proper scribing to avoid an obvious wavy line.
