

Home Decor
4 Installer Proven Fixes for a Gap Under Skirting in UK Homes

Sep
A small, even gap under skirting is usually normal movement and can be left alone unless draughts, pests or appearance bother you. Carpet fitters typically tuck the edge and hide the join; floating floors need the gap left open behind the skirting; tiled floors are best finished with a flexible, grout-matched sealant. Beyond that, your fixes fall into four camps: flexible caulk, weatherstrip tape, scotia trim, or refitting the skirting itself.
TL;DR:
- Flexible sealants and weatherstrip tape are effective for gaps up to 8mm, but larger gaps often require trims, refitting, or infill strips for a long-lasting finish.
- Seasonal movement, uneven subfloors, and the sequence of installation determine whether gaps are normal or indicative of structural issues.
- Floating floors should keep expansion gaps open behind skirting, while rigid fillers risk buckling the floor over time.
- DIY sealing is suitable for gaps under 8mm, but larger or uneven gaps benefit from professional trimming or refitting to ensure durability.
- Proper planning before flooring installation helps avoid the need for costly refits or re-fits later, especially for floating and tiled floors.
Table of Contents
- Why does a gap appear between skirting and floor?
- When should you leave a gap, and when should you fix it?
- Small-gap solutions: flexible fillers, mastic and weatherstrip
- Large-gap solutions: scotia, refitting, or infill strips
- Flooring-specific notes: carpet, laminate/LVT and tiles
- How do you fix a visible gap under skirting yourself?
- Carl’s take: what actually holds up on site
- What’s the real priority here, not just the popular advice?
- Get a professional finish from Coving.Online
- Sources
Why does a gap appear between skirting and floor?
Timber and laminate move with the seasons. Both expand slightly in humid summer months and contract as central heating dries the air in winter, and that constant flexing opens up hairline gaps along skirting joints that were flush when first fitted.
Houses settle too. Subfloors are rarely perfectly level, and skirting boards themselves can bow or warp over time, especially older softwood painted years ago.
The order of works matters more than most homeowners realise. Skirting fitted before flooring often sits slightly high once new flooring goes down, while skirting fitted after a floor is laid tends to follow the floor’s own unevenness more closely.
- Seasonal expansion and contraction of timber, laminate and MDF
- Subfloor unevenness or a house settling gradually over years
- Skirting fitted in the wrong sequence relative to the flooring
- A sudden, widening gap across several rooms, which can point to structural movement rather than routine seasonal shift
If gaps appear consistently across multiple rooms, or grow month by month rather than staying stable, that is worth flagging to a builder rather than filling over.
When should you leave a gap, and when should you fix it?
Floating floors, including most laminate and many engineered wood products, are designed with a deliberate expansion gap around every edge, and that gap is meant to stay open behind the skirting. Filling it rigidly with a hard filler risks the floor buckling as it expands, because there’s nowhere left for the wood to move. According to MyJobQuote’s guidance on skirting gaps, installers often remove and refit skirting specifically to hide this expansion gap properly rather than trying to seal it shut.
- Floating floors: leave the expansion gap open; conceal it with scotia, never with rigid filler
- Carpet: gripper rod and underlay usually tuck the carpet edge tight, so a visible gap rarely survives a proper fit
- Tiles and LVT: a flexible, grout-coloured sealant or a slim trim strip handles movement without cracking
- Draughty gaps: worth sealing for comfort and running costs, even where the gap itself is cosmetically fine
A gap that’s purely cosmetic is a style choice. A gap that’s letting cold air straight into the room is a heating bill, and that distinction should decide what you do next.
Small-gap solutions: flexible fillers, mastic and weatherstrip
For gaps up to around 5mm, a flexible decorator’s caulk or polymer sealant, never a rigid wood filler, is the right tool, because it stretches as the floor and skirting move rather than cracking along the joint. Little House on the Corner’s guide to skirting gaps notes that sealing these draughty gaps can produce a modest saving on annual heating costs simply by cutting down on cold air infiltration at floor level.
For narrower gaps, roughly 2 to 8mm, self-adhesive weatherstrip or window-seal tape is often quicker and less messy than caulk. It compresses into the joint and expands slightly to fill inconsistent gaps along a run of skirting, which is handy where the gap width varies from one end of a wall to the other.
- Clean the joint thoroughly and mask both the floor and skirting before applying anything
- Apply sealant in a thin, continuous bead rather than a thick blob, which shrinks and cracks as it cures
- Press weatherstrip firmly along the full length, working in short sections for a neat line
- Allow full cure time before painting or walking heavily on the area
- Choose a sealant designed to flex with movement, rather than a standard acrylic filler, for the best long-term result
Pro Tip: We’ve found that oxygen-curing silicone or a specialist flexible polymer sealant holds up far better on moving joints than a basic acrylic filler. Acrylic looks fine for the first winter, then splits along the same line every year as the floor keeps moving underneath it.
Large-gap solutions: scotia, refitting, or infill strips
Once a gap runs past about 8 to 10mm, or varies noticeably along the wall, filler starts fighting a losing battle. This is where trim and refitting earn their keep. As HomeRun’s guide to skirting gaps points out, professionals and experienced DIYers alike tend to favour scotia or a proper refit over rigid fillers once a gap gets substantial, because trim moves with the floor while filler cannot.
- Scotia or quadrant moulding pins along the base of the skirting and sits over the gap, flexing with seasonal movement while giving a crisp, consistent line
- Removing and refitting skirting lower lets a carpenter take the new floor under the board for the cleanest possible finish, at the cost of extra labour
- Timber or MDF infill strips, cut to follow an uneven floor and painted to match, work well where the gap width changes noticeably along one wall
- Expanding foam is best avoided for visible gaps; a Screwfix community thread on large skirting gaps shows experienced tradespeople consistently steering people away from foam toward trims, refits, or flexible fillers instead, since foam expands unevenly and looks poor once painted
Scotia is the fastest fix for most homes. A full refit looks better still, but it’s a bigger job, and it’s the one to hand to a carpenter rather than attempt on a Saturday afternoon.
Flooring-specific notes: carpet, laminate/LVT and tiles
- Carpet: gripper rod does most of the work here, pulling the carpet edge tight against the skirting so a tuck-in strip is rarely needed. Most fitters aim for a snug edge rather than a visible gap in the first place.
- Laminate and LVT: these floating floors need their expansion gap left intact, typically several millimetres all round, and hidden with scotia or a matching reducer strip rather than sealed shut.
- Tiles: a grout-coloured flexible sealant at the skirting edge handles minor movement neatly. Where the gap is wider or uneven, a slim trim strip often finishes better than a bead of sealant alone.
If you’re already planning new flooring, that’s the moment to decide whether skirting gets lowered or refitted, since doing it after the new floor is down means lifting skirting a second time.
How do you fix a visible gap under skirting yourself?
For gaps you’re tackling as a weekend job, rather than a full refit, the process is straightforward if you work through it in order.
Tools and materials: sealant gun, flexible sealant or decorator’s mastic, weatherstrip tape (for narrow gaps), masking tape, a scraper or old chisel, a filling or finishing knife, and matching paint for the final touch-up.
- Clean the joint along the full run, removing dust, old paint flakes and any loose debris with the scraper.
- Mask the floor edge and the face of the skirting so excess sealant doesn’t smear either surface.
- Test-fit a short length of weatherstrip, or run a small trial bead of sealant, to check the gap width and confirm your choice of material.
- Apply weatherstrip by pressing it firmly into the joint in short sections, or apply sealant in a steady, thin bead and tool it smooth with a wet finger or finishing knife.
- Leave it to cure fully, per the product’s stated drying time, before painting to match the skirting.
Pro Tip: In our experience, the biggest DIY mistake is overfilling a joint that’s still moving. If the gap is wider than roughly 10 to 15mm, or you’re seeing it open up in more than one room, that’s your cue to call a carpenter rather than keep adding filler on top of filler.
Carl’s take: what actually holds up on site
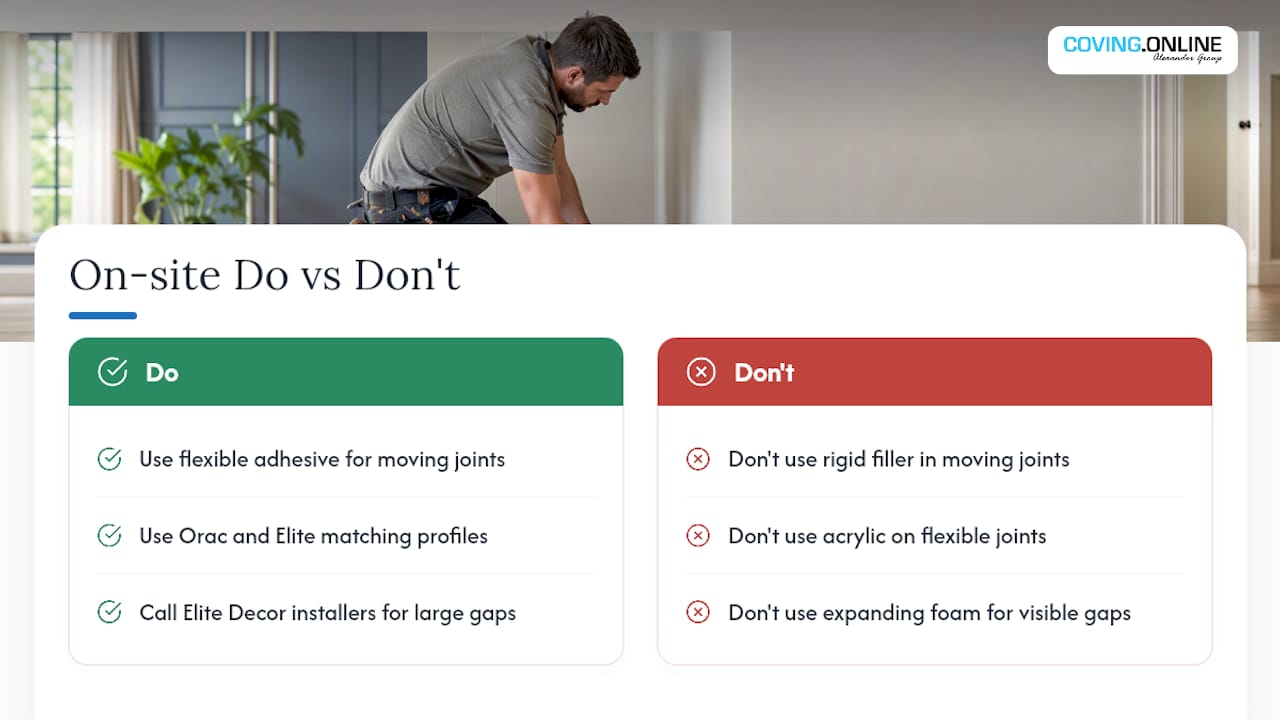
Working with skirting day in, day out teaches you where the shortcuts fail. In our experience, the biggest mistake homeowners make is treating every gap the same way, grabbing a tub of rigid filler and pushing it into a joint that’s going to keep moving with the seasons regardless. That filler splits within a year, and then you’re doing the job twice.
The second common error is mismatching sealant to the job: acrylic caulk on a joint that needs a flexible polymer, or worse, expanding foam behind a visible gap that was always going to need a proper trim.
For a genuinely neat, lasting finish, we lean on Orac Decor mouldings and matching Elite Decor profiles, paired with adhesives suited to a moving joint rather than a static one. Where the gap is large or the walls uneven, our fitters through the Elite Decor UK installer network handle the refit properly, first time.
What’s the real priority here, not just the popular advice?
Most guidance online treats every skirting gap as a filling problem, and that’s where it goes wrong. A gap under a floating floor is not a defect to be sealed. It’s a designed feature, and sealing it rigidly is the single most common mistake we see reversed a year later once the floor has buckled slightly at the edge.

The advice that gets underweighted is sequencing: deciding whether to fill, trim or refit should follow from what’s happening underneath the floor, not from what looks tidiest on day one. A homeowner fitting new LVT should decide on skirting treatment before the floor goes down, not after, because lifting skirting twice costs more than doing it once properly.
If there’s one thing worth prioritising first, it’s identifying whether the floor beneath is floating, fixed or tiled, because that single fact determines whether caulk, scotia or a refit is the right call. Everything else, colour matching, tidiness, cost, follows from that decision.
— Carl
Get a professional finish from Coving.Online
Coving is the practical alternative to trial-and-error DIY fixes when a gap under skirting is large, uneven, or simply not something you want to spend a weekend on. Our range includes skirting, scotia and quadrant trims, and matching profiles designed to sit cleanly against real floors, not just show-home ones.

Browse Orac Decor coving and skirting profiles to find a trim that matches your existing skirting, or look at the Elite Decor C702 profile as an example of a clean finishing moulding. If the gap is beyond a simple caulk-and-paint job, request an installation quote through our Elite Decor UK network and get a carpenter to sort it properly rather than patch it again next winter. Start by visiting Coving to browse the full range and get a quote.
Sources
Further practical guidance: Little House on the Corner, HomeRun Blog, MyJobQuote, and winterizing tips from One Day Doors & Closets.
- Gap between skirting and floor — Little House on the Corner
- Fixing gaps between floor and skirting boards — HomeRun Blog
- Why is there a gap between skirting board and floor? — MyJobQuote
