

Home Decor
Wall panelling installation: a complete DIY guide for UK homes
Aug
Most homeowners can install decorative wall panelling themselves. The single most important rule: plan your full layout and dry-fit every panel before you cut or fix anything permanently. Lightweight polyurethane mouldings from brands such as Orac Decor and NOËL & MARQUET are particularly DIY-friendly — they are easy to cut, simple to mitre and ready to paint straight from the box, making wall panelling installation genuinely achievable over a weekend.
- Verdict: yes, most homeowners can do this with basic tools and careful planning.
- Critical first step: plan the layout, number the panels and dry-fit before fixing.
- Best materials for DIY: lightweight PU mouldings (Orac Decor, NOËL & MARQUET) or MDF panel mouldings.
- Check local building regulations before altering walls, especially masonry or below-grade surfaces.
Key takeaways
Successful wall panelling installation comes down to three things: planning the layout before cutting, using the correct adhesive for your material, and allowing every stage of the finish to cure fully before moving on.
| Point | Details |
|---|---|
| Plan before you cut | Dry-fit and number all panels before fixing; photograph the layout so you can replicate it. |
| Match adhesive to material | Use latex or water-based adhesive for MDF and PU mouldings; solvent adhesives cause permanent staining. |
| Allow for expansion | Leave approximately 12 mm clearance at floor and ceiling on standard 2.44 m walls. |
| Combine adhesive and nails | Use both for thinner panels; ringshank nails should penetrate studs by at least 19 mm. |
| Coving.Online for PU profiles | Orac Decor and NOËL & MARQUET mouldings from Coving.Online are pre-primed, lightweight and DIY-ready. |
Table of Contents
- What tools, adhesives and materials do you need?
- How do you plan the layout and work out panel proportions?
- How do you prepare the wall before fitting panels?
- Which fixing method should you use: nails, adhesive or both?
- How do you cut, mitre and scribe panels accurately?
- How do you fit mouldings, fill joints and achieve a professional finish?
- How do you handle sockets, switches, radiators and uneven walls?
- What are the most common installation mistakes to avoid?
- Safety, ventilation and material-specific cautions
- How long does wall panelling installation take and what does it cost?
- Why choose lightweight polyurethane mouldings for DIY panelling?
- Carl’s installer tip
- A perspective on wall panelling from Coving.Online
- Coving.Online: mouldings, adhesives and expert advice for your project
- Sources
What tools, adhesives and materials do you need?
Gathering everything before you start saves multiple trips to the merchant and keeps the project moving.
Hand tools and measuring equipment
- Measuring tape, pencil and spirit level
- Mitre saw or mitre box (for accurate 45° cuts on mouldings)
- Utility knife and scoring tool
- Caulking gun and rubber mallet
- Chalk line and stud finder
Fixings and adhesives
- Colour-matched panel pins or ringshank nails
- Latex or water-based adhesive for MDF panels — solvent-based adhesives can cause permanent discolouration on MDF and PU mouldings
- Polyurethane-compatible contact adhesive where the manufacturer recommends it for Orac-style profiles
Consumables and PPE
- Decorator’s filler, flexible caulk, sandpaper (120 and 180 grit)
- Primer suitable for MDF or PU surfaces, and topcoat paint
- Masking tape, dust sheets, knee pads
Safety callout: cutting MDF produces fine dust containing urea-formaldehyde resin. Always work with adequate ventilation, wear an FFP2 or FFP3 dust mask and use eye protection. Read the adhesive manufacturer’s MSDS before use.
How do you plan the layout and work out panel proportions?
Always plan your layout and dry-fit before cutting — this prevents wasted cuts and avoids narrow, awkward slivers at the edges.
- Measure the total wall width and height. For standard UK ceilings around 2.44 m (8 ft), subtract approximately 12 mm for expansion clearance before calculating your panel count.
- Decide on panel width. A useful rule of thumb: panels between one-fifth and one-quarter of the wall width tend to look balanced. Avoid panels narrower than 200 mm at the edges.
- Choose your starting point. Centre a focal panel on a chimney breast or feature wall, or start from an inside corner for a more traditional run.
- Split any remainder equally across both edges so the margins match. A 50 mm sliver on one side and a full panel on the other will always draw the eye for the wrong reason.
- Mark vertical chalk lines for stud positions and panel edges. Mark the location of every socket, switch and service before picking up a saw.
Pro Tip: Number each panel on its back and photograph the dry layout before dismantling it. If you are using wood-grain panels, arrange them to balance colour and grain across the whole wall before committing to an order.
How do you prepare the wall before fitting panels?
Check stud centres and wall condition before anything else. Most domestic timber-frame walls in the UK have studs at approximately 400 mm (16") centres, but always measure rather than assume — external walls sometimes run at wider spacings.
- Use a stud finder or the knock-and-nail method to locate each stud, then snap vertical chalk lines down the wall face.
- If stud centres exceed 400 mm (16"), add horizontal furring strips at 400 mm intervals to give panels adequate support.
- For masonry walls, fix horizontal furring strips (25 mm × 50 mm timber or 12 mm plywood strips) to the masonry, then overlay with a suitable noncombustible backing before fixing thin panels. This also creates a service void for cables.
- Thinner panels generally require a continuous gypsum board or plywood backing; thicker panels may be fixed direct to studs — always follow the manufacturer’s guidance. Choosing the right solid backing material matters as much for panelling as it does for joinery.
- Address any damp, mould or ventilation issues before panelling over them. Sealing a damp wall behind panels accelerates deterioration and may breach building regulations.
Check your local building regulations if you are altering a wall in a listed building, a rented property or any below-grade space.
Which fixing method should you use: nails, adhesive or both?
Use adhesive combined with mechanical fixings for most panel types. The combination holds panels while the adhesive cures and improves long-term adhesion.
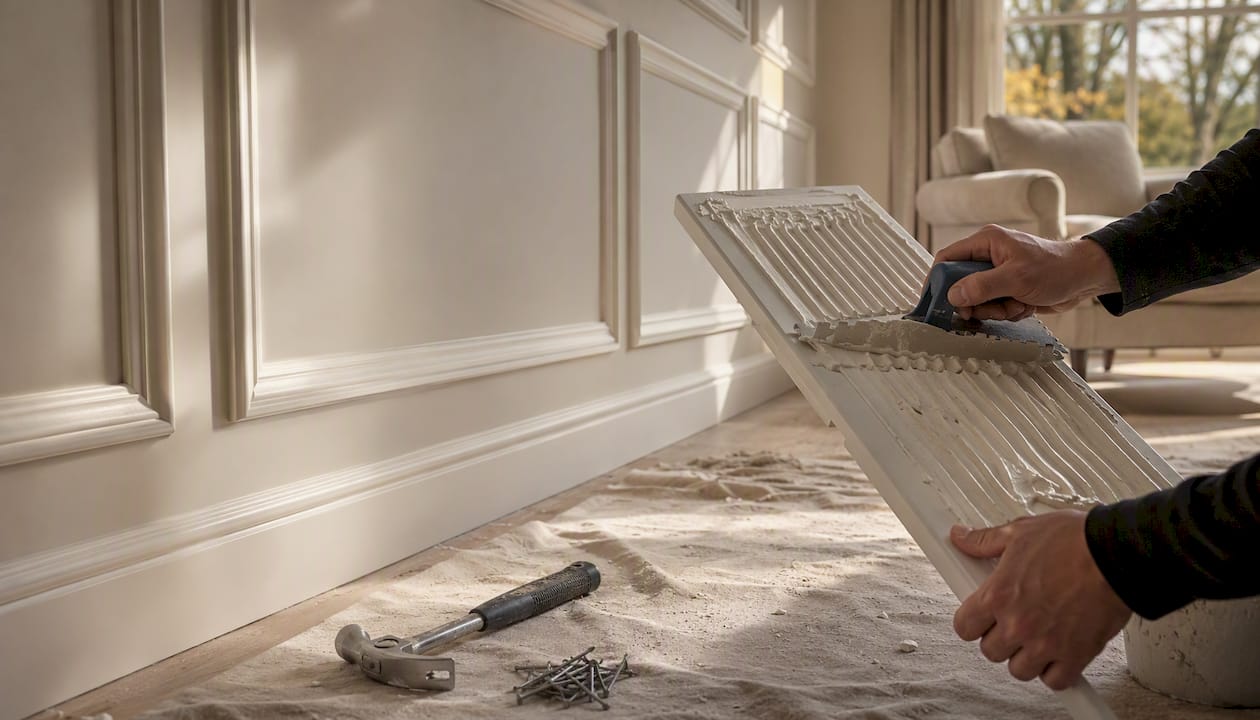
When to use adhesive only: tileboard and some rigid composite panels are fixed with adhesive applied with a notched trowel. Nailing is not appropriate for these products; seal edges with silicone where moisture may occur.
When to use adhesive plus nails: thinner MDF and hardboard panels benefit from both. Apply adhesive beads along the top, bottom and both side edges, plus a zigzag pattern between studs, then secure with ringshank nails while the adhesive sets.
When to use nails only: thicker plywood panels (12 mm+) fixed directly to studs can sometimes be nailed alone, but check the manufacturer’s specification first.
- Always use latex or water-based adhesive for MDF — solvent adhesives stain the surface permanently.
- Follow the adhesive manufacturer’s stated open time before pressing panels into place.
- Ringshank nails should penetrate studs by a sufficient depth as recommended by the manufacturer. Space nails more closely at panel edges than at mid-panel positions.
How do you cut, mitre and scribe panels accurately?
Accurate cutting is where a good layout becomes a good-looking wall. Measure twice, cut once, and always dry-fit after each cut before applying adhesive.
- Mark cut lines on the panel face with a pencil and straight edge. Cut long edges first, then mitres.
- For decorative PU mouldings, a mitre saw gives the cleanest 45° cuts. A mitre box works well for smaller profiles and is safer for occasional DIY use.
- To scribe a panel to an uneven wall, hold it in position and run a compass or scribing block along the wall surface, transferring the profile onto the panel edge. Cut to the scribed line with a jigsaw.
- When cutting around sockets or switches, transfer the box position onto the panel face using a template, then cut with a jigsaw or hole saw.
- Pre-paint mitred ends before fixing — once the panel is on the wall, reaching into a tight mitre joint with a brush is awkward.
Pro Tip: For PVC or PU profiles, score lightly with a utility knife before the mitre saw cut to prevent chipping on the face edge. A fine-tooth blade (at least 40 teeth) makes a significant difference to cut quality.
How do you fit mouldings, fill joints and achieve a professional finish?
Finish quality comes from neat joins, correct filler and thorough priming before the topcoat.
- Fix full panels first, working from your starting point across the wall.
- Mitre and install the decorative moulding profiles around each panel, locking mitred corners with a small dab of adhesive before nailing through.
- Fill any nail holes and open joints with decorator’s filler. Allow to dry fully, then sand smooth with 180-grit paper.
- Run a bead of flexible decorator’s caulk along movement joints (floor, ceiling and any internal corners). Smooth with a damp finger and allow to cure.
- Apply a suitable primer — use an MDF primer on MDF edges and a PU-compatible primer on Orac or NOËL & MARQUET profiles.
- Apply two topcoats of your chosen paint, removing masking tape before the final coat is fully cured to avoid lifting.
Maintenance: wipe painted panels with a damp cloth and mild detergent. Avoid abrasive cleaners on PU surfaces. Touch up chips promptly to prevent moisture ingress on MDF edges.
How do you handle sockets, switches, radiators and uneven walls?
Account for services before cutting — switch off the power at the consumer unit before working near sockets or switches.
- Sockets and switches: isolate the circuit, remove faceplates and measure the box position carefully onto the panel before cutting. Refit faceplates with appropriate clearances. For anything beyond faceplate removal, consult a qualified electrician.
- Radiators and pipes: measure around brackets and consider fitting removable access panels where future maintenance will be needed. Undercutting the skirting board retains access to pipework.
- Uneven walls: use furring strips and timber packers to create a flat plane before fixing panels. Scribe panels to the high points of the wall rather than forcing them flat.
- When panelling around doorframes and reveals, plan the panel margins so they align with the door lining or architrave for a considered, finished look.
What are the most common installation mistakes to avoid?
- Skipping the dry layout: always plan, number and photograph panels before fixing. Beginner guides consistently stress this as the step most often missed.
- Using solvent adhesive on MDF: it causes permanent staining. Use latex or water-based products only.
- Nailing too close to panel edges: follow the manufacturer’s minimum edge distance to avoid splitting.
- Ignoring expansion gaps: leave clearance at floor and ceiling. Panels fixed tight to the floor will buckle as the material moves with humidity.
- Rushing the finish: poor filling and insufficient sanding are visible after painting. Allow filler and caulk to cure fully before sanding.
Pro Tip: We’ve found that the most common cause of visible joints after painting is insufficient caulking at movement points. Run a second bead of caulk after the first coat of paint has dried, then apply the final topcoat.
Safety, ventilation and material-specific cautions
Cutting and sanding MDF produces fine dust — use extraction and an FFP2 or FFP3 mask alongside eye protection throughout.
- Formaldehyde: some MDF contains urea-formaldehyde resins. Ventilate the room during cutting and sanding, and read the product MSDS.
- Adhesive vapour: prefer water-based adhesives for indoor work. If using solvent-based products, open windows and doors and allow full ventilation during cure.
- Structural integrity: do not remove or compromise structural linings when fixing panels. If in doubt about what lies behind a wall, consult a structural engineer.
- PPE checklist: FFP2/FFP3 dust mask, safety goggles, ear defenders for power tools, work gloves and knee pads for floor-level work.
How long does wall panelling installation take and what does it cost?
A single feature wall typically takes an experienced DIYer a full weekend. Whole-room panelling takes longer, particularly if furring or electrical work is involved.
Approximate time by phase:
- Planning, measuring and marking: 2–3 hours
- Cutting and dry-fitting: 3–5 hours
- Fixing, filling and caulking: 3–4 hours
- Priming and painting (two coats, with drying time): 4–6 hours
Cost factors:
- Material choice: MDF mouldings are the most affordable; plywood costs more; lightweight PU mouldings (Orac Decor, NOËL & MARQUET) sit at a premium but save time on cutting and finishing.
- Adhesives and fixings: budget for latex adhesive, panel pins and caulk.
- Tool hire: a mitre saw hire for a weekend is typically available from national tool-hire companies.
- Specialist labour: if electrical or plumbing work is needed, factor in a qualified tradesperson.
When to call a professional: complex masonry walls, active damp, or restricted access to services are all situations where professional help pays for itself.
Why choose lightweight polyurethane mouldings for DIY panelling?
Polyurethane mouldings are lightweight, easy to cut and fix, paint-ready and genuinely DIY-friendly. They reproduce fine architectural detail without the weight or warping risk of solid timber.
- No warping: PU is dimensionally stable, so profiles stay true even in rooms with fluctuating humidity.
- Easy mitring: cuts cleanly with a fine-tooth mitre saw and requires no pre-sealing of edges before painting.
- Latex adhesive compatible: bonds reliably with water-based adhesives, avoiding the staining risk associated with solvent products on MDF.
- Reduced backing requirements: many PU profiles are light enough to fix directly to plasterboard without heavy timber backing, which simplifies the installation considerably.
Coving supplies Orac Decor and NOËL & MARQUET profiles across a range of panel moulding styles, from classic dado-height frames to contemporary flat-profile designs. If you are also considering coordinating your panelling with interior panel doors, choosing profiles with complementary proportions ties the scheme together.
Pro Tip: In our experience, pre-primed PU mouldings from Orac Decor accept water-based topcoats beautifully with minimal preparation. We’ve found that a light sand with 180-grit paper between coats gives a finish indistinguishable from traditional plaster mouldings.
Carl’s installer tip
Pro Tip: Always keep a small offcut of each panel profile on site. If a mitre needs adjusting after the adhesive has set, the offcut lets you test the correction before touching the fixed panel.

A perspective on wall panelling from Coving.Online
The guides and tutorials available online have made wall panelling installation more accessible than ever, and that is genuinely good for homeowners. What they sometimes underplay is the difference that material choice makes to the experience. MDF is affordable and widely available, but it demands careful edge sealing, the right adhesive and patience with finishing. Lightweight PU mouldings from Orac Decor and NOËL & MARQUET remove most of those friction points: they arrive pre-primed, cut cleanly and bond reliably with water-based adhesives. For a first panelling project, that reduction in variables is worth more than the price difference. At Coving.Online, we advise DIY customers on product selection every day, and the feedback from those who chose PU profiles for their first project is consistently more confident than from those who started with MDF. The planning discipline remains the same regardless of material — but the finishing process is noticeably more forgiving.
Coving.Online: mouldings, adhesives and expert advice for your project
Coving.Online stocks over 500 Orac Decor and NOËL & MARQUET decorative moulding profiles, including the panel mouldings, adhesives and accessories referenced throughout this guide. Every product is available for fast UK delivery, with expert advice on hand to help you match profiles, calculate quantities and choose the right adhesive for your substrate.

Whether you are planning a single feature wall or a full-room scheme, browse the full range at Coving and use the product pages to find compatible adhesives and finishing products. If you would prefer a professional result without the DIY commitment, the Elite Decor UK installer network can arrange installation across the UK. Contact the team directly through the website to request a quote or get product advice before you order.
Sources
Always consult the manufacturer’s installation instructions and MSDS for every product you use, particularly adhesives and MDF-based panels.
Recommended
