
Home Decor
How to Install NOËL & MARQUET Mouldings and Panels

Oct
Installing NOËL & MARQUET mouldings comes down to four things done in the right order: a clean, dry, flat surface, the correct adhesive for the size of profile, tidy 3 mm joints, and paint applied soon after fitting. Get those right and lightweight polyurethane cornice, skirting and wall panels are well within reach of a careful DIYer. This guide follows the manufacturer’s own installation manual and adds what we have learned fitting these products ourselves.
TL;DR
- Surfaces must be clean, dry, dust-free, degreased and smooth before anything is stuck to them. Prime absorbent surfaces and sand varnished ones.
- Use ADEFIX for standard interior profiles, and ADEFIX PLUS for larger profiles (8 cm or more), non-absorbent surfaces, damp rooms and wall panels.
- Leave joints of about 3 mm, fill with adhesive, smooth with a spatula and sand lightly after at least 6 hours.
- Paint interior profiles within 4 weeks of fitting, using solvent-free paint, and do a test coat first.
- If you would rather not fit them yourself, we can arrange installation through our national installer network.
Table of Contents
- What you need before you start
- Preparing the wall or ceiling
- Measuring and cutting
- Fitting cornice and coving
- Fitting wall panels
- Skirting boards
- Joints, corners and edges
- Painting after fitting
- Carl’s Installer Tip
- Our view: why preparation beats technique
- Order your mouldings, or have them fitted
- FAQ
- Sources
What you need before you start
A tidy kit makes the job calmer. The NOËL & MARQUET installation manual lists a mitre box, fine-tooth saws suited to the material (PS, or HDPS/PU for polyurethane), a cartridge gun and a painter’s spatula as the essentials. Add a spirit level, a pencil, a tape measure, a damp cloth and a small sanding block, and you are set.
Choosing the right adhesive
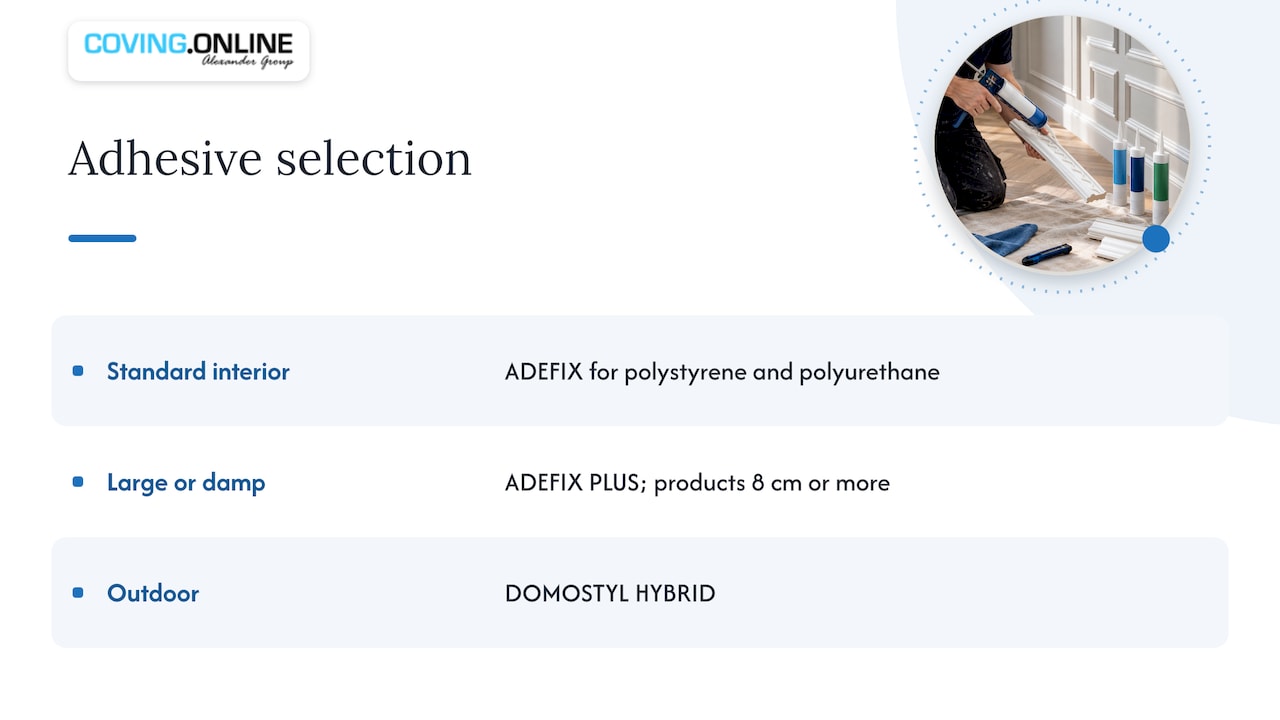
This is where most avoidable problems begin. The manual specifies ADEFIX for fixing polystyrene and polyurethane products on interior surfaces. ADEFIX PLUS is the one to reach for with larger products (8 cm or more in height or span), non-absorbent surfaces, damp rooms and certain panels. For outdoor applications the manual points to DOMOSTYL HYBRID instead.
A simple rule we use on site: if the profile is big, the wall is glossy, or the room steams, choose ADEFIX PLUS. If you are working in a dark scheme or want a colour-matched bead of adhesive, our ADEFIX BLACK 310 ml cartridge is worth a look. You can see the full range of adhesives and accessories in our shop.
Which profile suits your room
If you have not yet chosen your mouldings, our decorative mouldings buying guide walks through sizes and styles, and architectural moulding styles for every room helps match a profile to period and proportion. If you are weighing the material itself, we compare polyurethane versus timber for mouldings in a separate article.
Preparing the wall or ceiling
Preparation decides how long the finished job lasts. The manual is clear that the surface must be clean, dry, dust-free, degreased and smooth. Beyond that:
- Wallpaper: check that it is firmly stuck down. Loose or blistered paper will let go and take your moulding with it.
- Varnished or glossy surfaces: sand them so the adhesive has something to grip.
- Highly absorbent surfaces, wood and metal: prime them first.
The manual also warns against installing on damp substrates. If a wall is cold, stained or flaking, solve the cause before you fit anything. Our article on polyurethane mouldings and moisture explains where the material copes well and where the substrate is the real problem.
Sanding and priming in practice
For a gloss-painted skirting line or a varnished door frame you plan to dress with a surround, a light key with sandpaper and a wipe-down is usually enough. Bare plaster, MDF and raw timber soak up moisture from the adhesive, which weakens the bond, so prime them. If you are coordinating mouldings with natural timber finishes elsewhere in the room, these wood grain decor ideas show how warm, textured surfaces sit alongside crisp painted profiles.
Fitting over wallpaper
People often ask whether they must strip everything. Not always, provided the paper is sound, but the method matters. We cover two installer approaches in fitting coving over wallpaper.
Uneven walls and ceilings
Older UK homes rarely have perfectly straight walls. Lightweight polyurethane has some flexibility, which helps, but adhesive cannot bridge large gaps forever. Our guide to ceiling mouldings for uneven walls shows how to work with the wall you have.
Measuring and cutting
Measure every wall separately. Rooms are seldom square, and a run that is 5 mm longer than the next one will show in the mitre. Mark your lengths, then cut a little long where you can and trim to fit.
Use the mitre box and the fine-tooth saw recommended in the manual. A fine tooth leaves a cleaner edge on polyurethane and means less filling later. Keep the profile tight against the back of the box in the same orientation it will sit on the wall, so the angle comes out the right way round.
Dry fit first
Before opening the adhesive, hold each piece in position. Check that internal corners close, external corners meet cleanly and the lengths line up. Pencil the position lightly on the wall or ceiling. A dry fit takes minutes and saves wasted adhesive.
Fitting cornice and coving
NOËL & MARQUET cornices are lightweight and supplied with a white primer finish, ready for adhesive and painting. Because they are light, the fixing is chemical rather than mechanical: the adhesive does the work, so the quality of your bead matters.
- Apply a continuous bead of the right ADEFIX along both contact edges of the profile.
- Press the piece into place along your pencil line, using light pressure.
- Wipe away squeezed-out adhesive straight away with a damp cloth or spatula.
- Fit the next length, butting the joint with the 3 mm gap described below.
- Check the run by eye from the opposite side of the room before the adhesive sets.
For most cornice you will fit the corners first, then the straight lengths between them. That keeps any small cutting error in the least noticeable place, mid-wall, rather than at a corner. You can browse the full range in cornice and coving, and our article on lightweight cornice moulding explains why the weight makes such a difference to DIY fitting.
Ceiling roses and LED profiles
Ceiling roses are fitted with the same principle: clean, dry, flat surface and a suitable adhesive. Dry fit around the light fitting position first and keep the cable route in mind. If you want a soft glow above the cornice, look at our LED coving range and plan the cable runs before the profile goes up, not after.
Fitting wall panels
Wall panels demand more patience than cornice, because any error is repeated across a large flat area. The manual’s approach is straightforward: measure the wall, position panels with a spirit level, apply ADEFIX PLUS to the rear mounting surfaces and embed each panel with a sliding movement.
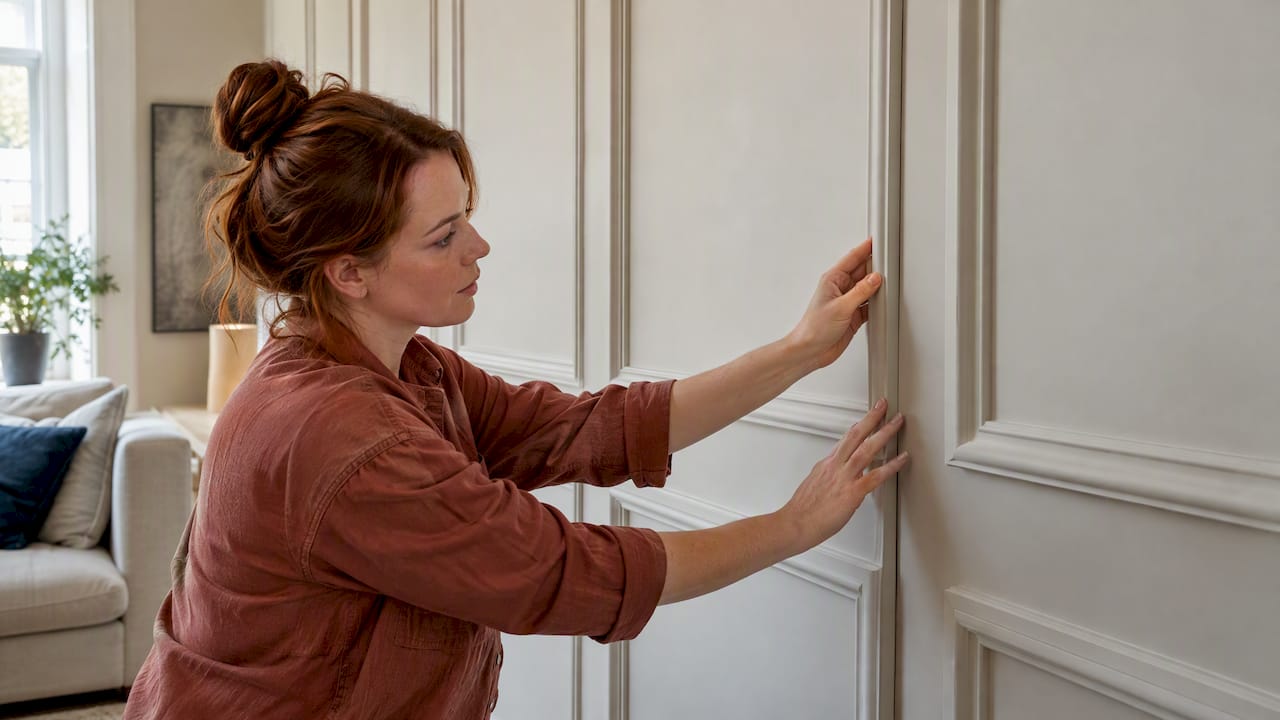
That sliding movement matters. It spreads the adhesive evenly and lets you nudge the panel to line up with its neighbour. The manufacturer’s guidance for its panels is to install profiles flat and without any step between them, pressing lightly. Check each panel with the spirit level as you go rather than at the end.
Planning the layout
Before you stick anything, decide where the pattern starts and finishes. A symmetrical layout, centred on a focal wall or a chimney breast, usually looks calmer than one that begins at a corner and ends with a thin slice at the other side. Mark a level starting line, and work out the last panel’s width on paper.
Panelling and wall mouldings
If you prefer a framed, traditional look, our panelling range suits dado-height schemes and full-height feature walls. Our article on decorative mouldings for walls explains how to proportion them. For a more sculptural look, see our 3D wall panels.
Skirting boards
Skirting follows the same logic as cornice: measure each wall, cut accurately in the mitre box, dry fit, then glue. Larger skirting profiles of 8 cm or more fall into the ADEFIX PLUS category in the manual. Fit against a clean wall and floor edge, and mind any uneven floor, as the skirting will follow whatever gap exists. We set out the main choices in skirting board styles, and you can browse the skirting range directly.
Joints, corners and edges
The manual specifies joints of 3 mm. That small gap gives the adhesive room to bond the two ends and lets the material move slightly without cracking the finish. Here is the sequence:
- Fill the joint with ADEFIX or ADEFIX PLUS, whichever suits the profile.
- Remove excess adhesive straight away.
- Smooth the joint with a spatula so it sits flush with the surface.
- Wait at least 6 hours, then sand lightly.
Do not rush the sanding. Cutting into adhesive that is still soft will drag it and leave a dent. Once it is cured, a light pass is all you need. Our guide to sanding moulding joints for a clean finish before painting shows the technique in more detail.
Painting after fitting
Paint is what makes separate lengths look like one continuous moulding. According to the manual, interior profiles should be painted within 4 weeks, with solvent-free paint, and a test coat is recommended. Test on an offcut or a hidden section first, so you know how the colour and sheen behave.
The manufacturer also recommends painting wall panels before installation, which suits panel schemes where you want crisp edges without cutting in around a fitted pattern. You will still need to touch up the joints once they are filled. For colour and sheen choices, see paintable wall moulding for polished interiors.
Carl’s Installer Tip
In our experience, the most common mistake is not the cutting. It is skipping the dry fit and the surface check. We’ve found that a wall which looks fine can still be dusty from old paint or crumbly in patches, and the adhesive then bonds to the dust rather than the wall. Run a dry hand over the surface, and if it comes away chalky, prime it.
Our other habit: wipe adhesive squeeze-out immediately with a damp cloth. Once it dries it needs sanding, and sanded adhesive shows through paint as a dull patch. A clean bead now saves a fiddly repair later.
Our view: why preparation beats technique
We supply the full Orac Decor and NOËL & MARQUET range, and we have also seen how these products behave on real walls. Our honest view is that the products are rarely the problem. Lightweight polyurethane is forgiving to cut, light to hold in place and easy to paint. What catches people out is the wall behind it.
That is why we always tell customers to spend more time on the substrate than the profile. A smooth, dry, primed surface and the correct adhesive give a result that looks as if a professional did it. A rushed surface gives joints that open and paint that cracks, however expensive the moulding.
We also think it is worth being realistic about scale. A single room of cornice is a very reasonable weekend job. A full wall of panels, a staircase of skirting or a run of LED coving with hidden cabling is where a second pair of hands, or a trained fitter, repays itself. For more on why fitters like the material, see polyurethane moulding benefits.
— Carl
Order your mouldings, or have them fitted
We supply over 500 premium Orac Decor and NOËL & MARQUET products, including cornice, skirting, ceiling roses, wall panelling, 3D wall panels and LED profiles, along with the adhesives to fit them. Start with our cornice and coving range or browse the shop for adhesives and accessories.
If you would prefer a professional finish, we can arrange installation through our Elite Decor UK national installer network. Details are on our installation page.
FAQ
Which adhesive do I use to install NOËL & MARQUET products?
Use ADEFIX for standard polystyrene and polyurethane profiles on interior surfaces. Use ADEFIX PLUS for larger products (8 cm or more), non-absorbent surfaces, damp rooms and certain panels. For outdoor use, the manufacturer specifies DOMOSTYL HYBRID.
Can I install them on a painted or wallpapered wall?
Yes, if the surface is sound. Painted walls must be clean, dry and smooth, and varnished surfaces need sanding. Wallpaper must be firmly stuck down, so check adhesion first, or see our guide to fitting coving over wallpaper.
How long should I wait before sanding and painting?
Sand joints lightly after at least 6 hours, once the adhesive has cured. Paint interior profiles within 4 weeks of fitting, using solvent-free paint, and try a test coat first.
Can I fit them in a bathroom or damp room?
The adhesive for damp rooms is ADEFIX PLUS, but the substrate must itself be dry before you start. The manufacturer warns against installing on damp surfaces, so cure any damp problem first.
Should I fit them myself or hire an installer?
A single room of cornice or skirting is a sensible DIY project if you prepare well. Large panel walls, high ceilings and lighting profiles with concealed cabling are often better left to a fitter, and we can arrange one through our installer network.
Sources
Recommended
