

Home Decor
3D wall panels cost: what homeowners need to budget
Aug
Most UK homeowners pay between £30 and £160 per square metre for 3D wall panels, with total project costs (materials and fitting) landing between £250 and £1,350 for a typical 8.5m² feature wall. Entry-level PVC and MDF panels sit at the bottom of that range. Mid-range painted polyurethane and slat designs sit in the middle. Bespoke oak, deep-relief or architect-grade panels push towards the top and beyond.
The final figure on your quote depends on three things: which material you choose, how complex the design is, and whether you fit the panels yourself or bring in a professional. A simple peel-and-stick PVC feature wall might cost you little more than the panels themselves. A full room in bespoke fluted oak, fitted by a tradesperson around sockets, corners and skirting, is a different budget entirely.
Here’s what shapes your final number:
- Material — PVC and basic MDF sit at the entry end; polyurethane and pine slats sit mid-range; oak, walnut and custom finishes sit at the premium end.
- Wall area and panel count — more square metres means more panels, more adhesive and more labour hours.
- Design complexity — mitred corners, continuous grain matching and deep relief profiles all add fitting time.
- Installation route — DIY saves on labour but costs you time and carries a higher risk of costly mistakes.
- Extras — adhesive, filler, primer, paint, trims and delivery rarely appear on the headline price but always appear on the invoice.
The sections below walk through each of these in turn, then give you a step-by-step method to calculate your own project cost from a tape measure and a calculator.
Key takeaways
Choosing your material first, measuring accurately with a sensible waste allowance, and pricing labour separately from panels are the three decisions that keep a 3D wall panel budget realistic from quote to finished wall.
| Point | Details |
|---|---|
| Know your price band | Entry-level PVC and MDF run roughly £30 to £70/m²; premium oak and bespoke panels can reach £160/m² or more. |
| Budget labour separately | Day rates around £210 for joiners mean a standard job typically runs £600 to £1,200 in fitting alone. |
| Measure before you order | Calculate net wall area, then add 10 to 15% waste allowance for corners and pattern matching. |
| Start with a feature wall | An 8.5m² feature wall delivers strong visual impact for a fraction of a full-room budget. |
| Check Coving.Online for exact pricing | The Coving list current SKU prices and panel coverage; Elite Decor UK can quote installation. |
Table of Contents
- What are 3D wall panels and where are they used?
- How much do 3D wall panels cost?
- What does 3D wall panel installation cost?
- What else affects the cost of 3D wall panels?
- How do you measure a wall and calculate how many panels you need?
- Feature wall or full room: which gives better value?
- Two worked cost breakdowns
- Should you fit 3D wall panels yourself or hire a professional?
- A tradesperson’s view on budgeting for 3D wall panels
- Get an accurate quote for your 3D wall panel project
- Sources
What are 3D wall panels and where are they used?
3D wall panels are moulded or profiled surface coverings that create texture and depth on a wall, rather than the flat finish you get from paint or standard wallpaper. Where traditional panelling tends to use flat boards with applied trim, 3D panels build the relief into the panel itself, so light catches ridges, waves or geometric facets across the whole surface. That’s the main reason they’ve become a popular alternative to a feature wallpaper or a painted accent wall: the texture holds up under different lighting in a way that flat finishes simply can’t.
Material choice drives both the look and the price, and it’s worth understanding the main categories before you start pricing anything up:
- Polyurethane — the material behind most premium ranges, including Orac Decor’s panel collections. Lightweight, moisture-resistant, and finished to a crisp, paintable surface that holds fine detail well.
- MDF and HDF — dense, stable boards often used for slat and fluted panel designs; good value but need sealing in damp rooms.
- PVC — the most budget-friendly option, often sold as interlocking or peel-and-stick tiles; genuinely waterproof, which makes it a sound choice for bathrooms.
- Polyurethane foam — very light, easy to cut, and forgiving for DIY fitting, though less robust than solid polyurethane mouldings.
- Timber and slat panels — real or engineered wood slats mounted on a backing board; a warmer, more textured look that costs more in materials and fitting time.
- Acoustic panels — combine a decorative front face with a sound-dampening core, aimed at home offices, media rooms and apartments with noise concerns.
In practice, most homeowners use 3D panels on a single feature wall in a living room or hallway, around a staircase, or in a bathroom where a moisture-rated PVC or polyurethane product does double duty as decoration and protection.
How much do 3D wall panels cost?
Three price bands cover almost every project you’re likely to plan, and understanding which materials sit in each one lets you sanity-check any quote you’re given.
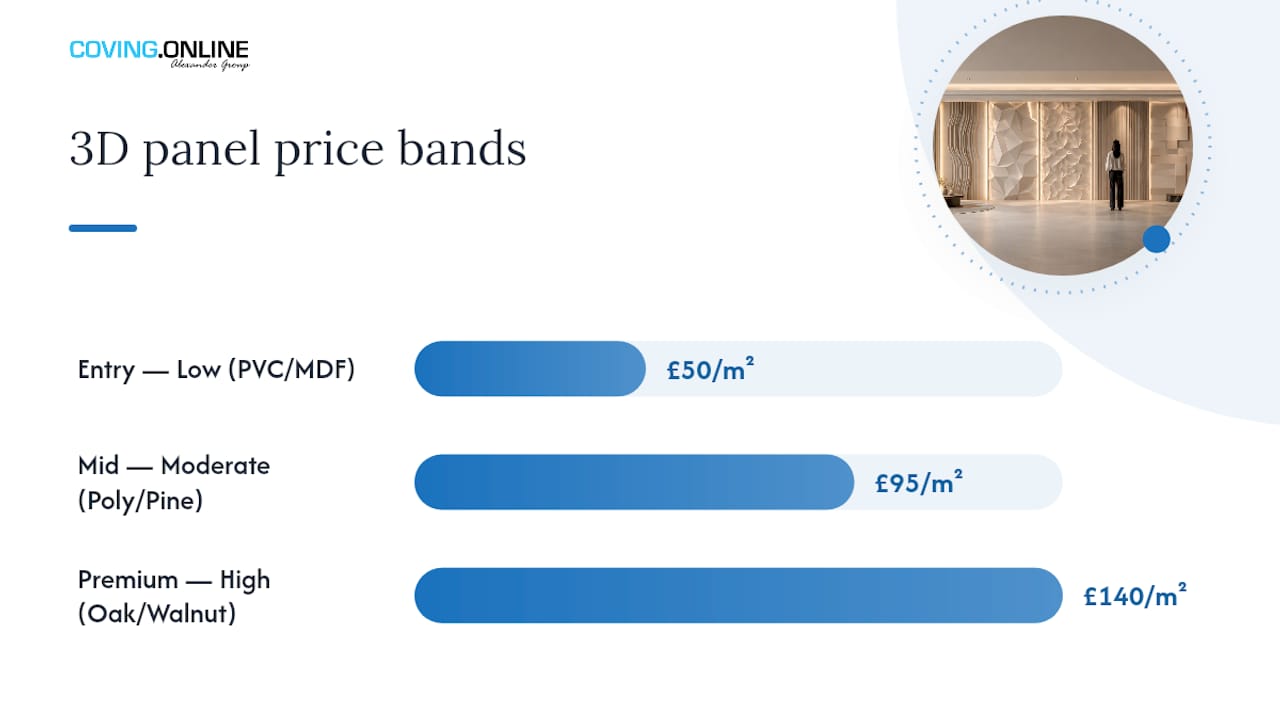
Entry-level (roughly £30 to £70/m²): PVC tiles, basic MDF slat panels and simple foam-based decorative panels. These are widely sold as interlocking tiles or peel-and-stick sheets, which keeps both material and fitting costs down.
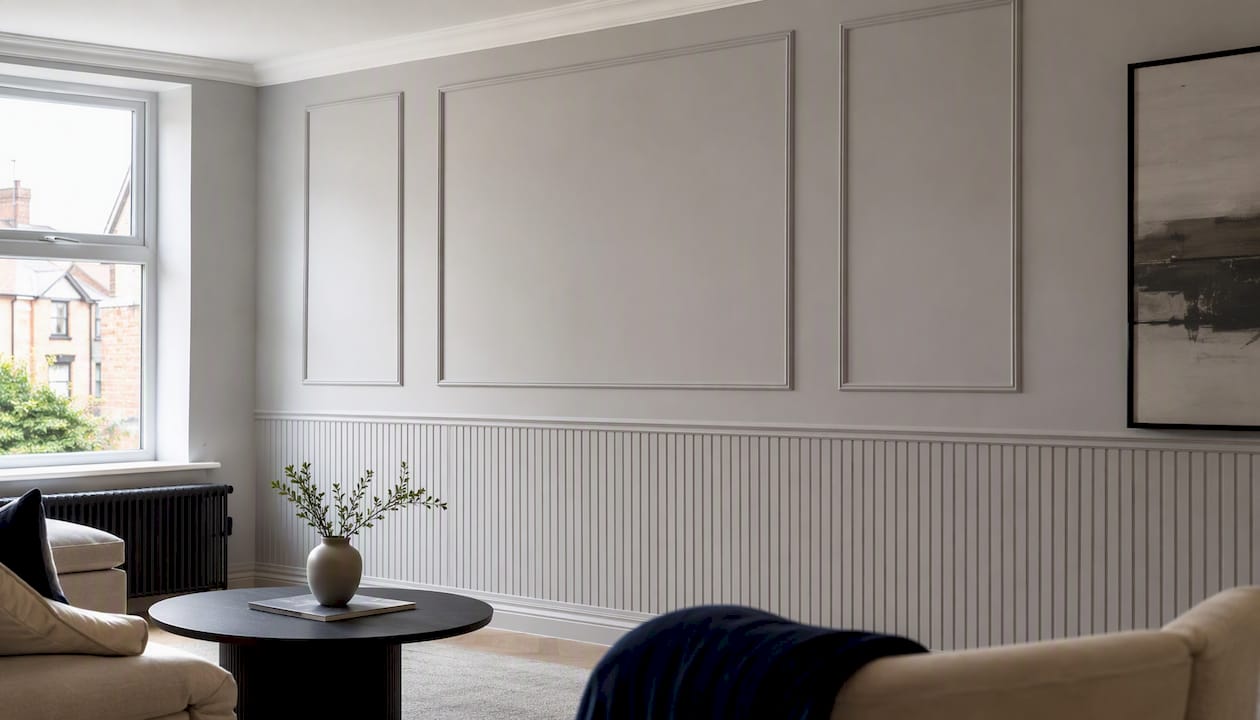
Mid-range (roughly £70 to £120/m²): Painted polyurethane panels, pine slat systems and better-specified MDF designs with deeper relief or a factory-primed finish. This is where most Orac Decor style panels sit, offering a genuine step up in detail and durability over entry-level options.
Premium (£120 to £160/m² and above): Oak and walnut slat systems, bespoke cut-to-size panels, and anything requiring continuous grain matching across multiple panels. MATERIA Collection notes that bespoke systems are typically quoted per project rather than by a flat rate, because fabrication and detailing vary so much between jobs.
Checkatrade’s own research puts the wider UK market at £50 to £400 per m², with an average around £225/m², reflecting how much bespoke and architect-specified work skews the top end upwards. Treat any average figure with caution: it blends budget PVC tiles with hand-finished oak commissions, so your actual quote will sit wherever your material choice and design complexity land you.
| Price band | Typical £/m² | Material examples | Installation complexity |
|---|---|---|---|
| Entry | £30–£70 | PVC tiles, basic MDF, foam panels | Low; often DIY-friendly |
| Mid-range | £70–£120 | Painted polyurethane, pine slats | Moderate; corners and returns add time |
| Premium | £120–£160+ | Oak/walnut slats, bespoke cut panels | High; grain matching, custom fabrication |
Some suppliers price by the panel rather than the square metre, particularly for slat and fluted systems sold in fixed-width boards. When you’re comparing quotes, convert everything to a per-m² figure first; otherwise you’re comparing apples with orange segments. For exact current costs, check the SKU listings on the Coving, which show coverage per panel alongside price, so you can work out your per-m² figure directly from the listing.
What does 3D wall panel installation cost?
Labour is where a lot of homeowners underestimate the final bill. Typical tradesperson day rates run around £210 for a joiner or carpenter and £175 for a painter, with a standard panelling job taking one to three days depending on wall area and complexity. On a small feature wall, that’s often a single day’s work. On a full room with multiple walls, corners and fittings, expect closer to the three-day end.
A handful of job elements reliably push labour time, and therefore cost, upwards:
- Wall preparation — stripping old wallpaper, filling cracks or skimming an uneven wall before panels go up.
- Corners and returns — internal and external corners need mitring or capping, which takes considerably longer than a flat run of panels.
- Socket and switch cut-outs — every electrical fitting means marking, cutting and finishing an aperture, and a wall with four sockets takes noticeably longer than a blank wall.
- Working at height — stairwells and double-height walls need scaffolding or tower access, adding both time and equipment hire cost.
- Uneven or solid walls — older properties with solid masonry or bowed plaster often need furring strips or packers before panels sit flush.
Here’s a simple way to estimate labour for your own wall:
- Measure your wall area in square metres (height × width, minus any large openings).
- Estimate fitting time using roughly 2 to 4 hours per square metre for a standard job, more if you have several corners or sockets.
- Multiply hours by the local hourly rate. A £210 daily rate over an 8 hour day works out at roughly £26 per hour, so a 6m² wall at 3 hours/m² comes to around 18 hours, or £470 in labour alone.
- Add a contingency of 10 to 15% for anything the tradesperson finds once the old finish comes off.
Labour rates vary by region, with London and the South East typically running higher than the rest of the country, so always get two or three local quotes rather than relying on national averages. Checkatrade’s cost data confirms that labour, preparation and finishing frequently account for more of the final bill than the panels themselves, particularly once wall preparation is factored in.
What else affects the cost of 3D wall panels?
Beyond material and labour, a handful of smaller decisions add up to a noticeable swing in your total spend.
- Panel format — a design built from many small modules takes longer to align and fit than a system using large, single panels covering the same area.
- Design complexity — deep relief profiles, mitred corners, and reeded or fluted designs that need to run continuously across a wall all add fitting precision and time.
- Wall condition — old plaster, damp patches or a wall that’s out of true will need remedial work before panels go up, and that cost sits outside the headline panel price.
- Wet-area specification — bathrooms and kitchens need waterproof panels and sealed joints, which typically costs more than a standard living-room specification. If you’re weighing up panelling a wet room against other finishes, this wet room cost guide is a useful comparison point for budget-conscious homeowners.
- Acoustic backing — panels specified for sound dampening carry a cost premium over a purely decorative equivalent.
- Delivery and lead times — bespoke or made-to-measure panels often carry a longer lead time and a delivery surcharge compared with stock lines.
Dundee Deco’s cost guide makes a point worth repeating here: settle on your material first, because that single decision does more to set your budget than any subsequent choice about finish or style. Get the material right, and everything else is a smaller adjustment on top.
How do you measure a wall and calculate how many panels you need?
Getting your panel count right the first time saves you a second delivery charge and an awkward colour-match problem if you order more later. Work through it in this order:
- Measure the height and width of each wall you’re panelling, in metres, and multiply to get the area in square metres.
- Subtract openings — doors, windows and any fixed fittings that won’t be covered, using their own height × width measurement.
- Total your net wall area. This is the figure you use to calculate panel quantities and materials.
- Check the coverage per panel on the product listing (most Coving.Online SKUs list this clearly) and divide your net wall area by that figure to get a base panel count.
- Add a waste allowance. A sensible starting point is 10% for a straightforward rectangular wall, rising to 15 to 20% for rooms with several corners, angled walls, or a pattern that needs matching across panels.
Worked example: a wall measuring 3m high by 3m wide gives 9m² gross. Subtract a single door opening of 2m × 0.9m (1.8m²), and you’re left with 7.2m² net. If each panel covers 0.5m², that’s 14.4 panels before waste, rounding up to 15.
Pro Tip: In our experience, the waste allowance is the single figure DIYers get wrong most often. It’s tempting to order exactly what the maths says you need, but the first cut on any pattern-matched panel is rarely perfect, and corners eat offcuts fast. We’ve found that ordering the extra 10 to 15% up front, rather than reordering mid-project, avoids batch and colour variation between deliveries.
Feature wall or full room: which gives better value?
A single feature wall almost always delivers the strongest visual impact for the lowest spend, because it needs less material and less labour than covering every wall in a room. Panelling one wall in a living room or bedroom draws the eye, sets a focal point, and lets you use a premium material you might not want to commit to across an entire room budget.
Here’s how the numbers typically compare:
- A typical 8.5m² feature wall at a mid-range price of, say, £90/m² for materials and fitting combined comes to roughly £765, sitting comfortably inside the £250 to £1,350 total range reported for UK wall panelling projects.
- A 40m² full-room job at the same £90/m² rate scales to around £3,600, close to five times the cost for four to five times the wall area, since labour efficiency improves slightly on larger continuous runs, but corners and returns multiply.
- The visual return doesn’t scale the same way. One well-chosen feature wall can transform a room’s character on its own. Four panelled walls rarely feel four times as striking, and can make a smaller room feel visually heavier.
Full-room panelling earns its place in specific situations: heritage rooms where panelling is part of the architectural character, spaces where you’re integrating joinery like shelving or a fireplace surround into the panel design, or rooms where acoustic or thermal performance genuinely benefits from full coverage. Outside those cases, a feature wall is usually the smarter first project, and it’s a sensible way to trial a material or finish before committing a larger budget to it.
Two worked cost breakdowns
Seeing the maths laid out for a real wall makes the abstract price bands click into place.
Example 1: 8.5m² feature wall (living room)
- Wall area 8.5m² plus 10% waste gives 9.35m² of panels required.
- At a £90/m² material rate, panels alone come to roughly £610.
- A single day’s fitting at a £210 day rate, plus consumables and finishing, brings the project total to around £930, sitting within the sourced UK range for a project of this size.
Example 2: 30m² whole-room job (three walls, one with a door and two sockets)
- Net wall area of 30m² plus 10% waste gives 33m² of panels.
- Material cost at £90/m² comes to roughly £2,970, before any labour.
- Three days’ labour at £210/day, covering socket cut-outs and corner returns, adds £630, with finishing bringing the project total to around £3,940.
Adjust the material rate up or down based on your chosen product line, and adjust labour days if your walls have more corners, sockets or awkward access than these examples assume.
Should you fit 3D wall panels yourself or hire a professional?
Plenty of 3D wall panel projects are genuinely achievable as a DIY job, particularly with lightweight peel-and-stick or PVC panel systems designed for straightforward home fitting. Dundee Deco’s comparison of DIY and installed pricing shows just how much cheaper DIY-friendly panels can be once you strip out professional labour, which makes them a sensible entry point if you’re confident with basic tools and a spirit level.
Tasks that suit a confident DIYer:
- Peel-and-stick or interlocking PVC panels on a flat, straightforward wall.
- Single feature walls with no sockets, switches or awkward corners to work around.
- Rooms with good natural light and easy access, avoiding scaffold or tower hire.
Tasks that generally call for a professional:
- Heavier polyurethane or timber slat panels that need precise fixing and level lines across a large area.
- Precision mitred corners, especially where a pattern or grain needs to continue unbroken around a return.
- High ceilings, stairwells or landings, where cutting panels to fit angles and multiple smaller runs adds real skill and time.
- Any wall with multiple electrical sockets, switches or fittings that need clean cut-outs.
If you’re leaning DIY, budget realistically for tools you may not already own: a decent mitre saw, spirit level, adhesive gun and panel adhesive rated for your wall type. For inspiration on smaller, low-cost DIY panel projects, this pegboard panel guide is worth a look before you commit to a full room.
Watch for the warning signs that push a job towards professional-only territory: an uneven or solid masonry wall that needs furring strips, a room with more than two or three sockets, or a staircase and landing combination where every panel needs its own angle cut. Any one of these can turn a weekend project into a much longer job than you planned for.
Carl’s Installer Tip
Pro Tip: In our experience, the finish quality of a 3D wall panel job comes down to two things most DIYers skip: letting the adhesive cure properly before loading any weight onto the panel, and dry-fitting the full run before you commit to glue. We’ve found that rushing the adhesive stage is the most common mistake, panels can shift slightly as the adhesive sets, and that’s what causes visible gaps at joints later. Dry-fit every panel across the wall first, mark your cut lines in pencil, then work from the centre outwards rather than from one edge. It keeps any final cut panel symmetrical on both sides of the wall, which reads as a far more deliberate, professional finish.
A tradesperson’s view on budgeting for 3D wall panels
Most clients arrive with a rough budget in mind but no fixed material choice, and that’s usually the wrong way round. Once you’ve seen enough installs, the pattern is clear: homeowners who choose their material first, then size the room to the budget, end up happier with the result than those who fix a total spend and then discover their preferred finish costs more than expected.
The panels themselves are rarely the surprise. It’s the preparation, the corner returns and the socket cut-outs that catch people out, which is exactly why a proper site visit or an accurate wall measurement matters more than any headline price-per-m² figure. A wall that looks straightforward from a photograph can turn into a longer job once you’re standing in front of it with a level.
For anyone weighing up DIY against professional fitting, the Elite Decor UK installer network gives you a practical route to a proper quote without committing to a single local tradesperson before you’ve compared options. It’s worth getting a fitted quote even if you’re planning to do the work yourself, simply so you know what you’re saving by doing it yourself, and what you’d be paying for peace of mind if the wall turns out trickier than expected. Check the Coving for current pricing and panel coverage before you finalise your material choice; the figures there reflect what’s actually in stock, not a general market average.
Get an accurate quote for your 3D wall panel project
There are other routes to a panelled wall, DIY kits from general hardware suppliers, or a local joiner working from a catalogue you’ve never seen fitted. What Coving.Online offers instead is a direct line to the material itself: genuine Orac Decor and NOËL & MARQUET polyurethane ranges, with full product specifications and coverage details listed against every SKU, so you’re pricing your project from real numbers rather than a rough estimate.

Polyurethane panels from these ranges hold fine detail and a crisp painted finish that lightweight PVC alternatives can’t quite match, while still being considerably lighter and easier to fit than solid timber. You can buy direct from the product pages, request panels cut to size for an awkward wall, or book a professional through the Elite Decor UK installer network if you’d rather leave the corners and cut-outs to someone with the right mitre saw. Browse the full 3D wall panel range to compare coverage and pricing across the collection, and get a bespoke installation quote before you commit to a material.
Sources
The price bands and labour figures in this guide draw on published UK cost data, cross-checked against Coving.Online’s own product listings for current material pricing:
- Wall panelling cost guide (UK prices)
- How much does wall panelling cost? | Checkatrade
- Wall panels cost guide: pricing & installation tips – Dundee Deco
Use the product pages to check coverage per panel against your own measurements before ordering, and get in touch about Elite Decor UK installation if you’d rather have your feature wall fitted by a professional than tackle the corners yourself.
