
Home Decor
Media Wall Coving: Ideas, Lighting and How to Fit It
Oct
Coving on a media wall does two jobs. It finishes the join between the wall and the ceiling, and it can hide LED lighting that washes light over the TV and fire. Done well, it makes a built-in feature look like part of the architecture rather than a box added to the room. Done badly, it leaves a gap, a visible cable or a shadow in the wrong place.
This guide covers which coving styles suit a media wall, where to put lighting, how deep to build, how to fit the mouldings and where the safety lines sit.
TL;DR
- Choose a simple, shallow coving or an LED-ready cornice for a modern media wall. Ornate profiles suit period rooms but can fight a flat, contemporary front.
- Indirect lighting is the biggest visual choice. Its distance from the ceiling changes how bright and how soft the glow looks.
- Plan the frame depth around the fire and TV first, then the coving. A typical fitted media wall costs £1,500 to £4,000 in the UK.
- Use an aluminium channel behind LED tape, file every cut edge smooth and leave adhesive to cure before adding the lighting.
- Hidden power and fire performance are safety matters. Use a registered electrician for anything beyond a simple spur.
Table of Contents
- Why coving works on a media wall
- Choosing the right coving style
- Lighting: where the coving earns its place
- Planning the frame before the coving
- Fitting coving to a media wall
- Hiding cables without cutting corners
- Safety, regulations and ventilation
- Our perspective: treat the ceiling line as part of the design
- Get the right profile and help fitting it
- FAQ
- Sources
Why coving works on a media wall
A media wall is a stud frame built out from an existing wall, usually housing a recessed TV, an electric fire and the cabling. Left plain, the top edge can look abrupt, especially where the new wall stops short of the ceiling or meets an old cornice that does not match.
Coving solves three problems at once:
- It ties the new structure to the room. If the rest of the room already has cornice, carrying a matching or complementary profile across the feature wall stops it looking bolted on.
- It hides the junction. Plasterboard on a new frame rarely meets an old ceiling in a perfectly straight line. Coving covers small irregularities.
- It houses lighting. A hollow or LED-ready profile conceals the strip, so you see the glow and not the source.
The design idea is to frame the space and anchor it. A media wall is the focal point of most living rooms, and the ceiling line above it is the first thing the eye reads.
Choosing the right coving style
Contemporary and minimal
If your media wall is flat-fronted, painted in a deep colour or clad in slats, a plain, low-projection profile or a square-edged uplighter profile looks cleanest. The aim is a crisp line, not decoration. Our LED Coving range covers profiles designed to take lighting from the outset, which saves improvising later.
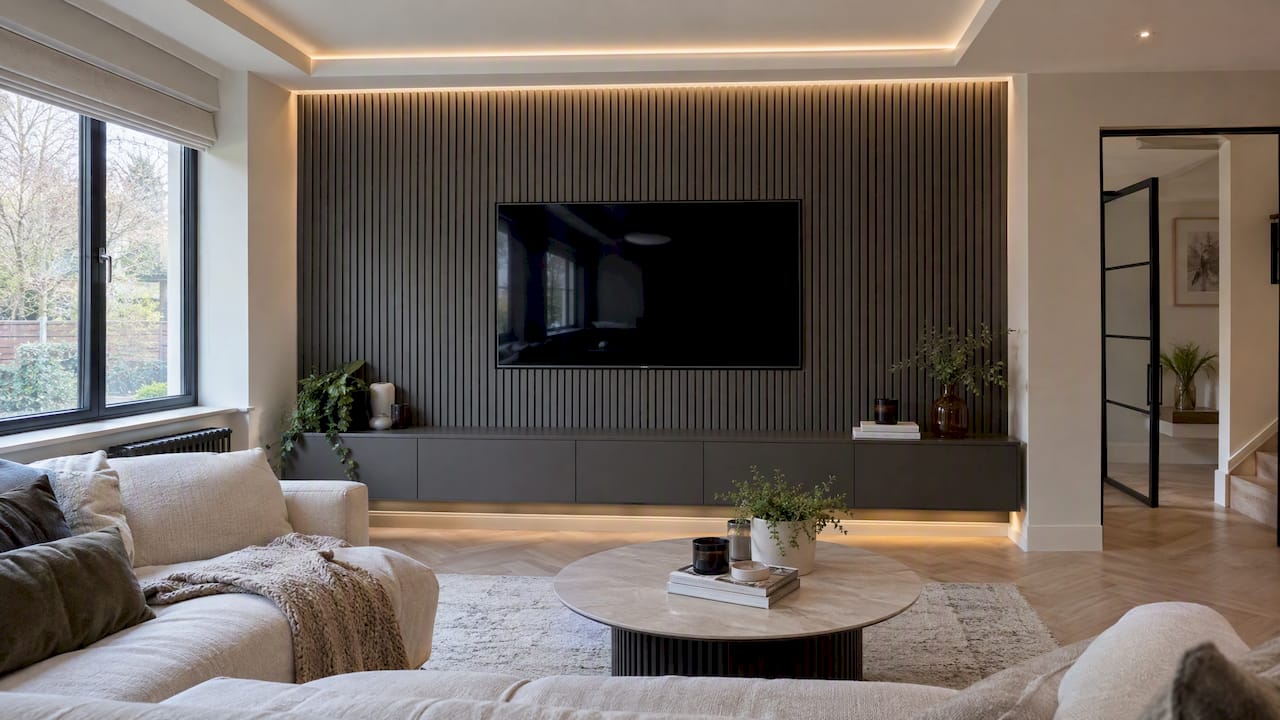
Traditional and period homes
In a Victorian or Edwardian room, a media wall can sit comfortably beside a classic cornice. Match the proportions of the existing profile where you can, and keep the media wall itself simple. Our Cornice & Coving collection includes traditional and modern Orac Decor and NOËL & MARQUET profiles, so you can continue a period look across the new wall. If you are unsure about terminology, our guide to cornice vs coving explains the difference.
Curved or arched alcoves
Some media walls have rounded ends or curved niches. Standard rigid coving will not follow them. Flexible coving bends to the radius, and it is worth ordering before the framing is finished so you can check the curve against the real profile.
Quick comparison
| Media wall style | Coving approach | Lighting |
|---|---|---|
| Flat, contemporary | Plain, low-projection or square profile | Indirect uplight above the wall |
| Slatted or panelled | Simple profile, with panelling kept below | Slim LED channel in the slat gap or the coving |
| Period room | Profile matched to existing cornice | Optional, softer and lower |
| Curved niches | Flexible coving | Flexible-compatible channel |
Lighting: where the coving earns its place
This is the part most people underestimate. According to the Orac Decor technical team, placing an indirect lighting profile closer to the ceiling surface gives a brighter, more directed light. Dropping it further down the wall gives a softer, more diffused glow. That placement sets the rhythm of the whole room’s lighting, so it deserves a decision before the first fixing goes in.
Some practical thoughts:
- Behind a TV, go soft. A strong, hard uplight right above a screen creates glare and reflections. A diffused glow reads as more comfortable in the evenings.
- Over a fire, go brighter. If the fire is the visual centrepiece, a more directed wash from the coving highlights the chimney breast or feature panel.
- Keep the colour temperature consistent. Mixing cool white coving light with warm shelf lighting is a common reason a finished wall feels off.
- Think about dimming early. Dimmable drivers need planning in the wiring, not after the plaster is dry.
On the wiring side, LED lighting for media walls is generally run from a 24V driver that should stay accessible for maintenance. Do not seal it behind a fixed panel. For more on how lighting profiles work in a room, see our guide to lighting profiles for better interior design and our overview of LED lighting in coving.
Planning the frame before the coving
The coving is the last element, but the frame decides whether it sits properly. Work in this order:
- Choose the fire and the TV. Their sizes set the width and height of the feature.
- Check the manufacturer’s manual. It will give the clearances and ventilation gaps, which are required for safety and warranty.
- Set the depth. As a guide, allow about 150mm for a slim fire and 250mm or more for an inset one. A frame built 50mm to 75mm forward of the wall is the minimum to carry cables and sockets without chasing.
- Decide the top edge. Does the media wall run to the ceiling, or stop short and finish with a shelf or lighting recess? Coving suits both, but the fixing method differs.
- Draw the symmetry. Installers advise settling how the fire’s width relates to the TV above before framing, rather than forcing it during the build.
If the TV recess is larger than the screen, it also leaves room for backlighting, which is one of the reasons so many finished walls look like a gallery piece.
Fitting coving to a media wall
The principles are the same as any coving job, with a few extra constraints because the wall is new and the lighting is integrated.
Tools and materials
- Mitre box and fine-toothed saw
- Pencil and spirit level
- Coving adhesive suited to polyurethane
- Filler and a flexible filling knife
- Aluminium channel and LED tape if lighting
- File or fine sandpaper
Our adhesives and tools are in the shop, and our guide to tools and materials for fitting coving is a useful checklist.
Step by step
- Prepare the surface. New plasterboard should be dry, sealed and dust-free. Check the ceiling junction for flatness, as covered in our guide to surface preparation.
- Mark the profile. Draw the mitre angle on the coving so you place it correctly in the box, and mark the ceiling side so you never fit it upside down. Orac Decor’s coving installation instructions show this clearly.
- Dry fit every length. Hold each piece up before any adhesive goes on. Corners are where a media wall’s symmetry shows or fails.
- Apply adhesive properly. The v-groove on the back of many profiles must be fully overfilled with adhesive. Running a bead inside the groove does not achieve the surface contact you need.
- Press, wipe and support. Press the length into place, wipe squeeze-out with a damp cloth and, if needed, use temporary supports while it sets.
- Fill the joints. Fill mitres and gaps, let them dry, sand lightly and paint.
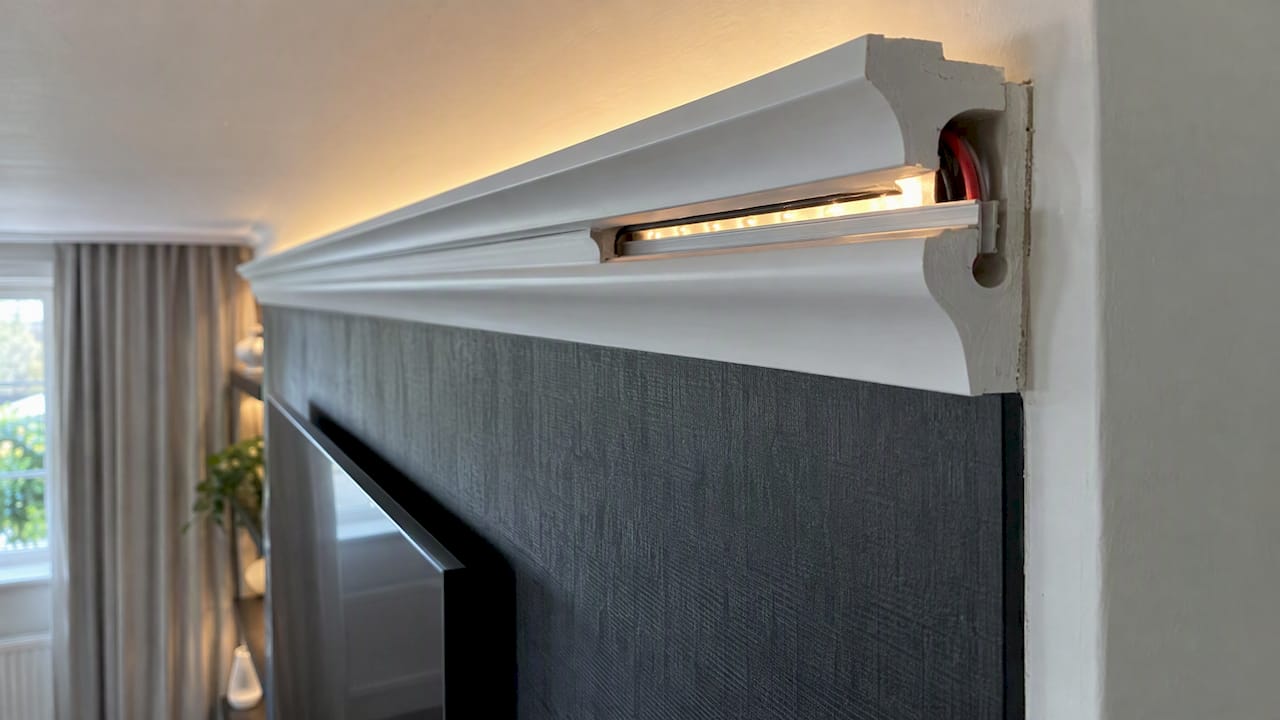
- Add lighting last. Insert the aluminium channel and LED strip once the mouldings have fully set. Orac Decor’s guidance is to fit the moulding first, then insert the LED strip.
Carl’s Installer Tip
In our experience, the most common mistake on a media wall is rushing the lighting on the same day as the coving. We’ve found that leaving the adhesive at least 24 hours before decorating or adding heavy LED components stops the profile shifting under its own weight while the glue sets, a point Orac Decor also makes in its installation guidance.
The second is a cable entry hole cut in the back of the profile. File the edge until it is perfectly smooth. A rough edge on the plastic can nick the insulation on the LED strip or feed wire and create a hidden short circuit risk. And always put the tape in an aluminium channel, which acts as a heat sink and extends the life of the lighting.
Hiding cables without cutting corners
One reason people choose coving on a media wall is to hide the wiring route. A hollow profile can carry a slim feed cable neatly from the driver to the strip. Our guides on hiding wiring with coving and when to call a professional go into more detail.
The key point is that coving can hide low-voltage lighting cable. It is not a place for mains wiring. Anything on the mains side belongs with a qualified electrician.
Safety, regulations and ventilation
This is where DIY media walls most often go wrong, so be careful here.
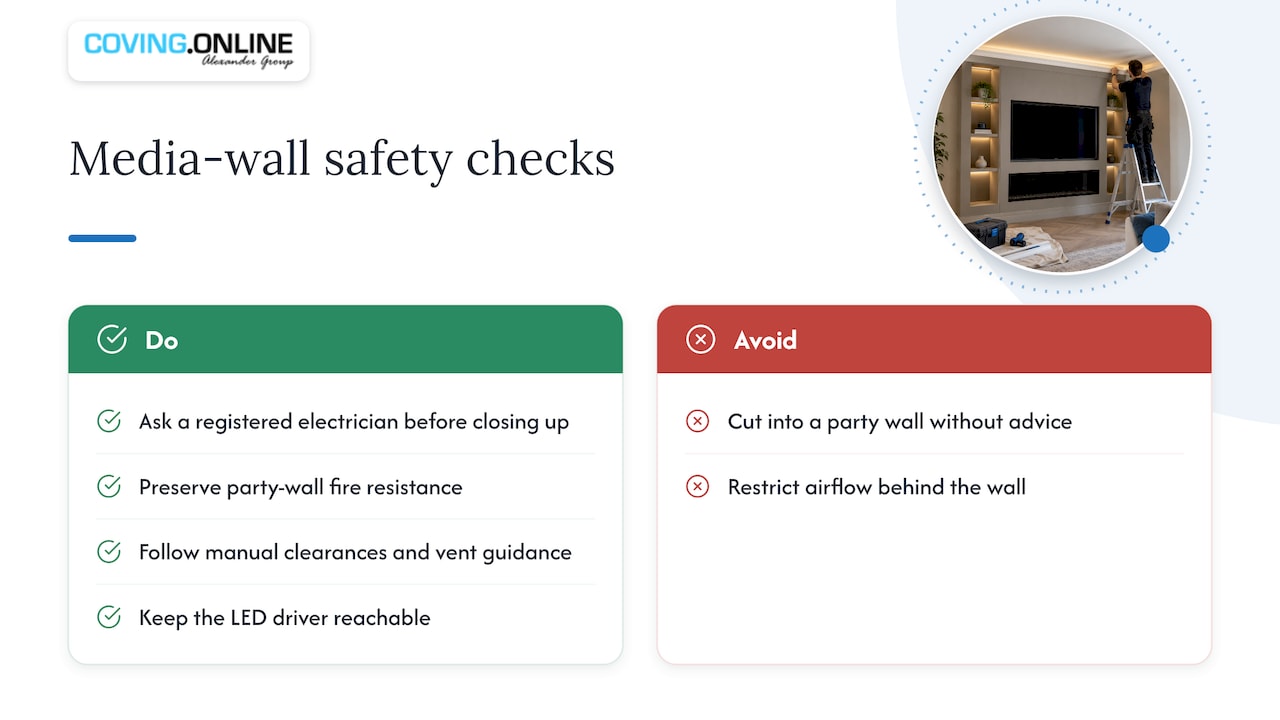
Electrical work. In England and Wales, electrical work in homes falls under Part P of the Building Regulations. Adding a spur from an existing circuit is often non-notifiable, but new circuits require notification to Building Control or certification by a registered electrician. If you are not sure which side of the line your job falls on, ask a registered electrician before you close up the wall. Scotland has its own building standards, so check locally if you are building there.
Fire performance. Electrical Safety First publishes best practice guidance on electrical installations that penetrate wall and ceiling linings. Any change to a wall, particularly a party wall, must preserve its fire resistance. Cutting into a separating wall for power or lighting without thinking about this can create a serious fire risk and may affect your home insurance. If your media wall sits on a party wall, speak to an electrician or Building Control first.
Heat and ventilation. Restricted airflow behind a wall can overheat a TV or an LED driver. Follow the fire manufacturer’s manual for the exact clearances and vents, and keep the driver reachable.
Our perspective: treat the ceiling line as part of the design
We supply and, through our Elite Decor UK installer network, arrange the fitting of Orac Decor and NOËL & MARQUET mouldings, so we see media walls from both sides: the product and the finished job.
Our view is simple. A media wall succeeds or fails on its edges. The cabinet and the fire get the attention, but the ceiling junction, the corners and the lighting line are what make it look expensive. A well-chosen profile costs a small fraction of the build and changes how finished the whole wall looks.
We would rather you choose a simple profile and fit it precisely than choose an elaborate one and struggle with corners. Pick the lighting position first, then the coving. Test a short length of the profile against the wall, in daylight and at night, before ordering the full run. Treat the electrical and fire points as non-negotiable and bring in a professional where the rules say so.
— Carl
Get the right profile and help fitting it
If you are planning a media wall, start with our LED Coving and Cornice & Coving ranges. If you want slatted or panelled detailing below the coving, see our Panelling and 3D Wall Panels collections. For the fire surround and room finish, our Skirting range and Ceiling Roses help carry the look across the room.
Would you rather not fit it yourself? We can arrange professional installation across the UK through Coving.Online. Tell us about your project and we will point you to the right profile and fitting route.
FAQ
Are media walls good?
They can be. A media wall gives you a tidy home for the TV, hides cables and creates a focal point, which is particularly useful in boxy rooms. The trade-offs are cost, with a fitted wall typically running from £1,500 to £4,000, and the planning needed for ventilation and electrics.
What types of coving are there?
The main types are plain, ornate or traditional, modern and minimal, flexible for curves, and LED or uplighter profiles that hide lighting. For a media wall, plain or LED-ready profiles tend to look best. Our guide to coving designs shows examples.
Is coving still fashionable?
Yes, particularly in cleaner, more architectural forms. Square, shallow profiles and LED coving suit modern interiors, and period styles remain popular in traditional homes. Our article on architectural coving covers current approaches.
What can I cover my media wall with?
Common finishes are paint, wood or MDF slats, decorative wall panelling and 3D wall panels. Whatever you choose, keep the area around the fire and its vents to the materials the fire manufacturer permits. Check the manual before you fix anything combustible nearby.
Sources
- How to build a media wall: depths, fires and the steps
- Electrical installations and fire performance, Electrical Safety First
- Choosing LEDs for a media wall installation
- Orac Decor: coving lighting
- Orac Decor: installation
- Orac Decor: coving installation instructions (PDF)
- Orac Decor: installation instructions for lighting profiles (PDF)
Recommended
- Transform Your Space with These Coving Design Ideas
- Best Coving for Living Rooms and How to Choose
- Coving Materials: Which Is Right for Your Room?
- 12 LED Ceiling Coving Ideas for Better Rooms
