

Home Decor
Sanding Moulding Joints: A Clean Finish Before Painting

Oct
Sand a moulding joint only once the adhesive has fully hardened. Use a fine abrasive on a shaped support, and blend the seam gently into both neighbouring pieces. Light sanding is the last refinement, not a repair for a badly cut or badly glued joint. If a mitre does not close, filler or a fresh cut will serve you better than more paper.
This guide covers the whole job. It starts with what to do before you pick up any abrasive, then goes through grits, technique, dust control and the point at which you should stop. It applies to coving, cornice, skirting, panel mouldings and the other profiles we supply.
TL;DR
- Let joint adhesive harden before you sand. For Orac Decor coving, the guidance allows painting after 24 hours, and LED coving needs 24 hours of drying before sanding or painting.
- Use fine abrasive and light pressure: a fine sanding sponge or paper of at least 220 grit for wood, and 320 grit for a light rub of primed polyurethane before painting.
- Work in short strokes, then lengthen them so the blend runs several centimetres onto both pieces. Support the paper with the profile’s shape, not a flat block.
- Check the joint with a fingertip and raking light, or with a coat of primer, before you commit to a topcoat.
- If the profiles do not line up, stop sanding. Fill small gaps or recut the joint.
Table of Contents
- Why a joint needs sanding at all
- Get the joint right before you sand
- Choosing sandpaper and tools
- How to sand a moulding joint, step by step
- Carl’s Installer Tip
- Know when not to sand
- Controlling dust when you sand
- Our perspective on joint finishing
- Choosing profiles that are easier to finish
- Get the supplies and fitting from one place
- FAQ
- Sources
Why a joint needs sanding at all
A mitre or scarf joint is rarely perfect straight from the saw. Carpentry guidance on blending joints lists profile misalignment, framing irregularities, compound build-up and inaccurate saw setup as the usual reasons a joint needs work. In an old British house, add ceilings that are not quite level and corners that are not quite square.
Paint makes this worse. Gloss and semi-gloss show every flaw. Fine Homebuilding’s trim carpentry advice warns that sawblade marks, tear-out and other imperfections stand out once semi-gloss goes on. Sanding and filling are what stop a good fit looking like a rough one.
With polyurethane mouldings, the picture is a little different. The material is cut cleanly and the joint is glued rather than nailed. The seam is part of the finish, and that changes how you approach it.
Get the joint right before you sand
Most sanding problems start earlier, at the cut and the glue.
Cut and fit first
If coving is turned the wrong way round, no amount of sanding will fix the mitre. Before you cut, check the orientation. Our guides on which way round coving goes and coving mitre angles show how to test-fit on offcuts. Our guide to cutting cornice corners covers internal and external corners step by step.
A cut that is slightly out is easier to fix at the saw than at the sanding stage. Check your measurements as well. A planning guide on measuring a room accurately is useful for catching wall lengths and corner problems before you cut.
Use the right adhesive on every joint
Orac Decor’s coving installation instructions say the full warranty applies only where FX200 or FX210 is used on every mitre and end joint. They warn that skipping it may result in open joints that are very difficult to repair. The instructions also tell you to remove excess adhesive while it is still workable, and to use DecoFiller on visible joints or small irregularities.
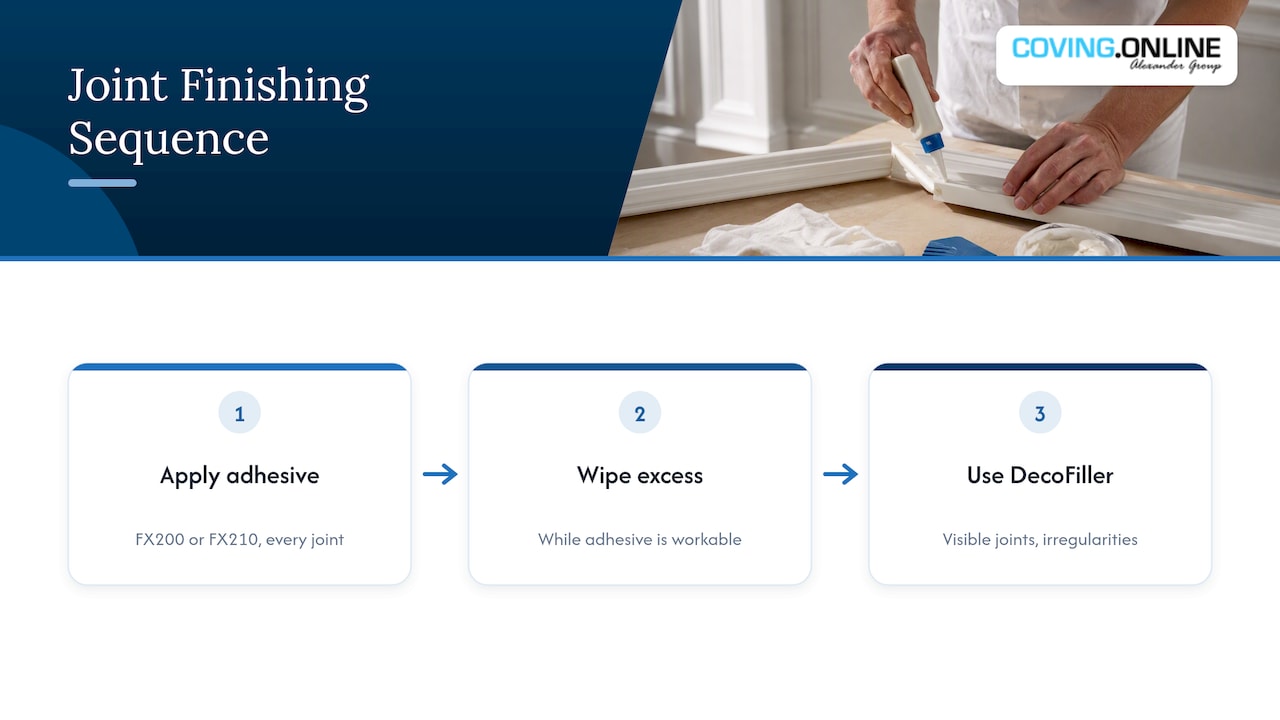
That sequence matters more than any sanding technique. A joint bonded with the correct adhesive and wiped clean needs only a light touch. A dry-cut joint that gapes asks you to remove material the profile cannot spare. Our guide to the best adhesive for coving explains the choice in more detail, and you can find adhesives in our shop.
Wait for the adhesive to harden
Sanding a soft seam drags it into a hollow. The Orac Decor guidance has you sand lightly only after the adhesive has hardened, and states that paint can follow after 24 hours for the relevant adhesive system. For LED profiles the manufacturer’s guide is stricter. The adhesive must dry for 24 hours before sanding or painting, because the profile can otherwise move under the weight of the LED bar. See our LED coving installation guide for the full sequence.
Choosing sandpaper and tools
Coarse paper removes a defect quickly, but it leaves scratches that can show through paint. Use it only for local correction, then step finer.
| Material | Suggested abrasive | Notes |
|---|---|---|
| Primed Orac Decor polyurethane | 320 grit, light rub | Orac’s guides specify 320 grit for lightly rubbing primed moulding before painting |
| Wood moulding | Fine sanding sponge, or at least 220 grit on a block | Dunn Lumber advises sanding with the grain |
| Rough sawn edges or tear-out on timber | Around 150 grit locally, then finer | Fine Homebuilding suggests keeping 150 grit to hand for rough spots |
| Between coats of primer or paint | Fine grit, light pressure | Improves adhesion and smoothness, as in the Woodgrain finishing guide |
The tool matters as much as the grit. For decorative profiles, a hand-held abrasive with a shaped support gives better control than a powered sander. Good options are:
- A fine sanding sponge. It follows beads and coves without flattening them.
- Paper folded over itself or a dowel. This works for tight coves and small fillets.
- A profiled foam or rubber block. It supports the paper across a repeated shape.
- A flat block, only on flat zones. Keep it off the detailed parts of the profile.
How to sand a moulding joint, step by step
- Check the adhesive has hardened. Give it at least the time the instructions specify. If in doubt, leave it longer.
- Remove proud material locally. Use short, controlled strokes with fine paper, concentrating on the high edge only.
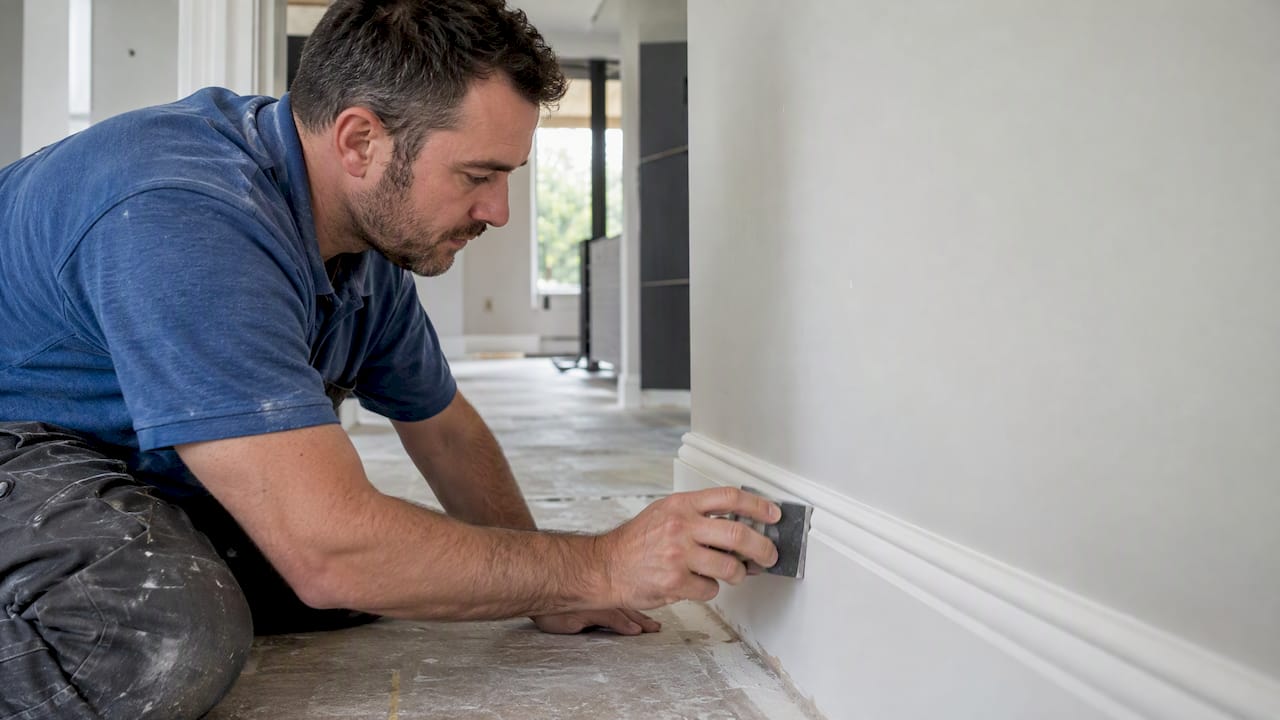
- Lengthen the strokes. Following the detail sanding method, start short so you do not tear the paper or lift splinters. Then extend the stroke gradually so the blend runs several centimetres onto both adjoining pieces.
- Sand by zone. A compound profile has flats, beads, coves, fillets and sharp edges. Professionals treat each as a separate sanding zone, because crossing boundaries with a flat block erases crisp detail and leaves a wave.
- Keep the paper supported. A tight scrub directly on the seam can create a dip, even when the ridge has disappeared.
- Fill low spots. If you find a hollow or hairline gap, apply DecoFiller, let it set, then sand again lightly.
- Wipe clean and prime. Remove dust fully before priming.
Sand with the grain, and smooth edges the same way
On timber or MDF skirting and architrave, follow the grain. Going across it leaves scratches that paint will highlight. When you are smoothing the sharp edge of a cut, ease it with a couple of light passes rather than rounding it over. A crisp arris is part of what makes a profile readable.
Check before you paint
A joint that feels flush can still show after painting. Run a fingertip along the seam and look along it with a torch held low against the surface. If your nail catches, or a shadow shows, keep blending locally or refill the low area. A coat of primer is the most honest test, because it shows what the topcoat will show.
Carl’s Installer Tip
In our experience, the most common mistake is sanding a joint that should have been filled. We’ve found that people press harder when a seam stays visible, and the profile loses its shape around it.
Here is what we do instead:
- Wipe excess adhesive off with a damp cloth while it is still workable. It saves most of the sanding.
- Let the joint harden fully, then fill any hairline with DecoFiller before you reach for paper.
- Use a fingertip, not your eyes, to judge flushness. Then confirm with primer.
- Never sand an LED coving joint until the 24-hour drying time is up.
If a mitre is clearly misaligned, cut it again. It takes ten minutes and the result is better.
Know when not to sand
The key professional judgement is knowing when to put the paper down. If the profiles do not line up, sanding can destroy the moulding’s geometry. A small amount of filler or a corrected cut keeps the intended shadow lines, and it is usually less visible once painted.
The signs are easy to spot:
- One piece sits proud of the other along the whole joint, not just at one edge.
- The gap is wider than a hairline.
- The profile is reversed or the angle is wrong.
- You have already sanded through the primer or into the detail.
In each case, fill or recut. Our walk-through of coving mitre angles helps you work out which one applies.
Controlling dust when you sand
Dust is the real health risk in this job. The HSE’s guidance on hand-held powered sanders says powered sanding produces high dust levels and recommends effective extraction on the tool. It also notes that softwood and MDF can produce particularly high levels. Cleaning up afterwards is not a substitute for capturing dust at the source.
So plan extraction before you start, not after the room is covered. For a small decorative joint, hand sanding with extraction nearby is often the cleaner and more controllable choice. Wear suitable PPE, and if you are working as a tradesperson, follow the COSHH requirements for the project. If you are a homeowner with a health condition such as asthma, speak to your GP before doing prolonged sanding, or have the work done for you.
After the job, a thorough clean helps. This guide to an after-builders cleaning checklist with HSE dust controls gives a useful routine for fine dust on ledges and surfaces.
Our perspective on joint finishing
We supply the full Orac Decor and NOËL & MARQUET ranges, and we arrange installation through our Elite Decor UK installer network. So we see both sides: the profile on the shelf and the joint on the ceiling.
Our view is simple. A good finish is mostly decided before sanding. The right adhesive on every joint, a test-fitted cut and a clean wipe-down remove most of the work. Polyurethane profiles are made to be glued, filled and lightly rubbed, not machined smooth like timber.
We would also rather you recut a poor joint than fight it. Paper is for blending, not for rescuing. If you are not confident with mitres, particularly around bays, chimney breasts or LED profiles, booking an installer costs less than replacing a ruined length.
— Carl
Choosing profiles that are easier to finish
Some profiles are kinder to joints than others. Simple, shallow shapes have fewer zones to blend. Ornate ones reward careful work but show errors more. If you are new to fitting, a plainer cornice or coving profile is a sensible start. Our guide to lightweight cornice moulding explains how it handles on site. For wall treatments, our panelling and skirting ranges follow the same joint rules. Our guide to skirting board styles helps you choose.
Get the supplies and fitting from one place
Coving.Online supplies over 500 Orac Decor and NOËL & MARQUET products, including adhesives, filler-ready profiles, coving, skirting, ceiling roses and LED profiles. Browse the full shop for joint adhesives, or see our LED coving range if you are lighting a ceiling. If you would rather leave the joints to a professional, we can arrange installation across the UK.
FAQ
What is the best way to sand moulding?
Use a fine sanding sponge or fine paper on a support that fits the profile, and follow the grain on timber. Keep pressure light and work in short strokes that lengthen as you blend. Treat each part of the profile separately rather than sanding it as one surface.
What grit should I use on moulding joints?
For wood, use a fine sanding sponge or at least 220 grit. For primed Orac Decor polyurethane, the manufacturer’s guides specify 320 grit for a light rub before painting. Use coarser paper only on a local defect, then go finer.
Can I sand a joint straight after gluing it?
No. Let the adhesive harden first. Orac Decor allows painting after 24 hours for the relevant adhesive system, and LED coving needs 24 hours of drying before sanding or painting. Sanding sooner can drag a soft seam into a hollow.
Should I use a power sander on moulding?
Usually not. A shaped hand-held abrasive gives more control on decorative profiles. If you do use a powered sander, the HSE recommends on-tool dust extraction and suitable protection, because sanding timber and MDF creates high dust levels.
How do I know if a joint is smooth enough to paint?
Run a fingertip across it and look along it in low, raking light. A coat of primer shows any remaining shadow. If your nail catches, refill the low area and blend again.
Sources
- Orac Decor coving installation instructions
- Orac LED coving installation guide
- Hyde Job Guide: How to sand contours and profiles
- THISisCarpentry: Detail sanding techniques
- Dunn Lumber: How to sand and cut moulding
- HSE WD7: Hand-held powered sanders
- Fine Homebuilding: 8 basic rules to master trim carpentry
- Woodgrain moulding finishing guide
Recommended
- Paintable Wall Moulding for Polished Interiors
- Priming Polyurethane Mouldings: UK Trade Advice on the UV Risk
- How to Cut Cornice Corners for a Clean Finish
- Paint Coving Like a Pro: Trade Sequence and Pre Primed Profiles UK
