

blog
LED Coving Installation Guide for Clean Results
Jul
A good LED coving installation guide needs to do more than tell you where to put the adhesive. The finish depends on planning, substrate condition, lighting layout and the type of moulding you choose. Get those decisions right at the start and LED coving can look sharp, even and properly integrated rather than like an afterthought stuck to the wall.
LED coving is popular for a reason. It softens the ceiling line, hides strip lighting from direct view and adds architectural detail at the same time. In a modern room it can create a clean floating glow. In a period-style interior it can add atmosphere without losing decorative character. The key is fitting it accurately so the profile reads as part of the room, not just a lighting accessory.
Before you start the LED coving installation guide
The first job is choosing a profile that suits both the room and the lighting effect you want. Some LED coving is designed for a soft upward wash across the ceiling, while other sections throw more light onto the wall or create a balanced spread between both surfaces. A deep profile usually gives better LED concealment, but it also makes more of a visual statement. In low-ceiling rooms, that trade-off matters.
Material choice matters too. Lightweight polyurethane mouldings are widely preferred because they are precise, durable and easier to cut and fix than plaster. That is especially useful when you are working around corners, running long lengths and trying to maintain a clean light trough for the LED tape. Paintable, factory-primed profiles also speed up the finishing stage.
You will also need to check the walls and ceiling. LED coving can hide minor irregularities, but it will not correct badly uneven surfaces. If the wall line is poor, the profile can sit proud in places and spoil the shadow gap. Fill major hollows, scrape back loose paint and make sure the fixing area is sound, dry and dust-free.
Tools and materials that make installation easier
Most problems come from using the wrong adhesive or rushing the cutting stage. For a reliable fit, use a fine-tooth saw, mitre box or mitre saw suitable for decorative mouldings, a tape measure, pencil, spirit level or laser, filling knife, caulking gun and a clean cloth or sponge for adhesive squeeze-out. You will also need the correct installation adhesive for fixing the lengths, plus a joint adhesive for tight, stable seams where recommended by the profile manufacturer.
For the lighting side, plan for LED strip, driver, compatible controls if required, and cable routing before any coving goes up. This is the point many DIY installers underestimate. The coving itself may be straightforward, but the overall result depends on where the power supply sits, how cables are concealed and whether the strip can be accessed later if needed.
Setting out the room properly
Before cutting any coving, mark the fixing lines around the room. Most LED profiles are not fitted tightly into the ceiling angle like traditional coving. They often sit slightly below the ceiling to create a recess for indirect light. That distance needs to be consistent across every wall, otherwise the lighting effect will look uneven once switched on.
Use the product dimensions to mark both the wall and ceiling contact points. A laser level helps in larger rooms, but a spirit level and chalk line can work well enough for smaller spaces. Do not rely on the ceiling line alone, especially in older properties where it may dip. Set out to what looks visually level in the room, not blindly to an imperfect surface.
This is also the moment to think about joint positions. If you can avoid a joint right next to an external corner or in the most visible section of the room, do so. Plan long, uninterrupted runs where possible.
Cutting internal and external corners
The neatness of the corners will decide how professional the installation looks. Measure carefully and dry-fit every piece before applying adhesive. Internal corners and external corners need opposite mitre cuts, so label pieces as you go if the room has several returns.
With lightweight mouldings, a clean saw cut usually gives a crisp edge, but accuracy matters more than speed. If a corner in the room is not perfectly square, which is common in UK homes, a standard 45-degree cut may need slight adjustment. Dry-fitting lets you correct that before adhesive makes things messy.
If you are new to coving installation, cut a short test section first. That is far better than learning on a full length of finished moulding.
Fixing the coving to wall and ceiling
Apply the installation adhesive generously to the contact edges according to the profile design. Press the coving into place along your marked lines and slide it slightly to bed the adhesive properly. Check alignment immediately. Lightweight polyurethane sections are much easier to handle than plaster, but they still need firm, even pressure to avoid gaps.
Some installers use temporary pins or masking tape to hold sections steady while the adhesive cures, particularly on longer runs or where walls are slightly uneven. That can be helpful, but avoid damaging the finished face. Remove excess adhesive straight away with a damp cloth before it hardens.
At the joints, use the recommended joint adhesive to create a tight bond between lengths. This is important not only for strength but also for keeping the finished line crisp after filling and painting. A poor joint will usually show once the LEDs are on, because grazing light is unforgiving.
Wiring and LED strip placement
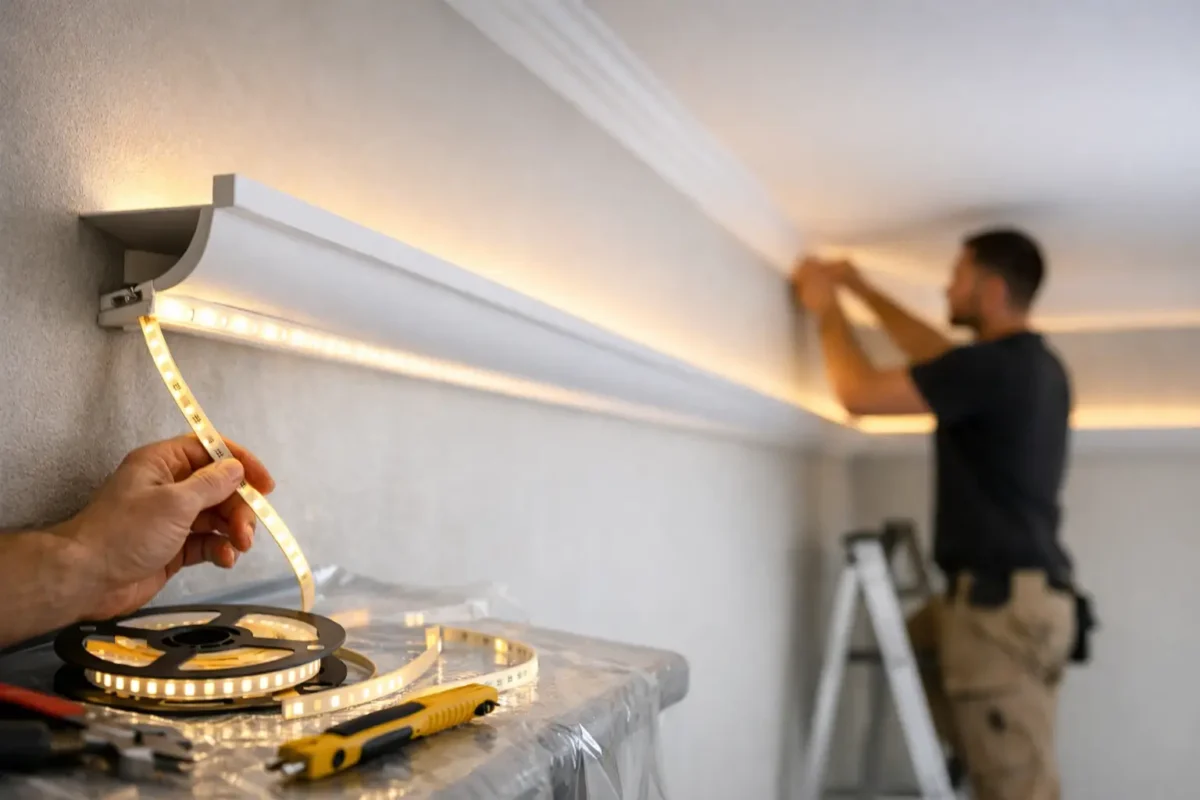
This part of the LED coving installation guide is where careful planning pays off. The LED strip should sit within the designated channel or ledge so that the light source remains hidden from normal viewing angles. If the strip is visible from the doorway or when seated, the effect will be harsher and less refined.
Make sure the LED tape is compatible with the profile and with the driver. Heat output, brightness and beam effect all vary between strips. A very powerful strip in a shallow profile can create hotspots on the ceiling, while an underpowered strip in a large room may look flat. Warm white usually suits living rooms and bedrooms, while cooler or controllable lighting may be more suitable for kitchens, bathrooms or commercial settings.
Do not bury drivers in inaccessible voids without considering future maintenance. If a component fails, access matters. Trade installers will already factor this in, but it is just as important for homeowners taking the DIY route. Any mains electrical work should be handled safely and, where required, by a qualified electrician.
Filling, finishing and painting
Once the adhesive has cured, fill any minor gaps at joints or along the edges with a suitable decorator’s filler or caulk, depending on the location and manufacturer guidance. Sand lightly where needed, but do not damage the profile detail.
Painting is what ties the installation into the room. Most quality mouldings come primed, which makes preparation easier, but they still need the correct topcoat. Matt finishes are often preferred because they reduce unwanted reflection and keep attention on the indirect glow rather than the paint sheen. Paint the coving and surrounding surfaces carefully so the profile feels built in.
Install the LED strip after the messy decorating work where possible. That reduces the risk of paint contamination and accidental damage.
Common issues and how to avoid them
The most common installation problem is uneven setting out. If the profile height drifts around the room, the light line will drift with it. The second is poor surface preparation, which leads to gaps or weak adhesion. The third is choosing a profile or LED strip without thinking about the actual lighting effect.
There are also cases where bigger is not better. A large decorative profile may look excellent in a tall reception room, but too heavy in a standard box bedroom. Likewise, the brightest LED strip is not always the best choice. Indirect lighting should add atmosphere and definition, not glare.
For trade projects, programme pressure can tempt installers to paint and light too early. Give adhesives and fillers proper curing time. It saves call-backs later.
When a professional installation makes sense
Many LED coving systems are suitable for competent DIY installation, especially in square rooms with straightforward layouts. But if the room has multiple external corners, curved walls, awkward ceiling levels or integrated lighting controls, professional fitting can be the better option. The same applies to larger commercial spaces, where consistency across long runs matters and access equipment may be needed.
For homeowners, the decision usually comes down to confidence with measuring, cutting and setting out. For decorators and builders, it is more often about time, finish expectations and coordination with electrical work. There is no single right answer. A simple room can be a very manageable DIY project. A complex layout benefits from experience.
A well-fitted LED coving scheme should look effortless once complete. That is usually the result of careful measuring, disciplined preparation and choosing the right products from the start. If you treat the lighting, profile and installation method as one system rather than separate parts, the finish will look cleaner, work better and last longer.
