

blog
Preformed Coving Corners for Cleaner Finishes
Aug
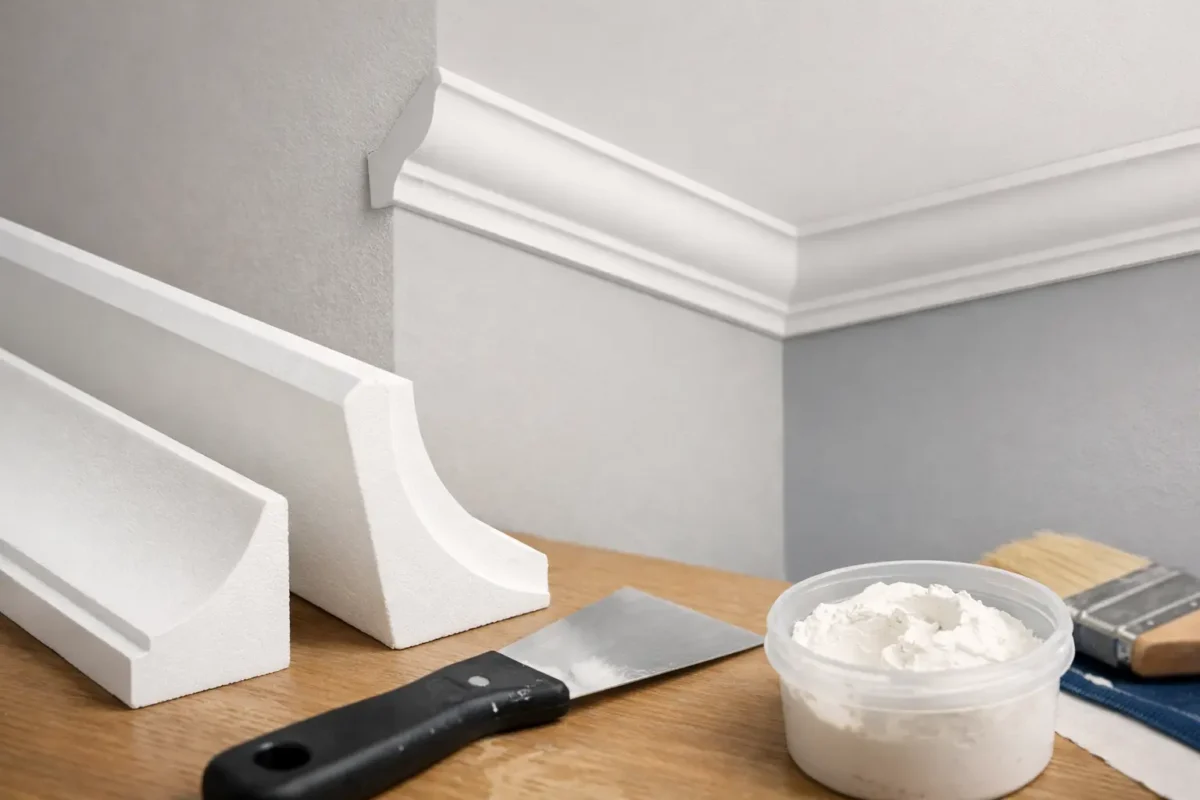
A difficult ceiling corner can spoil the appearance of an otherwise well-fitted coving installation. Preformed coving corners remove much of the measuring, mitre cutting and trial fitting from this part of the job, giving DIY customers and trade installers a reliable way to achieve a crisp decorative finish.
Rather than cutting two lengths of coving to meet at an exact angle, a factory-made corner section is fitted first and straight lengths are then cut to meet it. This is particularly useful with larger, more detailed profiles, where a small inaccuracy in a mitre is far more visible once painted.
What are preformed coving corners?
Preformed corners are ready-made sections designed to match a specific coving or cornice profile. They recreate the moulding’s shape around either an internal corner, where two walls meet inside a room, or an external corner, such as a chimney breast, boxed-in pipework or a projecting wall return.
They are not universal accessories. The profile, projection and drop must match the coving being used. A corner made for one design will rarely blend convincingly with another, even where the overall dimensions appear similar. Always select corners from the same moulding range as the straight lengths.
Quality lightweight polyurethane corners are also easier to handle than traditional plaster alternatives. They are durable, paintable and practical for renovation work, without the weight and fragility that can make plaster corners awkward to transport, cut and fix.
Why corners are the hardest part of fitting coving
A standard internal corner is often assumed to be 90 degrees, but many UK homes tell a different story. Plastered walls can be slightly out of square, ceilings may dip, and older properties can have corners that vary from one point to another. Cutting a neat mitre in these conditions takes care, the right tools and a willingness to make small adjustments.
The challenge increases with decorative cornice. Deep stepped profiles, curves, shadow lines and ornamentation need to align across the joint. A gap may be fillable, but excessive filler can soften the profile and leave a joint that becomes obvious under side lighting or after painting.
Preformed corners shift the most demanding shaping work away from site cutting. They create a fixed, continuous turn in the profile, so the installer only needs to make clean square cuts on the adjoining straight runs. That can save time, reduce waste and produce more consistent results across several rooms.
Internal and external corners: choose the right type
Internal corners are the most common choice for room perimeters. They fit into the angle created by two adjoining walls and are normally required at each corner of a rectangular room. External corners are needed wherever the coving runs around an outward-facing edge.
It is worth mapping the room before ordering. Count every change of direction, including alcoves, chimney breasts, bulkheads and boxed sections. Mark whether each turn is internal or external, then check the coving layout against the manufacturer’s profile drawing.
For a simple room, matching corners may be a convenience. For a layout with multiple returns or a prominent feature wall, they can make the installation much more predictable. They are especially useful where time on site is limited or where a homeowner wants a professional-looking result without learning to cut compound angles.
When a mitred corner may still be better
Preformed components are not always the answer. If walls are significantly out of square, a standard 90-degree corner piece may need careful adjustment, or a traditional cut-and-fit approach may give more control. The same applies where a discontinued profile has no matching accessories, or where a design deliberately calls for a custom angle.
A skilled installer can mitre coving accurately, and mitred joints remain a sound option. The benefit of preformed corners is not that they replace professional judgement. It is that they simplify a repeatable part of the process when the room geometry and profile are suitable.
How to plan for preformed coving corners
Start by choosing the coving profile, not the corner in isolation. Consider ceiling height, room scale and the depth of the design. A small, plain profile can suit a compact bedroom or hallway, while a deeper cornice has more presence in a lounge, dining room or period-style renovation.
Once the profile is confirmed, calculate the perimeter and add allowance for cuts, joins and waste. Corner pieces take up part of the run, so measure from the end of each fitted corner rather than assuming every wall receives a full wall-to-wall length. Product dimensions and cutting guidance should be checked before placing the order.
Also consider how the joints will fall. Avoid very short straight pieces where possible, especially near a corner. Longer continuous lengths generally look neater and are easier to align. If a joint is unavoidable, position it away from a main sightline and use the recommended joint adhesive as well as the appropriate fixing adhesive.
Fitting preformed coving corners neatly
A good installation begins with a sound, clean substrate. Remove loose paint, wallpaper, dust and greasy residue from the wall and ceiling contact areas. Newly plastered surfaces should be fully dry, while very porous backgrounds may need suitable preparation so the adhesive can bond correctly.
Dry-fit the corner first. Hold it in position, check that it sits flat against both surfaces and mark its location lightly. Do not rely on the ceiling alone as a guide if it is uneven. The visible line of the coving should look level and balanced in the room, which may require minor adjustment to suit the existing building rather than following every imperfection.
Apply the recommended installation adhesive to both bonding faces, following the product instructions. Press the corner firmly into place and remove excess adhesive promptly with a clean, damp cloth where appropriate. For larger or heavier profiles, temporary mechanical support may be useful while the adhesive cures.
Then measure and cut the straight coving lengths to butt cleanly against the preformed corner. Test the fit before applying adhesive. A square, clean cut gives the best result, but avoid forcing a length into place if the wall is bowed. Small gaps can usually be dealt with using a suitable finishing filler, whereas forcing the moulding can create a visible change in line.
Use the specified joint adhesive at the meeting point between the corner and the straight section. This is different from simply filling the surface after fitting: it helps create a strong, stable connection between moulding sections. Wipe away surplus before it hardens, then allow the installation to cure fully before decorating.
The finish depends on preparation and paint
Even the best-made corner needs thoughtful finishing. Once adhesive and filler are dry, inspect every join under normal room lighting. Sand only where necessary, using a fine abrasive and a light touch so the moulded detail remains sharp.
Prime only if the chosen product or paint system requires it. Many premium polyurethane mouldings arrive with a factory-applied primer and are ready for a compatible topcoat. A quality water-based paint is a popular choice for interior coving because it provides an even finish without overwhelming fine detail.
Painting coving and ceiling in the same colour gives a calm, integrated look. Using a contrasting shade can make the profile more architectural, but it also draws attention to every line and joint. In that case, precise fitting and careful caulking at wall and ceiling edges matter even more.
Common mistakes to avoid
The most costly mistake is ordering corners that do not match the straight coving profile. Check the product name, dimensions and profile illustration rather than choosing by appearance alone. It is equally important not to assume all corners in the property are square.
Avoid using general-purpose grab adhesive where a moulding system specifies dedicated products. The correct adhesive is formulated for the material, the substrate and the demands of both fixing and jointing. Finally, do not leave adhesive smears to dry on the face of the moulding. Cleaning as you work is quicker and protects the finished surface.
For homeowners fitting their first decorative moulding, preformed coving corners can turn a high-risk detail into a manageable task. For decorators and fit-out teams, they offer a consistent way to protect quality across repeat installations. Choose a matching profile, prepare the surfaces properly and take time over the first corner – it sets the standard for the whole room.
