

Home Decor
Skirting to Tile Transition: How to Get a Neat Finish
Oct
The neatest way to finish skirting against a tiled floor is to tile first, leave a small perimeter gap, then fit the skirting afterwards so its bottom edge sits over the tile edge and hides the gap. Where the old skirting has to stay, cut the tiles short of it and seal the junction with a flexible bead, never rigid grout. The detail that matters most is the gap itself: tiles move, and a junction with no room to move is the one that cracks.
Below we cover which order to work in, when to take skirting off, what changes with underfloor heating, how to treat tiled skirting, and the mistakes we see most often on site.
TL;DR
- Tile first and fit the skirting last wherever you can. The board then covers the perimeter movement gap and you avoid a awkward grout line against the wall.
- If the skirting must stay, stop the tiles a few millimetres short and seal the joint with flexible sealant, not grout.
- Over underfloor heating, perimeter and movement joints are not optional. Follow the heating manufacturer’s commissioning instructions before any skirting goes on.
- Tiled skirting suits bathrooms and kitchens, but it is less forgiving than timber on uneven walls.
- Choose a solid, moisture-tolerant skirting profile and the right adhesive, then scribe or caulk the bottom edge for a clean line.
Table of Contents
- Why the junction fails, and what a good one looks like
- Over the tiles or against them: which order works best
- Do you need to remove skirting before tiling?
- Choosing skirting that suits a tiled floor
- How to fit skirting over a tiled floor, step by step
- What to do at doorways and where the tile meets another floor
- Skirting and underfloor heating
- Gaps under the skirting: what is normal and what is not
- Tiled skirting: when the skirting is the tile
- Common mistakes at the skirting to tile junction
- Perspective: what we see on site
- Get the right skirting for your tiled floor
- FAQ
- Sources
Why the junction fails, and what a good one looks like
A tiled floor is a rigid surface sitting on a base that expands and contracts slightly with temperature and moisture. A wall is a different material with its own movement. Where the two meet, something has to absorb the difference. In a good finish, that something is a narrow gap left around the edge of the floor, hidden by the skirting.
The Tile Association’s guidance for fixing over heated floors recommends perimeter and movement joints, together with a suitable polymer-modified adhesive and solid-bed fixing. That is written for heated floors, but the principle holds for any tiled floor: leave room at the edge and let the trim do the hiding.
A good transition has four features:
- A clear perimeter gap behind or under the skirting, free of adhesive and grout.
- A skirting bottom edge that sits tight to the tile, or is neatly sealed to it.
- No rigid fill between the tile and the board that can crack as the floor moves.
- A tile edge that is protected from knocks, cleaning and damp.
The poor version is easy to recognise: a thin grout line wedged against the skirting, hairline cracks along it within a year, and a dark shadow gap where the board does not quite meet the tile.
Over the tiles or against them: which order works best
This is the question most people ask first, and tilers are fairly united on it. Skirting is normally installed last, so it sits above the tiles and covers the expansion gap. A tiler quoted on MyBuilder puts it the same way, and adds that where existing skirting stays, the tiles should be cut short and the joint sealed with silicone.
Here is how the two approaches compare in practice.
| Skirting fitted over (after) the tiles | Tiles cut up to existing skirting | |
|---|---|---|
| Movement gap | Hidden behind the board | Visible, needs sealant |
| Grout against the wall | None | Not used; flexible sealant instead |
| Finished look | Cleanest, most “built in” | Good if the cut is straight and the bead is neat |
| Work involved | Remove and refit skirting, make good decoration | Less disruption, more precise tile cutting |
| Best for | Full renovations, new floors, bathrooms | Quick refreshes, listed or fragile plasterwork, fitted units already in place |
If you are already renovating, we would take the first route almost every time. Taking skirting off costs an afternoon and gives you a finish that reads as original rather than retrofitted.
Do you need to remove skirting before tiling?
Not always, but it is usually worth it. Removing skirting lets the tiler run the floor right to the wall, and lets you refit a board that covers the edge. The risk is damaging the wall, so do it carefully.
Checkatrade’s UK guide to removing skirting boards advises scoring the caulk line first, placing a wooden block behind the crowbar, and levering gradually at regular intervals to reduce damage to plaster or plasterboard. We would add a few points from the tools side:
- Number the back of each board in pencil before you lift it, with the wall and position. It saves time when the same boards go back.
- Score the paint line with a sharp knife, not just the caulk, or the paint will tear plaster skin with it.
- Work from a corner where one board is already loose, and lever near the nail positions rather than mid-span.
- If the boards are brittle or split, treat them as waste. New skirting is a small cost against an afternoon of patching.
Some walls are better left alone. If you have fragile lime or old plaster, tile up to the existing skirting, leave a gap at the bottom and seal it. That is a legitimate method, not a compromise.
Carl’s Installer Tip
In our experience, the cleanest results come from dry-fitting the new skirting before the tiler finishes. We’ve found that holding a length of board against the wall with a loose tile beneath it shows exactly how much gap the board will cover. Most standard skirting profiles hide a perimeter gap comfortably, but a thin, flat profile on a thick tile and bed might not. Settle the skirting height before the tiles are laid, not after.
Choosing skirting that suits a tiled floor
The skirting you choose affects how easily it handles a hard floor.
Height. Taller boards give you more cover for the gap and for any uneven tile edge. A deeper board also balances a thick tile and adhesive bed better than a shallow one. If you have to raise the floor level, check the architrave and door lining heights at the same time.
Material. Bathrooms, kitchens, utility rooms and anywhere the floor gets mopped are the areas where moisture is the concern. Polyurethane skirting does not absorb water the way untreated timber or MDF can, which makes it a sensible match for wet rooms and kitchens. Our Skirting range includes Orac Decor and NOËL & MARQUET profiles in traditional and contemporary shapes, and you can see the sizes and styles before you decide.
Profile. A plain, flat-faced or modern square-edge profile gives the sharpest line against tile and is easier to keep clean. Heavily moulded profiles look lovely in a hallway but collect dust and splash in a bathroom. If you are curious how profile choices change a room, our piece on how decorative skirting can change your room goes through the options.
For a very modern look, a flush skirting detail is another route, and the planning for it is different from standard boards. We explain it in our guide to flush skirting boards.
How to fit skirting over a tiled floor, step by step
This is the method we use when the tiles are down and the movement gap is in place.
- Check the gap. Look along the wall edge for debris, grout splashes and cured adhesive. Clear them out. The Tile Association states that backgrounds must be free of contamination and loose material, and the same logic applies to a junction you intend to seal or cover.
- Cut the board to length. Work from the longest, most visible wall first. Internal corners are best coped for a tight fit, which our guide to coping skirting joints covers, and external corners need accurate mitres, covered in our external corners guide.
- Dry-fit and mark. Hold each board on the tile. Mark any high spots on the wall and any low spots on the tile edge.
- Fix to the wall, not to the floor. Use grab adhesive and, where the wall allows, pins or screws into masonry or studs. The board should rest lightly on the tile rather than being glued down to it. Our adhesive guide explains what to match to which board.
- Leave a hairline gap for sealant. A board that is jammed hard onto the tile cannot move. A small, even gap allows a flexible bead.
- Seal the bottom edge. Run a flexible sealant or decorator’s caulk along the base, tool it flat and wipe it clean straight away. In kitchens and bathrooms use a sanitary-grade sealant colour-matched to the board or tile.
- Finish. Fill nail holes, paint or touch up, and replace any trims at doorways.
If the wall is out of true and you can see the gap telegraphing along the board, our advice on scribing skirting to uneven floors shows how to trace the floor line on to the board before cutting.
What to do at doorways and where the tile meets another floor
The skirting line is only half the story. Where the tile stops at a doorway and carpet, laminate or vinyl begins, you need a clean threshold, and its height often decides how the skirting ends beside the door lining.
The tile edge, the trim and the neighbouring floor should sit within a couple of millimetres of each other, or the doorway becomes a trip point. If levels differ noticeably, fixing uneven floor transitions is a practical walkthrough, and it also helps you decide how the skirting should stop against a door frame once the trim is in.
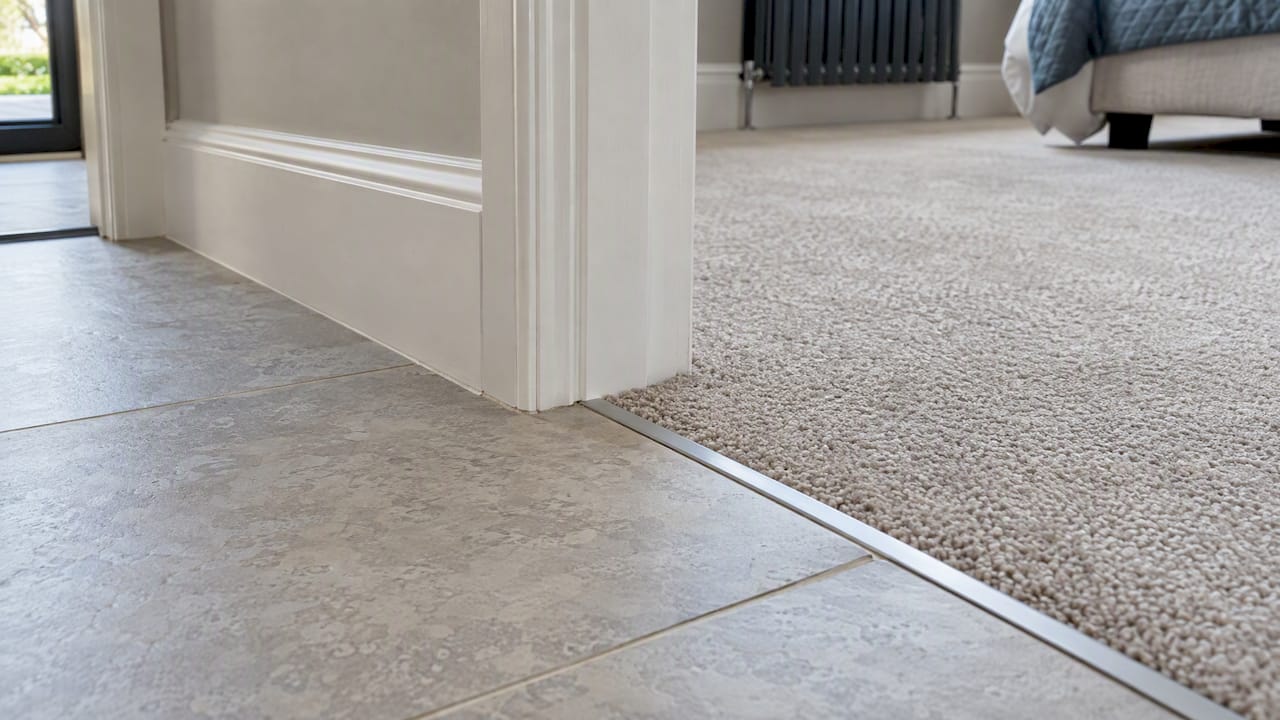
For laminate or engineered boards meeting a tiled area, the junction behaves differently, because the timber floor needs its own expansion gap. Our guide to skirting with laminate flooring covers it. Checkatrade notes that removing skirting before laying laminate or engineered flooring lets the expansion gap sit beneath the refitted board, so you do not need scotia or another covering trim.
Skirting and underfloor heating
Heated floors make the junction more critical, because the floor moves more.
The Tile Association says underfloor heating should be commissioned in accordance with the manufacturer’s instructions. It also recommends perimeter movement joints on tiled floors over heated screeds, with movement joints aligned vertically with joints in the screed. In practice, that means:
- Never omit the perimeter joint. A tiled floor pressed hard against the wall is the leading cause of tenting and cracks. The same guidance warns against skipping perimeter and movement joints on heated floors.
- Use solid-bed fixing. Voids under tiles concentrate heat and stress. A full bed of suitable polymer-modified adhesive is the Tile Association’s recommendation.
- Keep the heating commissioned and the floor stable before fitting skirting. If the floor is still being brought up to temperature, it is still moving.
- Choose stable skirting. Polyurethane profiles are dimensionally stable, so they are well suited where temperature swings are regular. Always check the manufacturer’s installation notes for the specific product.
- Leave the skirting off the floor. Fix to the wall only, with a flexible seal along the base.
Keep the heating pipes or mats in mind before you drill. Plan fixings into the wall at a safe height, and avoid fixing near any heating feed that comes up the wall.
Gaps under the skirting: what is normal and what is not
Even when everything is fitted correctly, a small shadow gap can appear between a board and a tile, especially if the tile edge is slightly uneven. A gap of a couple of millimetres is easy to deal with using a neat bead of flexible sealant. A larger or irregular gap points to uneven tile height, a bowed board or a wall that is out of plumb.
The checklist we use:
- Is the gap even along the board, or does it wander? A wandering gap means the board is not tracking the floor, so scribe or shim.
- Is the board pressing on a tile edge? If so, it may chip the tile when it moves.
- Is the gap wider than the sealant can bridge? Fit a deeper board or add a bottom bead trim.
Our article on fixing a gap under skirting takes you through four installer fixes in order of difficulty.
Tiled skirting: when the skirting is the tile
Some rooms are better with tiled skirting, where short strips cut from the floor tile are fixed to the wall. UK tile professionals quoted by Homebuilding say it creates a neat, smooth transition, makes cleaning easier and needs minimal maintenance once sealed, which is why it works in splash zones such as bathrooms and kitchens. Checkatrade also describes it as a water-resistant alternative to timber that avoids the warping linked to moisture.
There are trade-offs we would want you to know about before choosing it:
- It is less forgiving on uneven walls, since tile cannot be scribed or flexed like a board.
- It is harder to change later. Removal can damage the plaster, so it is a poor choice if you expect to replace the floor.
- The bottom joint still needs a flexible seal, not grout, and the strip should be fixed to the wall and rest lightly on the floor tile, rather than being bonded rigidly to it.
- Joints between tiles should be at least 2 mm wide, as the Tile Association’s fixing guidelines state, with the width chosen to accommodate variation in the tiles.
If the walls in a bathroom are fully tiled down to the floor, you may not need separate skirting at all. If they are only part tiled, skirting is generally still needed on the untiled areas. For rooms that mix tiled and painted wall, a timber-effect or polyurethane board in the painted part, and tile or a trim at the junction, can look intentional rather than patched.
Common mistakes at the skirting to tile junction
- Grouting the bottom edge. Grout is rigid and cracks as the floor moves. Flexible sealant stays intact.
- Tiling hard against the wall. No gap means no room for movement. On heated floors this is the most serious error.
- Gluing the board to the tile. Fix to the wall, and let the base rest on the floor.
- Skipping the dry fit. A board that looks right in the shop can be too shallow once tile and adhesive add height.
- Wrong adhesive for the board. Match the adhesive to the material and the wall surface.
- Letting sealant dry before tooling. Smooth it and wipe immediately. Tidying dried sealant makes things worse.
- Leaving the colour decision too late. Paint colour and finish affect how a shadow gap reads. Our skirting colour guide covers it.
Perspective: what we see on site
The most common call we get is not about the skirting at all. It is a floor that has just been tiled hard to the wall, with the boards already ordered, and the question is how to make it look right. Almost always it can be saved with a deeper profile and a careful bead of sealant, but it would have been simpler to plan the height before the tiles went down.
We supply the full Orac Decor and NOËL & MARQUET range and can arrange fitting through our Elite Decor UK installer network, so we see the same junctions from both sides of the counter: the product that is chosen, and how it behaves once it is on the wall. Our view is that the junction deserves as much thought as the profile. A beautiful board with a cracked grout line beneath it looks unfinished. A simple board with a clean, even line looks expensive.
— Carl
Get the right skirting for your tiled floor
If you are planning a tiled floor, send us the room details and we can help you choose a profile height that covers your movement gap and matches the rest of the room. Browse the skirting collection, pick up the right adhesive, and if you would rather not fit it yourself, ask about professional installation through Coving.Online.

We supply polyurethane boards that cope well with damp rooms and heated floors, and our team can talk through quantities, corners and finishing before you order.
FAQ
Should skirting go over tiles or stop at them?
Where you can, fit the skirting after tiling so it sits over the tile edge and covers the perimeter gap. Where the existing skirting stays, cut the tiles slightly short and seal the joint with flexible sealant. Both work, but fitting last gives the cleaner result.
Do I need a gap between the tile and the skirting?
Yes. The Tile Association recommends perimeter movement joints on tiled floors over heated screeds, and the principle is sound for other floors too. The skirting hides the gap, and a flexible sealant keeps the base neat without locking the floor in place.
What can I use skirting with underfloor heating?
Use a stable, moisture-tolerant board, such as polyurethane, fixed to the wall only. Leave the perimeter joint clear, commission the heating per the manufacturer’s instructions, and check product notes. If you are unsure about fixing positions near pipes or cables, ask your heating installer before drilling.
Should I grout or caulk where skirting meets tile?
Use flexible sealant or decorator’s caulk, not grout. Grout is rigid and tends to crack as the floor and wall move. Choose a sanitary-grade sealant in wet rooms, and tool it flat straight away.
Is tiled skirting better than timber or polyurethane?
It depends on the room. Tiled skirting is water-resistant and easy to clean, which suits bathrooms, but it is less forgiving on uneven walls and harder to change later. A polyurethane board is easier to scribe, repaint and replace.
Sources
- Tiling to Heated Floors, The Tile Association
- Guidelines for Tile Fixing, The Tile Association
- How to remove skirting boards, Checkatrade
- Tiled skirting boards: is this stylish trend right for you?, Checkatrade
- Tiled Skirting: Find Out How to Incorporate This Style, Homebuilding
- Skirting off to have porcelain tiles laid, MyBuilder
- Fixing uneven floor transitions
Recommended
- How to Cope Skirting Joints for Tight Internal Corners
- Avoid Gappy Corners: Trade Tips for DIY Skirting External Corners
- 4 Installer Proven Fixes for a Gap Under Skirting in UK Homes
- One Twelfth Rule to Match Skirting and Coving for DIYers and Pros
