

blog
Smart Lighting Mouldings for Refined Interiors
Oct
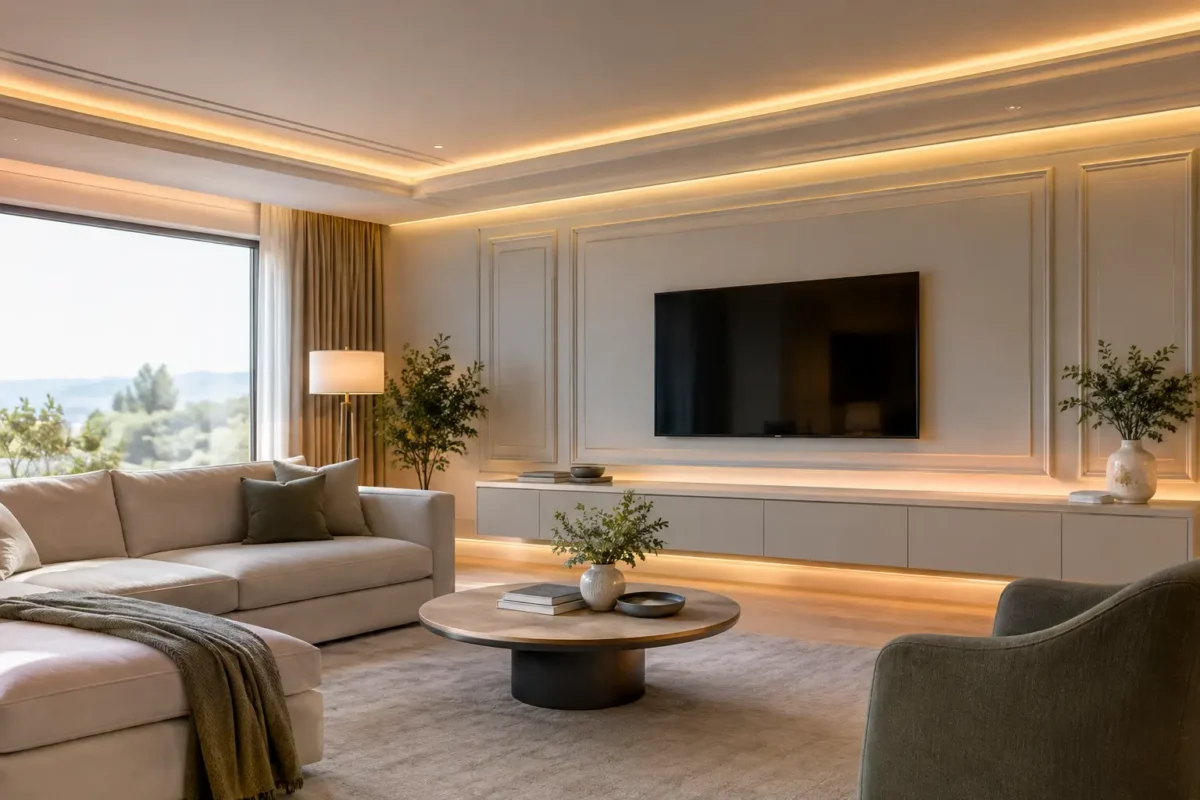
A central pendant can light a room, but it rarely gives it atmosphere. Smart lighting mouldings change that by placing LED illumination within carefully designed ceiling or wall profiles, so the light appears to wash across a surface rather than shine from a visible fitting. The result is a more considered finish that works equally well in a renovated Victorian terrace, a contemporary kitchen extension or a commercial reception.
For homeowners, designers and installers, the appeal is not simply decorative. Indirect LED lighting can soften harsh shadows, make ceilings feel higher and provide useful evening illumination without relying on multiple lamps. When paired with smart controls, it can also respond to the way a room is used – brighter for cleaning, warmer and lower for relaxing, or scheduled to come on before you arrive home.
What smart lighting mouldings do differently
An LED moulding is an architectural profile designed with a channel or recess for an LED strip. It may be fitted at the ceiling line, part way down a wall, close to the floor or behind a feature element. The profile conceals the light source and, depending on its shape and position, directs light upwards, downwards or across the wall.
The word “smart” refers to the lighting system rather than the moulding itself. A compatible LED strip, driver and controller allow lighting to be adjusted from a wall control, remote, app or wider home-automation system. Many systems offer dimming, tunable white light and colour-changing options. For most living spaces, tunable white is often the more practical choice: cool white supports task-focused use, while a warm white setting gives bedrooms, lounges and dining areas a calmer feel.
This combination solves a common design problem. Recessed spotlights provide direct light but can create pools of brightness and visual clutter across a ceiling. Smart LED coving produces a broad, reflected glow instead. It is particularly effective where the aim is to add character without introducing ornate traditional plasterwork or bulky light fittings.
Choosing the right smart lighting mouldings
The best profile is determined by the room, the desired lighting effect and the condition of the surfaces being fitted. A large open-plan room with generous ceiling height can carry a deeper cornice profile and benefit from a stronger upward light throw. In a standard-height bedroom, a more compact profile may be the better proportion and avoid making the ceiling feel lower.
Ceiling coving for ambient light
Ceiling-mounted LED coving remains the most popular option because it creates a soft perimeter glow and makes a room feel more spacious. Upward-facing profiles reflect light off the ceiling, while profiles with a downward opening can highlight wallpaper, wall panelling or a textured finish. Some designs combine both directions for a layered effect.
Consider where the light will land before selecting the profile. A narrow gap between the LED strip and ceiling can create a defined line of light, whereas a deeper recess produces a softer wash. Neither is automatically better. Crisp lines suit contemporary schemes; a more diffused effect is often preferred in bedrooms and relaxed living spaces.
Wall and skirting profiles for detail
Lighting mouldings are not limited to the ceiling. Wall-lighting profiles can add depth to a media wall, frame a corridor or draw attention to wall panelling. Low-level LED skirting can provide discreet night lighting in hallways, bathrooms and stairwells, although the electrical specification must be appropriate for the location.
For commercial interiors, low-level illumination can also help define circulation routes without overpowering the main lighting scheme. In homes, it is a practical way to light the route from a bedroom to a bathroom after dark. The key is restraint: use illuminated profiles to support the architecture, not to outline every surface in the room.
Material matters
Lightweight polyurethane mouldings offer major advantages over traditional plaster for LED projects. They are durable, stable, simple to cut and easier to handle on site. Their smooth, paintable surface allows the profile to be finished in the same colour as the ceiling or wall, or used as a deliberate contrast.
This is especially valuable in renovation work, where walls and ceilings are not always perfectly straight. A quality adhesive system and sensible preparation help achieve a close fit, while lightweight lengths are far more manageable for a decorator or competent DIY installer than heavy plaster sections. Premium ranges such as Orac Decor are designed for precisely this type of interior detailing, combining crisp profile definition with practical installation benefits.
Plan the lighting before fitting the moulding
The best results come from planning the electrical layout before ordering profiles or cutting the first length. Decide where the driver and controller will sit, how they will remain accessible and where cables will run. A concealed driver should never be buried where it cannot be serviced or replaced.
Measure each run carefully, including returns, internal corners, external corners and breaks for wardrobes or curtain tracks. It is also worth deciding whether the LED strip will run continuously around the room or stop at a feature wall. Continuous runs give a more architectural look, but they require thoughtful cable routing and suitable driver capacity.
LED tape should be specified for the required brightness, colour temperature and control method. The strip needs to be compatible with the driver, controller and intended smart platform. Avoid treating these as separate purchases. A technically mismatched system can lead to flickering, poor dimming performance or a light output that disappoints once the room is finished.
For longer runs, voltage drop is another consideration. If the far end of a long strip looks dimmer than the beginning, the installation may need power supplied at more than one point. This is a detail an experienced electrician or lighting installer will account for at the planning stage.
Installation details that protect the finish
Mouldings should be fitted to clean, dry, sound surfaces. Remove loose paint, dust and wallpaper from the bonding area, then check the walls and ceiling with a straightedge. Minor irregularities are common, particularly in older properties, but large gaps should be addressed before fitting rather than filled excessively with adhesive.
Dry-fit the pieces first and mark the position of the profile. Use the manufacturer-recommended adhesive for bonding, and use a suitable joint adhesive where required to keep mitres neat and stable. Accurate cutting matters most at corners, so a fine-tooth saw and mitre box or appropriate cutting equipment are worthwhile investments.
Fit the moulding before installing the LED strip wherever possible. This protects the lighting from adhesive, filler and paint, and makes it easier to create clean joints. Once the profile is secure and joints are filled, allow the adhesive to cure as directed. Paint the moulding before placing the strip in its channel, taking care not to paint inside areas intended to reflect or ventilate the LED system.
Electrical connections should be completed and tested by a qualified electrician where the work involves fixed wiring. This is particularly important in kitchens, bathrooms and commercial settings, where circuit protection, zoning and product ratings must be considered. Test the lights at full brightness, low dimming levels and across any colour-temperature settings before finalising access panels or furniture positions.
Getting the balance right in each room
Smart LED coving is generally best used as ambient or accent lighting, not the sole source of light for every activity. A kitchen still needs effective task lighting over worktops. A home office needs good illumination at the desk. Bathrooms require carefully selected fittings and appropriately rated equipment. The moulding lighting then adds comfort, depth and a premium evening setting around those practical layers.
Colour temperature has a strong effect on the final impression. Warm white around 2700K to 3000K tends to flatter lounge, bedroom and dining spaces. Neutral white can suit kitchens, utility rooms and contemporary commercial interiors. Tunable-white systems offer flexibility, but only if the controls will actually be used. For a straightforward project, a quality dimmable warm-white strip may be the more economical and reliable choice.
Paint colour also affects the result. Pale matt ceilings reflect light efficiently and create the softest glow. Darker colours absorb more light but can produce a dramatic, intimate effect when the LED output is correctly specified. Before committing to the whole room, test a short section or review a sample in the intended paint finish.
Smart lighting mouldings are most successful when they look like part of the building rather than an add-on. Choose a profile that suits the room proportions, plan the electrics early and give the finish the same care as the lighting. Done well, the room feels better lit before anyone notices where the light is coming from.
