

Home Decor
Commercial Coving Installation: Why Kitchens Need Hygienic Coves
Oct
For front of house and low wash commercial spaces, decorative polyurethane coving is a suitable and attractive finish. For commercial kitchens and heavy washdown areas, building regulations and hygiene practice call for a dedicated hygienic cove system, such as cap and cove flooring, welded vinyl or stainless steel. Order Orac Decor profiles for the former and brief a hygienic specialist for the latter.
TL;DR:
- Food areas fall under Regulation (EC) 852/2004, which requires washable surfaces that can be cleaned and disinfected, including sealed, nonporous floor to wall junctions.
- For decorative coving, keep rooms above 5°C and humidity at 40% to 70%; dry fit mitres and apply adhesive across contact faces and the back groove.
- Match adhesive to the surface: DecoFix Pro suits dry, porous walls, DecoFix Power suits damp or nonporous surfaces, and DecoFix Extra joins lengths.
- Hygienic systems need flat, dry subfloors and dry walls; check an installer’s heat welding experience, request a test weld, and agree on phased kitchen closures.
Table of Contents
- What ‘commercial coving’ actually means: decorative coving versus hygienic coved systems
- Regulatory and compliance checklist for food risk and washdown areas
- Step by step for installing decorative polyurethane coving in commercial interiors
- Hygienic cove systems, thermoforming and welded seams: what to specify for heavy washdown areas
- How to choose an installer and a site readiness checklist for commercial projects
- Carl’s installer tip
- What this guide gets right that most advice misses
- How Coving.Online helps with supply and arranging installation
- FAQ
- Sources
What ‘commercial coving’ actually means: decorative coving versus hygienic coved systems
The phrase “commercial coving” covers two genuinely different products, and mixing them up causes specification errors that fail inspections later.
Decorative polyurethane coving, the Orac Decor style most people picture, is a moulded profile fitted at the wall and ceiling junction to frame a room and hide uneven joins. It suits receptions, offices, retail floors, corridors and dining areas where cleaning means a light wipe rather than a daily hose down.
Hygienic coved systems do a structural job instead of a decorative one. They form a sealed, radiused, washable junction between floor and wall, usually as part of a vinyl or resin floor, and they are specified wherever food is prepared or heavy washdown happens.
- Decorative coving: polyurethane, painted finish, ceiling to wall junction, front of house and office use.
- Hygienic cove: welded vinyl, cap and cove flooring or stainless steel, floor to wall junction, kitchens and washdown areas.
- Mixed buildings: many commercial units need both, decorative coving in the dining room and a hygienic cove behind the pass.
Getting this distinction wrong at the specification stage means a system that looks fine on day one but fails an inspection or starts harbouring grease within months, because it was never designed for that environment.
Regulatory and compliance checklist for food risk and washdown areas
Any kitchen, prep area or washdown zone handling food is covered by Regulation (EC) 852/2004 on the hygiene of foodstuffs, and its requirements shape exactly what a junction finish needs to achieve.
Annex II, Chapter II, Paragraph 1(b) of the regulation requires surfaces in food areas to be easy to clean and, where necessary, disinfect, which in practice means impervious, non absorbent and washable right up to the junction, with no gaps for grease or bacteria to collect. That single clause is why a painted plaster coving or a basic silicone bead at floor level will not pass muster in a working kitchen.
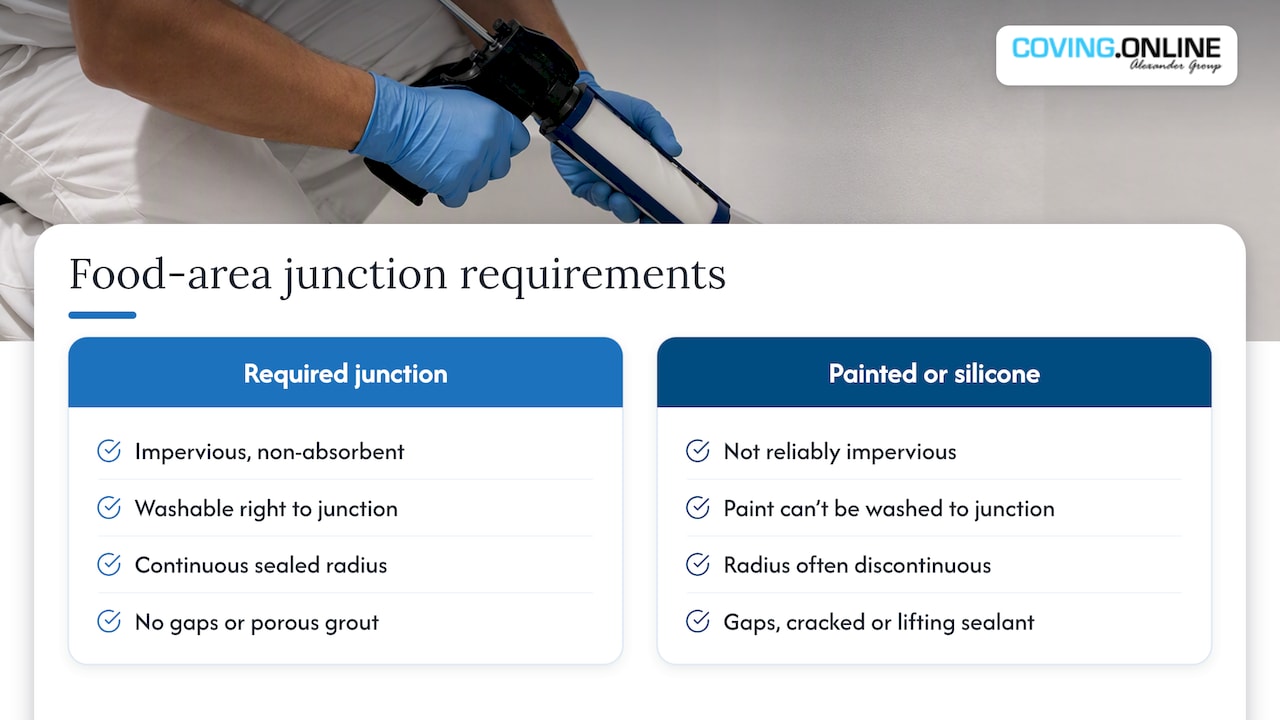
Inspectors walking a commercial kitchen check junctions specifically: they look for a continuous, sealed radius where floor meets wall, no exposed timber or porous grout, and no cracked or lifting sealant. A junction that is merely painted rather than genuinely sealed reads as a fail, because paint does not stop moisture tracking behind the surface.
When a space includes any food handling, washdown hosing or steam cleaning, the practical move is to escalate straight to a hygienic specialist rather than adapting a decorative product. Decorative polyurethane coving was never engineered to be watertight at a floor junction, and no amount of careful painting changes that.
Step by step for installing decorative polyurethane coving in commercial interiors
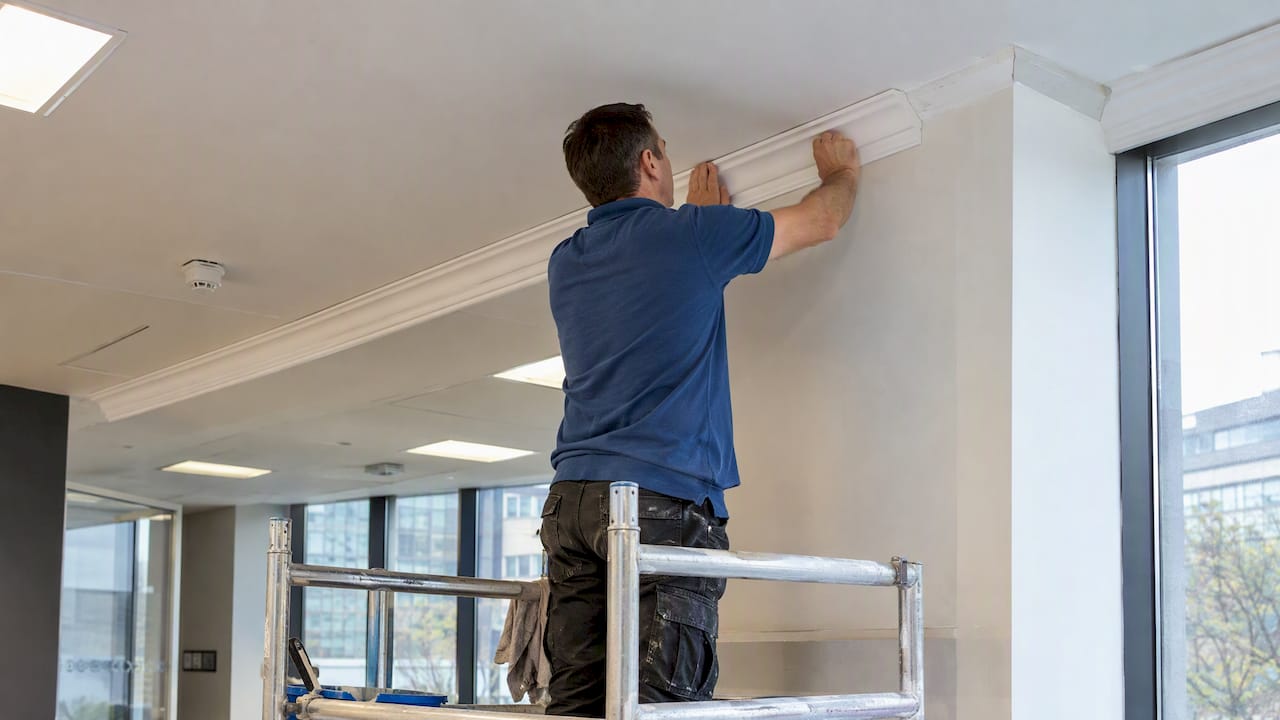
Fitting Orac Decor style coving in an office, reception or dining area follows a dependable sequence, and skipping steps is where most failures start.
- Check conditions first: walls should be dry, the room above 5°C and humidity in the 40 to 70% band, matching the ranges set out in Orac Decor’s UK installation instructions.
- Mark a level guideline along the wall and ceiling, then measure and cut lengths with a mitre saw or coving mitre block for internal and external corners.
- Dry fit each length before adhesive goes anywhere near it, correcting any mitre gaps while you can still adjust.
- Apply adhesive to both the wall and ceiling contact faces and across the back groove, not just inside it: the groove is functional, and adhesive needs to overspill it to bond properly.
- Select the right adhesive for the surface: DecoFix Pro for dry, porous walls, DecoFix Power for non-porous, damp or larger profiles, and DecoFix Extra for jointing between lengths, each with its own clean-up window.
- Press, fettle excess adhesive away promptly, within the manufacturer’s stated window for each product, then fill joints, sand smooth and leave to cure before decorating.
Clean-up timing varies by product: DecoFix Extra needs cleaning within about an hour, while excess DecoFix Pro or Power is best removed with water and mild detergent promptly, so plan your team’s pace around the adhesive you have chosen, not the other way round.
Allow a full 24 hours before painting where the manufacturer advises it, and treat working at height with the same care as any other ceiling-level task, with proper platforms rather than improvised stacking. A typical office room of average size can usually be coved and jointed within a single day, with painting following once cured.
Pro Tip: Prime any particularly porous or previously painted substrate before applying adhesive, it improves grab and avoids a coving length creeping before the adhesive sets.
Hygienic cove systems, thermoforming and welded seams: what to specify for heavy washdown areas
Hygienic cove work is a different trade entirely, closer to specialist flooring than to decorative joinery.
Cap and cove flooring uses a cove former to shape the radius, a capping strip at the top edge, and heat welded seams to create a genuinely watertight, continuous surface rather than a sealed join. Weld quality depends on consistent speed and colour matched welding rod, since a rushed weld leaves weak points that fail under repeated washdown.
For wall corners in the same environments, a thermoformer is often the right tool: a portable heated device that shapes PVC cladding into a continuous corner on site, removing the visible trim joint that would otherwise trap moisture.
- Stainless steel: best reserved for walls directly behind cooklines and high heat equipment.
- Welded vinyl cladding: a practical, fast alternative to tiling across most other kitchen walls.
- PVCu cladding with thermoformed corners: suited to production kitchens and clinical areas wanting a seamless look.
None of this performs as intended without proper preparation. A flat, dry subfloor and genuinely dry walls are what let the cove former sit flush and the welded seam hold, and skipping that step is the most common reason a hygienic installation cracks or lifts within a year or two.
How to choose an installer and a site readiness checklist for commercial projects
A strong quote for commercial coving work, decorative or hygienic, should answer a short set of questions before you sign anything.
- Ask for evidence of heat welding or cap and cove experience, including recent references from similar commercial sites.
- Request a test weld or sample mitre on site before committing to the full job, especially for hygienic systems.
- Confirm access windows and whether areas need isolating, since kitchens and washdown zones often need phased closure.
- Check wall dryness and subfloor flatness have been assessed, not assumed, before a price is finalised.
Cost and time are driven mainly by linear metres, the number of corners, substrate condition and whether welding or thermoforming is involved, all of which push a quote up compared with straightforward decorative coving.
Before handover, build a short quality check into the contract: a weld test, confirmation of adhesion at a sample section, and a stated allowance for painted finish curing time. Firms experienced in both residential and commercial fit-outs, including practices like BOOM Studio, often build these checkpoints into their own project sign-off, which is a useful model to borrow even for a smaller single-room job.
Carl’s installer tip
In our experience, the mitre is where commercial jobs go wrong fastest under time pressure. We’ve found that testing adhesive grab on an offcut first, priming porous plaster before fitting, and never painting before the stated cure window saves far more time than it costs. Fill the groove generously, not sparingly: a thin bead there is the single most common cause of a coving length working loose later.
What this guide gets right that most advice misses
Most online guidance treats “coving” as one product and gives generic fitting tips that apply reasonably well to a living room and dangerously badly to a commercial kitchen. The gap we see most often on site is specifiers assuming a decorative polyurethane profile can be adapted, with extra sealant, to do a hygienic cove’s job. It cannot, and Regulation (EC) 852/2004 does not leave much room for interpretation on that point.
The more useful instinct is to ask what the junction needs to survive, not what it should look like, before choosing a product. A front of house area with a dining-room feel genuinely benefits from a well-proportioned Orac Decor profile, properly mitred and painted. A prep kitchen behind it needs a welded, radiused junction that an inspector can run a hand along without finding a seam. Treating both as the same decision, or worse, letting the decorative choice drift into the kitchen because it is cheaper and easier to source, is where most commercial jobs lose time and money later through failed inspections or premature repairs.
— Carl
How Coving.Online helps with supply and arranging installation
We supply the full Orac Decor and NOËL & MARQUET ranges for decorative commercial coving, from classic profiles through to LED coving and 3D wall panels, and we can coordinate professional fitting through our Elite Decor UK installer network.

To get a quote moving, have your room dimensions, substrate type and intended use to hand, then get in touch to arrange a site survey. Browse the cornice and coving and panelling ranges, or start your installation enquiry on our installation page today.
FAQ
What is the difference between coving and hygienic cove?
Decorative coving is a moulded polyurethane profile fitted at the ceiling and wall junction mainly for appearance, while hygienic cove is a sealed, radiused floor to wall junction built for washdown environments. The two serve different regulatory purposes and are not interchangeable in a working kitchen.
Do commercial kitchens legally need hygienic coving?
Food preparation areas fall under Regulation (EC) 852/2004, which requires surfaces to be easy to clean and disinfect, effectively ruling out porous or unsealed junctions. In practice this means a hygienic cove system rather than decorative coving wherever food handling or heavy washdown takes place.
What adhesive should I use for commercial polyurethane coving?
Orac Decor guidance recommends DecoFix Pro for dry, porous walls, DecoFix Power for non-porous, damp or larger profiles, and DecoFix Extra for jointing between lengths. Each has its own clean-up window, so match the product to the surface before you start.
How long does a commercial coving installation take?
A typical office-sized room can usually be fitted and jointed in a day, with painting following once the adhesive has cured, often around 24 hours. Hygienic cove and thermoformed corner work generally takes longer because of welding and subfloor preparation.
Can I use decorative coving in a kitchen area?
Decorative polyurethane coving suits front of house dining areas but is not designed to be watertight at floor level, so it is unsuitable for prep kitchens or washdown zones. Those areas call for a hygienic cove system such as cap and cove flooring or welded vinyl instead.
Sources
- Regulation (EC) 852/2004 on the hygiene of foodstuffs
- ORAC Decor installation instructions (UK)
- What is cap and cove flooring? A guide to hygienic safety floors — GW Flooring
- What is a wall cladding thermoformer? — Jemiclad
Recommended
- Transform Your Space with These Coving Design Ideas
- Trade Ready Commercial Coving: LED Ready and Wipe Clean Solutions
