

Home Decor
Add Character in an Afternoon with Practical Coving for UK New Builds

Sep
Coving is one of the fastest, most reliable ways to add architectural depth to a new-build room, and for most reception rooms and dining spaces, it’s worth the investment. A lightweight polyurethane profile fitted by a competent DIYer, or a professional installer for tricky rooms, will transform flat new-build ceilings without a major renovation.
TL;DR:
- Coving is best suited for reception rooms, hallways, and feature ceilings with ornate details, especially in rooms with ceilings over 2.3 meters.
- Polyurethane is the ideal material for new-build coving due to its good detail definition, moisture resistance, and mid-range cost, unlike polystyrene, plaster, or timber.
- Accurate dry-fitting of coving and careful mitre cuts are crucial to prevent gaps, with angled cuts made against the fence in a mitre box to ensure seamless joints.
- Costs vary based on complexity, with DIY fitting suitable for simple rooms and professional installation recommended for rooms with many corners, high ceilings, or intricate profiles.
- A mid-sheen or matte finish in a matching or contrasting color to the ceiling creates a polished look that enhances architectural depth without highlighting imperfections.
Table of Contents
- Why add coving to a new build?
- How do you choose the right coving style and size?
- What are the best coving materials for new builds?
- What tools and preparation do you need?
- How do you install coving step by step?
- How much does coving cost, and when should you hire a professional?
- What paint and colour choices suit coving best?
- Carl’s installer tip and how Coving.Online supports your project
- Trend or timeless: how should you think about coving?
- How Coving.Online can help with your new build
- Sources
- FAQ
Why add coving to a new build?
New-build ceilings tend to be functional rather than characterful. Coving fixes that in an afternoon, and it does more than decorate.
It adds architectural depth where builders have left flat, unadorned junctions, giving a room the kind of considered finish usually associated with older, higher-spec properties. It also conceals the small imperfections that come with handover, the slight gaps and uneven lines where wall meets ceiling that new-build snagging lists rarely catch.
Coving works particularly well in:
- Reception rooms and dining rooms, where a stronger sense of scale pays off
- Feature ceilings with cornice-adjacent detailing, cornicing lights, or ceiling roses
- Hallways and stairwells, where continuous coving runs create a sense of flow between spaces
It’s less suited to very low ceilings (under 2.3 metres), where even a modest profile can make a room feel more cramped, and to interiors built around strict minimalism, where any moulding may read as fussy rather than intentional.
How do you choose the right coving style and size?
Proportion is where most new-build coving projects succeed or fail. Choose coving profiles appropriate to your ceiling height for good proportion: smaller profiles for lower ceilings and larger or more ornate designs for higher ceilings to avoid overpowering the space.
Match the profile to the room’s design language rather than the house’s age. A minimal square-edged cove suits a contemporary new build far better than a heavily scrolled Victorian-style cornice, even though both are technically “coving.”
- Tape a length to the wall and ceiling junction before ordering in bulk
- Order samples in the exact finish you’re considering, since photographs rarely convey scale accurately
- Coordinate coving depth with skirting height and any wall panelling for visual balance across the room
Pro Tip: We always recommend taping up a sample length in the corner of the room and living with it for a day or two. Light changes dramatically from morning to evening, and a profile that looks perfect under a showroom spotlight can feel heavy under grey daylight.
What are the best coving materials for new builds?
Four materials dominate the market, and each behaves differently once it’s on the wall.
Polystyrene is the budget option. It’s featherlight and easy to cut with a sharp knife, which makes it popular for quick refreshes, but it dents easily and doesn’t hold fine detail well over time.
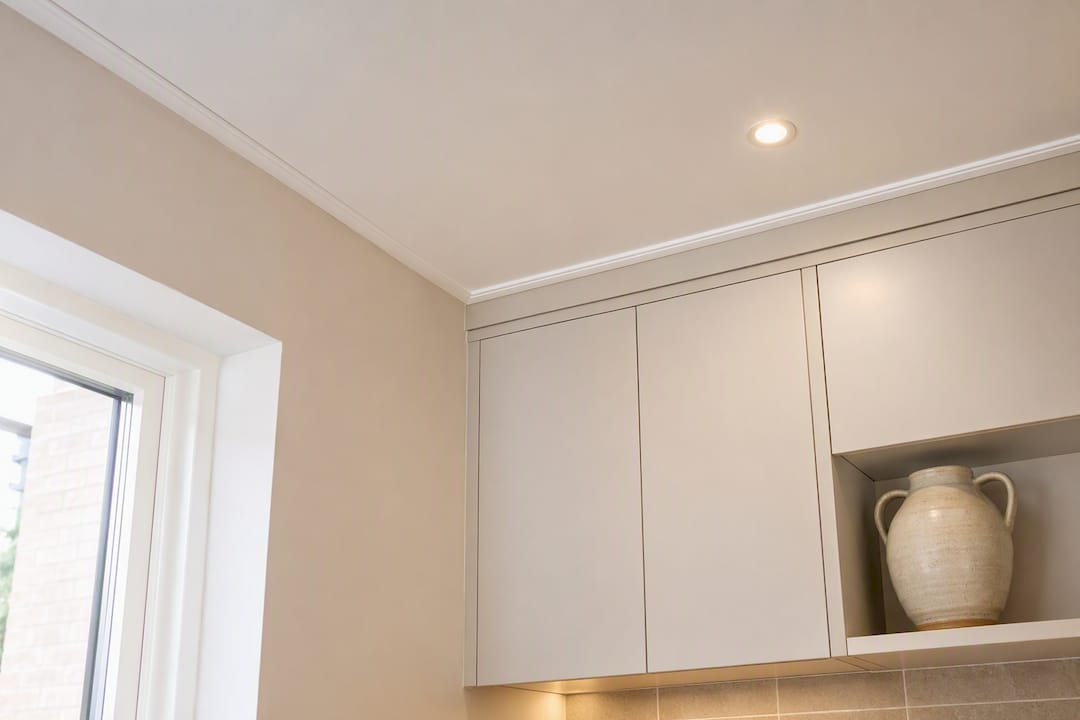
Polyurethane, sometimes called duropolymer, is the material Coving works with most for new-build projects, largely because it combines good detail definition with genuine moisture resistance and installs quickly. It handles humid rooms like kitchens and bathrooms far better than polystyrene or timber, and it sits at a mid-range price point that suits most new-build budgets.
Plaster gives the most authentic, professional finish, particularly for ornate or period-inspired profiles, but it’s heavy, brittle in transit, and generally needs a skilled installer.
MDF and timber profiles work well for simple, square detailing and pair nicely with contemporary panelling, though they can bow or swell in damp areas if not properly sealed.
- Polystyrene: cheapest, easiest to cut, least durable
- Polyurethane: strong detail, moisture resistant, mid-range cost
- Plaster: premium finish, heavy, best for ornate designs
- MDF/wood: clean simple lines, risk of bowing in humid rooms
What tools and preparation do you need?
A clean installation depends more on preparation than on the fixing itself.
- Gather a mitre box or mitre saw, a fine-tooth saw, a spirit level (or laser level for longer runs), a tape measure, a caulking gun, suitable adhesive, and panel pins for temporary support
- Check the plaster is fully dry and free of loose or flaking textured coatings before you mark anything
- Mark level guide lines on both the wall and ceiling using a spirit or laser level, since new-build junctions are rarely perfectly straight
- Wear a dust mask and sheet the floor, especially if you’re sanding back any old textured coating
- Measure every wall individually and sketch a rough plan of joins so you buy the right lengths and minimise offcuts
Wickes’ guide to fitting coving covers this tool list in more detail if you want a fuller checklist before you start.
How do you install coving step by step?
Once the walls are marked and materials are on site, the process follows a consistent sequence.
- Mark continuous guide lines along the ceiling and wall using your level, rather than trusting the ceiling itself to be true
- Dry-fit every length first, marking cut points and noting which corners are internal and which are external before any adhesive comes out
- Cut mitre joints carefully, checking the profile orientation each time, since flipping it upside down in the mitre box is the single most common beginner error
- Apply adhesive along both fixing edges, press the length firmly into position on your marked line, and pin temporarily if the profile needs support while it sets
- Fill joints, sand smooth, then paint once the adhesive has fully cured
Accurate dry-fitting is worth dwelling on. Checking every joint before committing to adhesive prevents the vast majority of visible gaps and mismatched mitres, and it costs nothing but time.
Tricky spots deserve special attention. Bay windows need extra mitre angles calculated individually rather than assumed as standard 45s. Arched openings usually call for a flexible coving or a scribed timber profile instead. On textured ceilings, mark a continuous level line and fit to that line rather than following the plaster, filling any small gaps afterwards rather than forcing the coving to track an uneven surface.
Pro Tip: In our experience, the single most common installation mistake is cutting a mitre with the coving lying flat on the mitre box floor instead of angled against the fence as it will sit on the wall. Get that angle wrong and every joint in the room will gape, no matter how carefully you measure.
How much does coving cost, and when should you hire a professional?
Costs scale with complexity rather than room size alone. Labour and material costs rise sharply with ornate plasterwork, high ceilings and rooms with many corners, while a simple square room with a plain polyurethane profile is comparatively quick and affordable to fit either way.
For a typical 3m by 4m room, DIY costs are largely the price of materials and adhesive, while hiring a professional adds a day rate that reflects the room’s corner count and ceiling height.
Before deciding, run through this checklist:
- Do you have a full day free, including drying and finishing time?
- Do you already own, or can you borrow, a mitre saw and spirit level?
- Does the room have more than four corners or an awkward feature like a bay window?
- Do you want flawless, invisible corner joints, or is a good-enough finish acceptable?
If you answered no to the first two, or yes to the third, hiring a professional installer is usually the better economic decision once you factor in wasted materials from a first attempt.
What paint and colour choices suit coving best?
A matt or mid-sheen finish is almost always the right call for coving, since it hides the minor surface imperfections that a satin or gloss finish would highlight under raking light.
Matching the coving to the ceiling colour keeps the look understated and lets the profile read as texture rather than decoration. Painting it in contrast to the wall, or extending the wall colour up and over the coving in a colour-drenched approach, makes a room feel taller and more dramatic, though it draws more attention to any imperfect joints.
- Paint the ceiling and coving before cutting in the wall colour, so any overlap sits on the wall, not the moulding
- Use a fine angled brush for the joint line rather than relying on tape alone
- Dust coving periodically with a soft brush attachment, and touch up paint every few years rather than waiting for visible yellowing
Carl’s installer tip and how Coving.Online supports your project
Carl’s Installer Tip: We’ve found that new-build ceilings are rarely as flat as they look. Always check with a spirit level before you cut a single length. It saves more rework than any other single step.
Coving.Online stocks Orac Decor and NOËL & MARQUET’s polyurethane ranges suited to new-build proportions, with samples available before you commit. If you’d rather not fit it yourself, our Elite Decor UK installer network can quote and book the job directly.
Trend or timeless: how should you think about coving?
Designers increasingly use restrained, minimal coving in contemporary schemes rather than skipping it altogether, since even a plain profile can make a room feel more considered without reading as period. A well-chosen profile tends to age better than a trend-led statement wall, and it rarely hurts resale appeal.
— Carl
How Coving.Online can help with your new build
Choosing between polystyrene, polyurethane and plaster is easier once you can see and touch a sample against your own ceiling height and paint colour, as seen in this kitchen extension with rooflights in Halesowen project case study. Coving.Online supplies Orac Decor and NOËL & MARQUET’s coving, cornices, ceiling roses and matching skirting, so an entire room can be specified from one source rather than pieced together from several suppliers.

If you’d rather see the finish before ordering full lengths, samples can be requested directly through the Orac Decor coving range. For rooms with awkward corners, bay windows or high ceilings where a professional finish matters, our installer network can provide a quote and book the work without you needing to source separate tradespeople. Browse the full coving and cornice collection to compare profiles by room type, or get in touch for a tailored quote on materials and installation together.
Sources
- How to install coving
- How to put up coving
- How to put up coving | Wickes
- How to fit coving in a UK home
FAQ
Do modern new-build houses have coving?
Many do, particularly in reception rooms and hallways, though builders often leave ceilings plain as standard and treat coving as a buyer upgrade or post-completion addition.
What can I use instead of coving?
Shadow gap detailing, a painted contrast line, or simple wall panelling that stops short of the ceiling are common alternatives, though none conceal handover imperfections as effectively as a coving profile does.
What are good decorating ideas for a new build?
Coving, ceiling roses and wall panelling are the three upgrades most likely to add perceived value quickly, since new-build interiors typically start with plain, flat surfaces throughout.
What are the real must-haves for a new build?
Beyond structural essentials, most homeowners prioritise good lighting, adequate storage, and finishing details like coving or skirting that make the space feel complete rather than newly built.
Is coving hard to install yourself?
A straightforward square room with polyurethane coving is achievable for a confident DIYer in a day, provided you dry-fit every joint before applying adhesive.
