
Home Decor
Orac Flex Installation: A Step-by-Step Fitting Guide

Nov
Orac Flex is installed like any polyurethane moulding, with one difference: the profile bends, so the preparation, adhesive and joints matter more than the cutting. Let the profile acclimatise, prepare a clean, dry surface, bond it with DecoFix Pro, join every end and mitre with DecoFix Extra, and wait at least 24 hours before painting. This guide walks through each stage for curved walls, arches, bay windows and rounded ceiling features.
TL;DR
- Leave Orac Flex and the adhesives in the room for 24 hours before fitting, and make sure the surface is flat, dry, grease-free and dust-free.
- Use DecoFix Pro to fix the profile to the wall or ceiling, and DecoFix Extra for every joint between lengths.
- Check the minimum bending radius for your exact profile in Orac’s instructions before you order or fit.
- Let the adhesive harden for at least 24 hours before painting.
- Dry-fit first, work in short sections on curves, and wipe off excess adhesive before it sets.
Table of Contents
- What Orac Flex is and when you need it
- Before you start: tools and materials
- Step 1: Acclimatise the profile and prepare the surface
- Step 2: Measure for curved and shaped surfaces
- Step 3: Cut and join Orac Flex
- Step 4: Fix the profile to the wall or ceiling
- Step 5: Fill, finish and paint
- Carl’s Installer Tip
- Common mistakes to avoid
- Our perspective on fitting flexible mouldings
- Choosing the right Orac profile for your room
- Get your Flex mouldings and fitting from one place
- FAQ
- Sources
What Orac Flex is and when you need it
Orac Flex is the flexible version of Orac Decor’s polyurethane mouldings. Instead of a rigid length, it can be curved to follow a radius, which makes it the right choice wherever a straight profile would leave gaps: curved walls, bay windows, arched alcoves, domed recesses and round ceiling features.
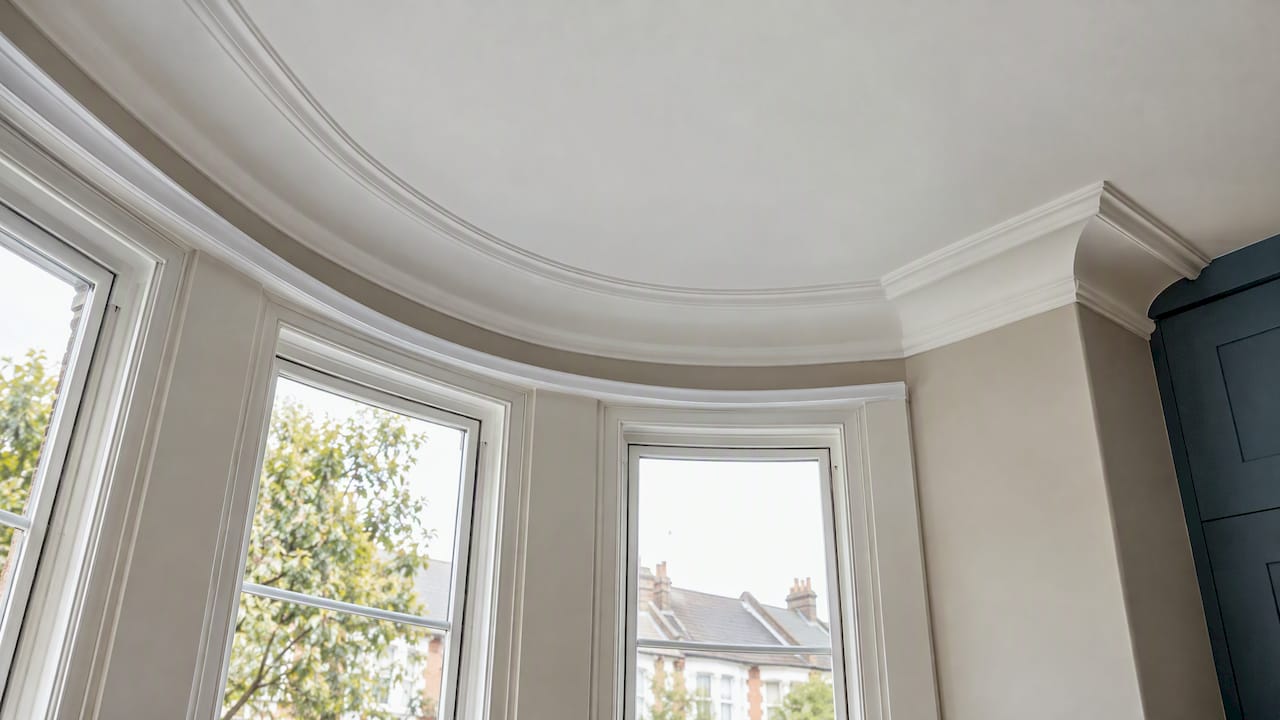
The range covers several moulding families, from cornices and coving to panel mouldings and skirting. Our Orac C321 Flex coving is a good example of the cornice side. If you are still choosing between profile types, our practical buying guide to Orac Decor coving explains how to match a profile to the room.
Because polyurethane is lightweight, it needs no mechanical fixing for most installations. It is bonded, which is exactly why the adhesive and the surface decide whether the job lasts.
Before you start: tools and materials
Gather everything before you open a tube. Stopping halfway along a curve to find a tool is how adhesive skins over and joints go wrong.
Materials
- Orac Flex profile, with 10% or so extra length for trial cuts and awkward ends
- DecoFix Pro, the acrylic installation adhesive for fixing the profile to the wall or ceiling
- DecoFix Extra, the polyurethane-based adhesive for joints between mouldings
- Decorator’s caulk for small gaps at the wall and ceiling edges
- Masking tape and a damp cloth
Tools
- Tape measure and pencil
- Fine-toothed hand saw and a mitre box
- Sealant gun
- Spirit level or laser line
- Sanding block (fine grit) and a filling knife
Orac’s own installation instructions list DecoFix Pro for attaching profiles to the wall or ceiling and DecoFix Extra for the joints between mouldings, so these are the two adhesives to buy. You can find both in our adhesives and accessories range.
Step 1: Acclimatise the profile and prepare the surface
This is the stage people skip, and it is the one that causes most callbacks.
Orac advises bringing the profiles and adhesives to room temperature and leaving them for 24 hours before installation. It also says the substrate should be flat, dry, grease-free and dust-free. Lay the flexible lengths flat or loosely coiled in the room where they will be fitted, not propped in a cold van or garage.
Then deal with the surface:
- Scrape off loose paint, flaking distemper and old wallpaper edges.
- Wipe down greasy or dusty areas, particularly kitchen walls and ceilings above hobs.
- Fill cracks and deep dents, then sand back.
- Check that new plaster is fully dry.
- On a curve, draw a pencil guide line on the wall and ceiling where the top and bottom edges of the profile will sit.
Pencil lines matter more on a curve than on a straight run, because the eye notices any wobble straight away.
Step 2: Measure for curved and shaped surfaces
A tape measure does not follow a curve well. Use a flexible tape or a length of string pressed into the corner, then measure the string flat. Add a little for waste and for trial fits.
The key figure is the bending radius. Every flexible profile has a minimum radius it can follow, and tighter bends risk kinking or cracking the moulding. Orac’s guide lists the minimum bending radii for its flexible profiles, and the figure differs by profile and by whether the curve is inside or outside. Check your profile’s figure against your wall before you buy, not after.
As a rough guide to choosing:
| Situation | What to check |
|---|---|
| Gentle curved wall or ceiling | Wide, shallow curve; most flexible profiles cope easily |
| Bay window | Several shallow angles or curves; plan joints where the wall changes direction |
| Arched alcove | Tighter radius; confirm the profile’s minimum radius first |
| Round ceiling recess | Inside versus outside curve; check the right figure for each |
Step 3: Cut and join Orac Flex
Cut with a fine-toothed hand saw, not a power saw. Powered blades tend to heat and drag the polyurethane, leaving a rough, melted edge that will not close cleanly. A mitre box keeps the angle true on straight sections that lead into the curve.
Tips we follow on every job:
- Dry-fit the length before any adhesive goes on. Hold it in place, check the pencil lines, and flex it through the full curve.
- Cut slightly long, then trim back. You can always take off a millimetre; you cannot put it back.
- Keep the end cuts square where two flexible lengths meet along a curve. Use mitres only at genuine corners.
- Sand each cut end lightly so it sits flush.
For joints, the manufacturer is clear. Its installation guidance says to coat each end completely with DecoFix Extra and states that the full warranty applies only where the joint adhesive is used on every mitre and end joint. Skipping it risks open joints that are very difficult to repair.
Step 4: Fix the profile to the wall or ceiling
Work in sections rather than trying to hold a three-metre length against a curve while you chase the adhesive.
- Run a continuous bead of DecoFix Pro along both contact edges of the profile, with a little extra on any area where the surface is uneven.
- Press the profile gently against the wall and ceiling, following your pencil lines.
- On a curve, start at the centre of the arc and work outwards, so any tension is shared along the length.
- Hold the profile in position for a minute or two. On tight curves, support it with masking tape on the wall until the adhesive grips. Remove the tape once the bond has taken.
- Wipe away excess adhesive with a damp cloth straight away, before it skins.
At each joint between lengths, apply DecoFix Extra to both ends, push them together and clean off the squeeze-out. The joint adhesive’s own technical sheet advises removing excess glue before it hardens, so do it as you go rather than at the end.
Step 5: Fill, finish and paint
Once everything is bonded, check the lines and joints. Small gaps between the profile and the wall can be filled with decorator’s caulk, smoothed with a damp finger. Tiny gaps at the joints can be filled and lightly sanded once the adhesive has hardened.
For painting, Orac states the adhesive is paintable only after hardening, with a minimum of 24 hours. Wait at least that long. Its guidance also recommends an undercoat and a top coat for the best result.
Our finishing routine:
- Mask the wall and ceiling edge with low-tack tape.
- Apply one coat of undercoat, then one or two top coats.
- Use a good water-based paint; heavily loaded coats can soften fine detail on ornate profiles.
- Cut in carefully along the profile edge rather than painting the whole wall again.
Carl’s Installer Tip
In our experience, the most common cause of a failed Flex installation is rushing the acclimatisation and surface prep, then blaming the profile. We have found that a profile left in the room overnight bends more willingly, sits flatter against the wall and gives a tighter joint than one fitted straight from a cold delivery.
Three habits that save time:
- Dry-fit the whole curve first. If the profile fights the curve dry, it will fight it with adhesive on too.
- Never skimp on DecoFix Extra at joints. A joint that looks fine on the day can open a hairline crack a month later if it was only bedded with the wall adhesive.
- Place joints deliberately. On a bay window, put them where the wall changes direction, not in the middle of the smoothest arc where the eye lands first.
If the radius is tighter than the profile’s minimum, change the profile. Forcing it is never worth it.
Common mistakes to avoid
- Fitting straight from delivery. Cold, stiff profile is harder to shape and can spring away from the wall.
- Fixing to dusty or damp surfaces. The adhesive grips the dust, not the wall.
- Using a power saw. It leaves ragged ends that never close up.
- Leaving out joint adhesive. It is the one step the manufacturer ties to its warranty.
- Painting too soon. Give the adhesive the full 24 hours at least.
- Ignoring the minimum radius. A kinked profile cannot be repaired invisibly.
Our perspective on fitting flexible mouldings
We supply the full Orac Decor and NOËL & MARQUET ranges, and we also arrange professional fitting through our Elite Decor UK installer network. That combination shapes how we see flexible mouldings.
Flex is one of the products where installation quality shows. A straight run of coving forgives a small error, because the lines are simple. A curve does not: any wobble, open joint or flat spot is visible from across the room. That is why we advise customers to treat the adhesive system, the radius check and the preparation as part of the product, not as extras.
For DIY fitters, our advice is to start with a gentle curve and a single room. Orac’s polyurethane profiles are light and designed to be installed with the right adhesive, and a confident homeowner can achieve a very good result with patience. For tight arches, multi-angle bays or large commercial schemes, we would rather you had an installer who has done it many times. We can arrange that.
Whichever route you choose, we are happy to help you pick the right profile for the radius you have, so the product suits the wall rather than the other way round.
Carl
Choosing the right Orac profile for your room
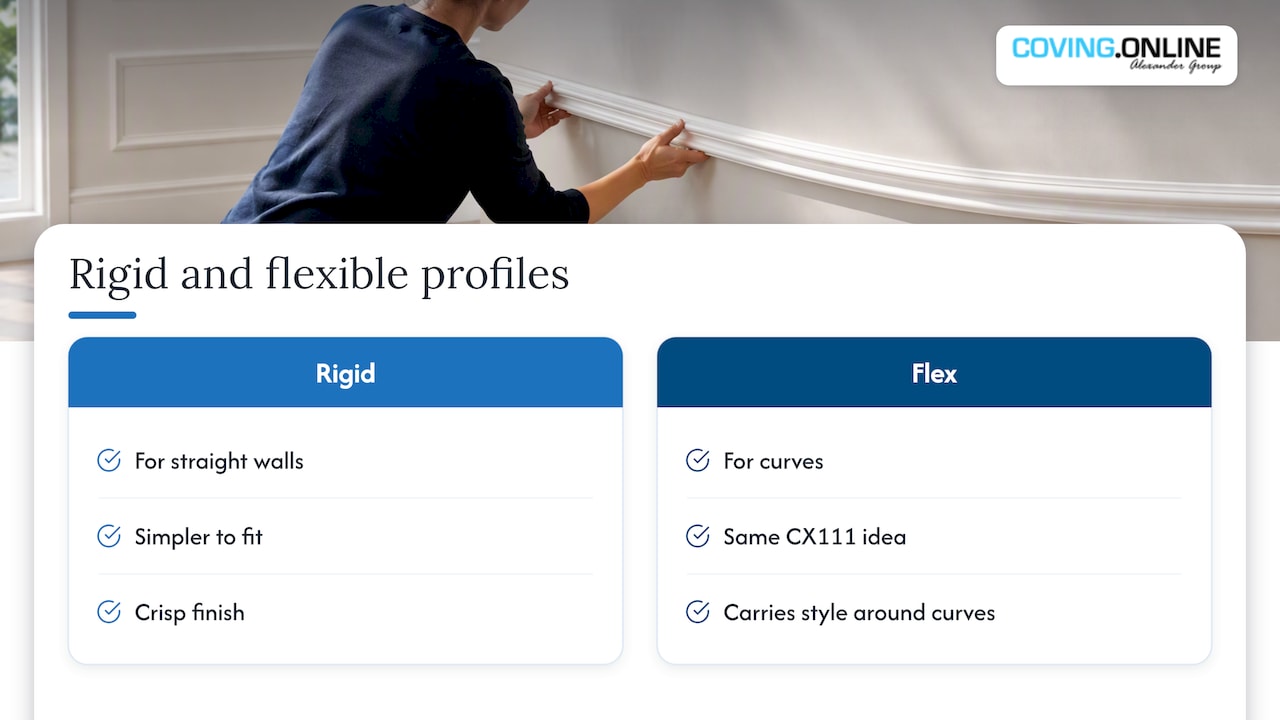
Flex is not always the answer. If your walls are straight, a rigid profile is simpler to fit and gives a crisp finish. Reserve Flex for the curves.
For most rooms, our cornice and coving range offers rigid and flexible profiles in traditional and contemporary styles. If you prefer a cleaner, more modern look, a plain profile such as the Orac CX111 cornice works well in straight rooms, while the Flex version carries the same idea around a curve.
If you are weighing polyurethane against plaster, our comparison of Orac Decor and plaster coving covers weight, finish and installation differences. For ideas on how coving works in different spaces, see our guide to coving designs for your home.
If you are also adding a ceiling rose to a curved or round feature, it is worth reading how to choose a ceiling rose well so the proportions match the coving.
Get your Flex mouldings and fitting from one place
We stock Orac Decor and NOËL & MARQUET mouldings, along with the adhesives and accessories that go with them, and we can arrange installation across the UK through our Elite Decor UK installer network. That means you can buy the profile, the DecoFix adhesives and, if you want it, a professional fitter in one order.

Browse the cornice and coving collection, add the right adhesives from our shop, or ask about installation if you would rather have a specialist handle the curves.
FAQ
Can I install Orac Flex myself?
Yes, if the curve is gentle and you are comfortable preparing surfaces and working with adhesive. Acclimatise the profile, dry-fit it, and use the correct adhesives. For tight arches or complex bays, a professional installer will usually give a cleaner result.
Which adhesive should I use for Orac Flex?
Orac’s instructions specify DecoFix Pro to fix the profile to the wall or ceiling and DecoFix Extra for joints between mouldings. Using both is what the manufacturer’s warranty conditions are built around.
How long should I wait before painting?
Orac says the adhesive should be left to harden for a minimum of 24 hours before painting. In a cold or damp room, we would allow longer, and apply an undercoat followed by a top coat.
How tight a curve can Orac Flex follow?
It depends on the profile. Orac’s installation guide gives a minimum radius for each flexible profile, with separate figures for inside and outside curves. Check the figure for your chosen profile against your wall before ordering.
What saw should I use to cut flexible moulding?
Use a fine-toothed hand saw with a mitre box for straight cuts. We avoid power saws on polyurethane because they can leave a rough, heat-marked edge that makes tight joints harder to achieve.
Sources
- Orac Decor flexible mouldings installation instructions
- Orac Decor 3 steps to the perfect finish installation guide
Recommended
- Orac Decor C304F Coving
- Orac C240 Flex / Cornice
- Orac Decor C334 Flex
- Orac C250 Flex Coving / Cornice
