

Home Decor
Match Georgian Cornices: 75–125mm Sizing and UK Installer Tips

Sep
A Georgian cornice is a restrained, classically proportioned moulding dating from around 1714 to 1830, built up from simple curves such as the ovolo and cavetto rather than heavy ornament. If you’re working on one, the first job is always the same: identify the existing profile before deciding whether to repair or replace it. For long runs, complex enrichment, or anything in a Listed Building, bring in a specialist rather than guessing. Specialist suppliers can help supply matching profiles or arrange professional fitting either way.
TL;DR:
- Genuine Georgian cornices typically measure between 75 and 125 millimeters in depth, with a simple profile based on classical curves like ovolo and cavetto.
- To match or replace a Georgian cornice, taking an accurate profile template with a contour gauge or cardboard is essential before ordering or repairing.
- Repairs for minor damage can be DIY, but long runs or highly ornate profiles should be handled by specialists with fibrous plaster or bespoke casts to ensure accuracy.
- Original Georgian cornices are lime-based, breathable, and reversible; modern polyurethane options are a practical, lighter alternative for non-historic settings.
- For correct installation, always test-fit profiles before fixing, especially for long or asymmetric runs, and obtain the necessary permissions for work in listed buildings.
Table of Contents
- What defines a Georgian cornice?
- Which Georgian cornice profiles and sizes work best?
- What materials and techniques suit Georgian cornices?
- How do you identify and measure a Georgian cornice?
- Repair, re-run or replace: choosing the right approach
- How should you finish and maintain a Georgian cornice?
- Carl’s installer perspective: the mistakes that cause rework
- How Coving.Online can help with your Georgian cornice project
- Sources
- FAQ
What defines a Georgian cornice?
Georgian cornices belong to the neoclassical revival that ran through the reigns of the Georges, roughly 1714 to 1830. Architects of the period drew directly on classical entablature design, favouring restrained, geometric curves over the elaborate acanthus scrolls that came later in Victorian interiors.
You’ll typically find profiles built from two or three simple elements: an ovolo (a convex quarter round), a cove or cavetto (a concave sweep), and occasionally a cyma curve where the profile reverses direction. The Georgian Group’s mouldings guide describes how these shapes echo the classical entablature, with the cornice reading as a scaled-down version of the crowning member on a Georgian facade.
Scale matters more than decoration here. A cornice that’s too shallow disappears against a high ceiling; one that’s too deep overwhelms a modest Georgian room. Getting that relationship right is the difference between a convincing restoration and one that looks slightly wrong without anyone quite knowing why.

Which Georgian cornice profiles and sizes work best?
Three profile families cover most genuine Georgian work: the ovolo, which throws a crisp highlight and shadow line; the cavetto or cove, a softer concave sweep that reads well in low light; and the cyma recta or reversa, an S-shaped curve often used where a room called for slightly more presence. Each depends on shadow, not carved detail, to do the visual work.
Sizing follows a fairly reliable rule of thumb: cornice depth should sit at roughly 5 to 8% of your ceiling height, and this 5 to 8% sizing calculation is worth running before you order anything. Genuine Georgian rooms typically used cornices in the region of 75 to 125mm, noticeably shallower than the deeper Victorian sections that followed:
| Period | Typical cornice depth |
|---|---|
| Georgian (c.1714–1830) | 75–125mm |
| Regency | 100mm |
| Victorian | 125–250mm |
| Edwardian | 75–125mm |
These period depth ranges are a starting point, not a fixed rule. A tall Georgian room with generous proportions can carry a section at the top of that range comfortably. Where the original profile has unusual enrichment or an asymmetric run, stock mouldings won’t match it, and a bespoke cast becomes the only honest option.
What materials and techniques suit Georgian cornices?
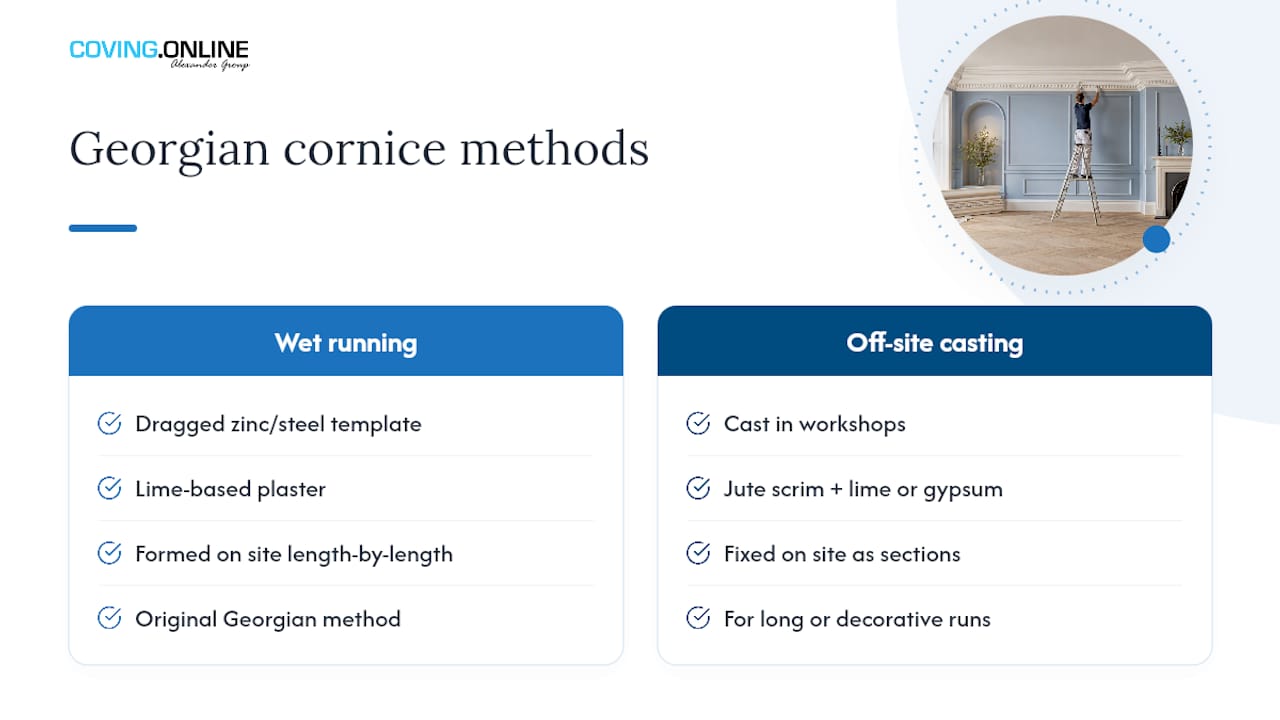
Original Georgian cornices were built in lime-based plaster, either run in-situ or cast off-site. In-situ “wet running” dragged a zinc or steel template, known as a horse, along a wet plaster bed to form the profile length by length. Longer or more decorative runs were typically cast in workshops using jute scrim bound with lime or gypsum, then fixed on site as fibrous plaster sections.
For conservation work, lime plaster is generally preferred over gypsum. It’s breathable, compatible with historic fabric, and reversible, which matters if a future owner or conservation officer needs to undo the work. Gypsum has its place for small modern patches in non-historic settings, but it’s the wrong material for genuine period repairs.
Modern polyurethane profiles, including ranges from Orac Decor and NOËL & MARQUET, offer a practical alternative where an exact historic fabric match isn’t required. They’re lighter than plaster, easier to install without specialist casting, and hold historic proportions convincingly when the profile has been chosen correctly.
How do you identify and measure a Georgian cornice?
Before ordering anything, gather the evidence a supplier or conservator will actually need. Restoration work typically starts with profile identification using a physical template taken from the existing run, not a photograph and a guess.
- Confirm the room’s likely date from deeds, architectural detailing or local records, then photograph the cornice in context.
- Take a profile using a contour gauge, or cut a cardboard template by tracing the section directly onto card and cutting it out.
- Measure projection (how far it extends from the wall), overall height, and total run length along each wall.
- Note any enrichments, the plaster type if visible, and the general condition, including cracking or missing sections.
- Photograph from multiple angles in good light, including close-ups of corners and any damaged areas.
Pro Tip: Hold your cardboard template flush against the wall and ceiling junction when tracing it. A template taken even slightly off the true angle will throw the whole profile out once it’s scaled up for casting or ordering replacement lengths.
Repair, re-run or replace: choosing the right approach
Small, localised damage rarely justifies a full replacement. Hairline cracks and minor missing detail can usually be repaired by cleaning the area, wetting the existing plaster to improve adhesion, filling with a modelling plaster or repair compound, then sanding back once cured. This is a genuine DIY-friendly repair sequence for anyone reasonably comfortable with basic plastering.
Beyond that, the right method depends on scale:
- Short sections with straightforward profiles can often be re-run in-situ using a matching template, provided the surrounding plaster is sound.
- Long runs, elaborate enrichment, or anything approaching 2 to 3 metres of missing cornice generally calls for a commissioned fibrous plaster cast rather than DIY re-running.
- Anywhere the property is Listed, check with your local planning authority before altering interior fabric. Listed Building Consent is usually required for changes to historic interiors, even for what feels like straightforward repair work.
- Budget realistic time for specialist casting. A bespoke fibrous plaster run isn’t a same-week job once moulds have to be made.
Rushing a long or ornate run without the right expertise is the single most common cause of a poor match, and it usually costs more to correct than it would have cost to commission properly the first time.
How should you finish and maintain a Georgian cornice?
Whether you’re finishing a restored plaster cornice or a new polyurethane profile, the sequence matters more than the paint itself. Prime bare plaster or polyurethane before topcoating, using a product suited to the substrate, and follow a trade-recommended paint order for coving profiles to avoid an uneven, patchy finish.
Where years of paint build-up have blurred original detail, careful, gradual removal can reveal a sharper profile again, though this is delicate work on soft historic plaster and best approached cautiously rather than with heavy abrasives. Our guide on priming before painting panelling and mouldings covers the same principles that apply to cornices.
Day-to-day maintenance is mostly about prevention: use the correct fixings and adhesive for the substrate, avoid letting paint build up so thickly that it swallows the profile’s shadow lines, and manage condensation in bathrooms and kitchens, where damp cycling is the usual cause of plaster failure at ceiling level.
Carl’s installer perspective: the mistakes that cause rework
In our experience, most rework on Georgian cornice jobs traces back to one thing: skipping the template stage and ordering by eye. A profile that looks close in a photo often isn’t close enough once it’s fixed against an original run.
Carl’s Installer Tip: Always dry-fit mitres before applying adhesive, and use a caulk or filler formulated for the substrate at joints, not a general-purpose filler that shrinks and cracks within a season.
— Carl
How Coving.Online can help with your Georgian cornice project
Getting the profile right is one thing. Getting it supplied, cut and fitted properly is another, and that’s where Coving.Online earns its keep. Coving.Online stocks an extensive range of Orac Decor coving and cornice profiles alongside NOËL & MARQUET mouldings, covering both traditional Georgian proportions and more contemporary options, so you’re not limited to whatever a local merchant happens to hold.

If you’ve taken measurements and a template as described above, some suppliers can help match them against stock profiles or advise when a bespoke solution makes more sense. For homeowners who’d rather not fit the cornice themselves, professional installation services are available across the country, taking the project from purchase through to a finished, fitted result. Browse the full Cornice & Coving range to see what’s available, or head to the Installation page to request a profile match and book fitting through the network. Need adhesives or fixings to go with a repair job? The shop stocks the accessories most Georgian cornice projects call for.
Sources
For deeper background beyond this guide, three sources are worth keeping bookmarked. The Georgian Group’s mouldings guide documents period profile names and their classical derivation in detail. The Wikipedia entry on Georgian architecture gives useful context on the era’s broader stylistic principles. And the period cornice restoration guide from squote.app covers technical repair steps and conservation considerations in more depth than fits here.
FAQ
What years count as the Georgian period for cornices?
The Georgian period runs roughly from 1714 to 1830, covering the reigns of the four King Georges. Cornices from this era are generally restrained, with classical curved profiles rather than heavy ornamentation.
How deep should a Georgian cornice be?
Genuine Georgian cornices typically measure 75 to 125mm in depth, though larger rooms can carry a deeper section. A useful working rule is to size the cornice at roughly 5 to 8% of your ceiling height.
Can I repair a Georgian cornice myself?
Small hairline cracks and minor missing detail are within reach of a confident DIYer, using a clean, wet, fill and sand repair sequence. Runs longer than 2 to 3 metres or with elaborate enrichment are better handled by a specialist fibrous plasterer.
Do I need permission to replace cornices in a listed building?
Listed Building Consent is usually required for changes to interior fabric in a Listed property, even for repairs that seem minor. Always check with your local planning authority before starting work.
Where can I buy Georgian-style cornice profiles?
Coving.Online supplies Orac Decor and NOËL & MARQUET profiles covering Georgian and other period styles through its Cornice & Coving category. Current pricing is listed on the site, and installation can be arranged through the Elite Decor UK network.
Recommended
