

Home Decor
Coving Scarf Joints: How to Cut, Fit and Hide Them
Nov
A scarf joint in coving is two lengths joined end to end with matching 45-degree cuts that overlap, so the seam runs at an angle instead of straight across the profile. Done well, it is far harder to spot than a plain butt joint and it tolerates small movement in the wall. Cut both ends at opposite 45-degree angles, bond them with adhesive, fill the line and sand it before you paint.
This guide covers the cuts, the direction to cut in, where to put the seam, how to secure and fill it, and how the method changes between polyurethane, plaster and timber.
TL;DR
- A scarf joint uses two opposing 45-degree cuts, so one piece of coving overlaps the other and the seam is angled, not square.
- Cut with the coving upside down in the mitre box, in the same position it will sit on the wall and ceiling, and test the pair dry before any adhesive goes on.
- Put the joint where furniture or a door will draw the eye away, and keep it well clear of internal corners.
- Bond both faces, press the joint tight, then fill and sand the line so it vanishes under paint.
- Polyurethane, plaster and timber all take a scarf joint, but the adhesive, filler and fixing method differ.
Table of Contents
- What a coving scarf joint is, and when you need one
- Plan the run before you cut anything
- Cutting the scarf: angle and direction
- Securing and aligning the joint
- Fitting the coving to the wall
- Filling and finishing so the seam disappears
- Does the method change by material?
- Scarf joint or butt joint?
- Our view: why joints are worth getting right
- Need coving, adhesive or a fitter?
- Common mistakes with coving scarf joints
- FAQ
- Sources
What a coving scarf joint is, and when you need one
In timber joinery, a scarf joint connects two pieces to span a greater length. The same idea applies to decorative mouldings: when a wall is longer than a single length of coving, you have to join pieces somewhere along it.
The two options on a long wall are a butt joint, where two square-cut ends meet, and an angled joint, which is the scarf. A butt joint is quick, but it relies on both ends being perfectly square and the wall being perfectly flat. Any gap shows as a dark vertical line the full height of the profile. An angled joint spreads that line across a longer face, so a hairline gap is far less visible and the two pieces can sit slightly out of line without creating a step.
You will usually need a joint when:
- the wall is longer than the length of coving you are fitting
- you are using up offcuts on a run that will sit behind furniture
- the room has an awkward shape and a full length would otherwise need trimming at both ends
If you can avoid a joint by planning your lengths, do. If you cannot, a well-made scarf is the tidy answer.
Plan the run before you cut anything
Most visible joints are a planning problem, not a cutting problem. Before you pick up the saw, measure each wall and lay out the lengths on paper.
- Start with the corners. Internal and external corners are mitred or fitted with preformed pieces, so decide how you will handle those first. Our guide to cutting cornice corners for a clean finish covers the corner cuts, and preformed coving corners remove the corner mitres altogether.
- Work out where each long run needs a joint. Aim for as few as possible.
- Place the joint where something else holds the eye. One guide to scarf joints in trim advises hiding the seam behind furniture or a door if you can, and warns that a seam closer than 16 inches (about 40 cm) to a corner can look like a repair mistake. That rule of thumb translates well to coving.
- Avoid placing the joint directly above a window or the main light source, where raking light shows every imperfection.
In our experience, the walls people look at first on entering the room, usually the one facing the door, deserve a full unjoined length wherever possible. Put your joints on the walls the eye skips.
Cutting the scarf: angle and direction
The working angle is 45 degrees. Make the first cut at 45 degrees, then make the second cut on the other piece at the opposite 45 degrees, and check that the two form a tight joint with no gaps. That is the approach described in this guide to cutting crown moulding, and it applies equally to coving.
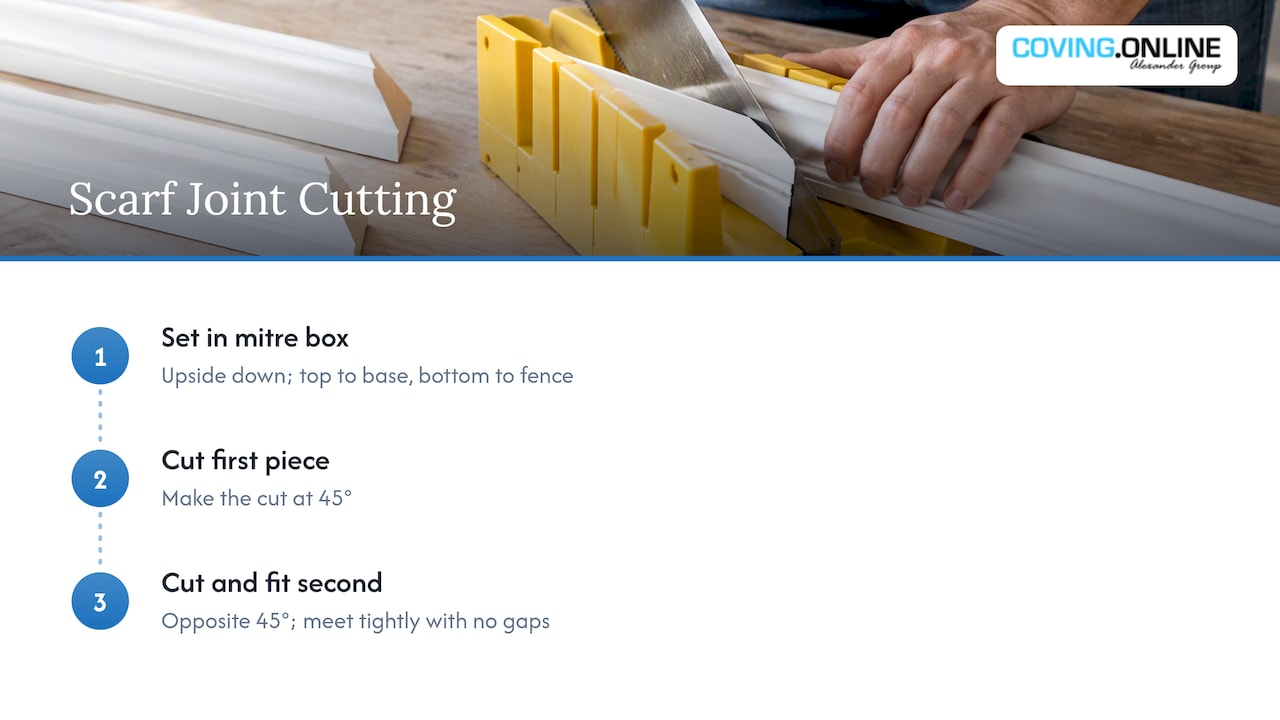
The detail that catches people out is orientation. Moulding is cut upside down: the same guide says to place it upside down on the saw, held at the same angle you will fit it at. With coving in a mitre box, that means the top edge, which sits against the ceiling, rests against the base of the box, and the bottom edge, which sits on the wall, rests against the fence.
Step by step
- Mark the length. Measure the wall and mark the first piece. Allow for the second piece to overlap the first at the joint, so remember the overlapping cut adds a small amount of length across the angle.
- Set the saw or mitre box to 45 degrees. A fine-toothed saw gives a cleaner face. For polyurethane, a sharp fine-tooth hand saw in a mitre box works well. A power mitre saw is quicker over many joints but needs a blade suited to the material.
- Cut the first piece. Load the coving upside down and back to front, exactly as it will sit in place, and cut the end at 45 degrees. Decide at this point which way the joint will face.
- Cut the second piece at the opposite angle. This end mirrors the first, so the two faces lie flat against each other.
- Dry fit them. Hold both pieces against the wall and ceiling and look at the joint. The faces should meet with no daylight and the profile lines should continue without a step. If there is a gap, recut by the smallest amount rather than forcing it.
Which way should the joint face?
Face the overlap so the exposed edge points away from the main viewing position. When you enter the room, you want to look at the back of the lap, not into the open end. Standing at the doorway, the outer piece should be the one that points away from you. It is a small decision that makes a visible difference once the paint goes on.
Carl’s Installer Tip: We’ve found that cutting both ends of a joint from the same pair of pieces, then labelling them “A” and “B” on the back in pencil, saves a lot of confusion on a room with several joints. Coving that has been cut and then moved around is the number one cause of joints that were perfect on the floor and gappy on the wall. Test each pair dry, mark the order and fit them in sequence.
Securing and aligning the joint
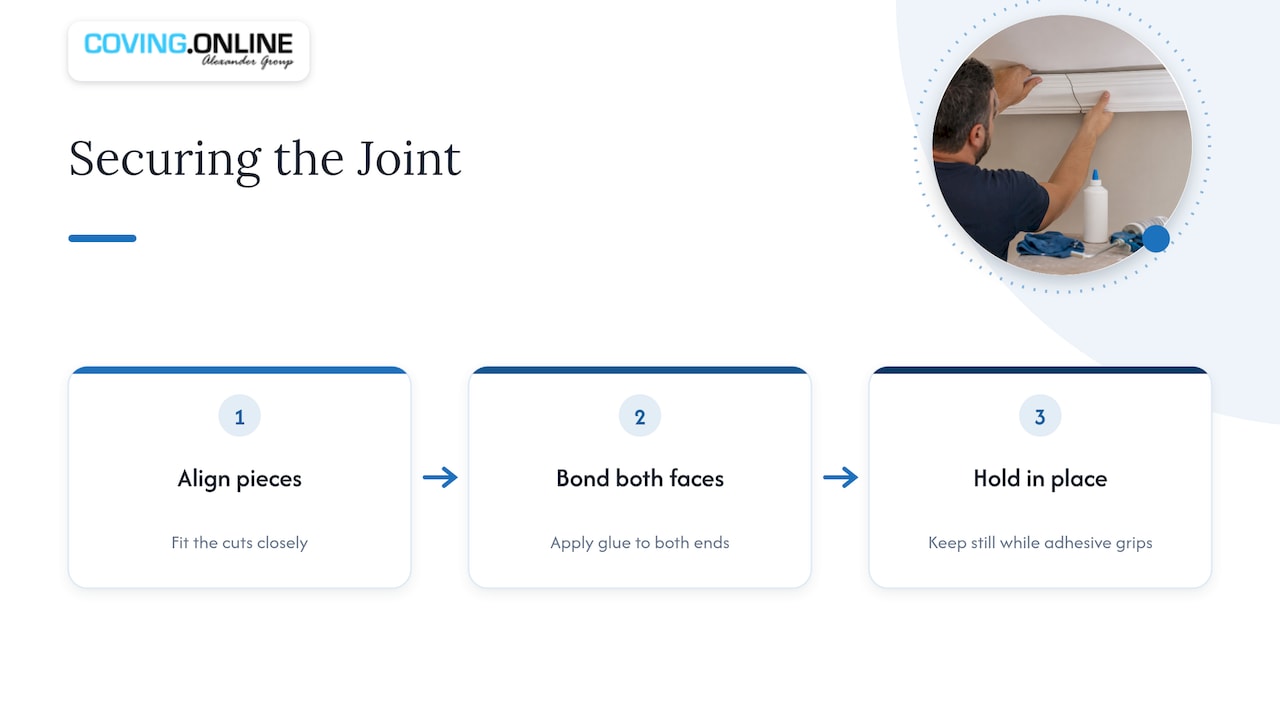
A scarf joint is only as good as the way the two pieces are held together. The principle is simple: get the pieces aligned, bond both faces, and hold them still while the adhesive grips.
For timber trim, one guide recommends fitting the cuts closely, drilling angled pilot holes, applying glue to both ends and driving nails through the pilots. The same guide suggests angling the pilot holes slightly so the joint does not slide apart as the nails go in. For larger trim, it also suggests gluing and screwing a plywood gusset or steel mending plate over the seam for extra support. For a lightweight polyurethane moulding you will not need that, but for heavy timber or a deep plaster cornice it is worth knowing about. If you want more detail on securing seams with adhesive, pilot holes and nails, this millwork finishing guide is a good companion read for timber work.
Choosing the right adhesive
Two different jobs happen at a joint. One adhesive holds the coving to the wall and ceiling. Another, or the same one used carefully, bonds the two ends together. Our guide to the difference between installation adhesive and joint adhesive explains why they are not always interchangeable.
A few practical points:
- Spread adhesive on both cut faces of the scarf, not just one, so the joint is bonded across its full length.
- Do not overload the joint. Excess squeezes out onto the face of the profile, where it must be wiped off before it skins.
- Match the adhesive to the coving and the surface. We explain why general grab adhesive is often the wrong choice and how to choose adhesive for the profile weight and room.
Follow the adhesive manufacturer’s instructions for working time and any temporary support. Hold the joint with masking tape or a few temporary pins until it grips, then remove the supports before you fill.
Fitting the coving to the wall
A joint will not hide a badly prepared surface. Before fitting, mark pencil guide lines on the wall and ceiling, clean off dust, and key any glossy or crumbling areas. If your walls are not flat, the joint will show a step even if your cuts are perfect, so read our guide to installing coving on uneven walls first.
When you fit a pair:
- Fit the first piece to its line and let it grip.
- Apply adhesive to the angled end and to the back edges of the second piece.
- Slide the second piece into position so the two faces meet, pressing the joint together as well as the coving against the wall.
- Check that the top and bottom edges are flush across the joint, with no ridge you can feel with a fingertip.
- Wipe away excess adhesive with a damp cloth straight away.
If you must choose between a joint that is perfectly aligned and a piece that is perfectly straight along the wall, choose the aligned joint. Small wall irregularities can be hidden with flexible filler along the top and bottom edges. A step at the seam cannot.
Filling and finishing so the seam disappears
The scarf does the structural work, but the filling does the cosmetic work. A good fill can make a seam invisible. A rushed one makes it stand out under a coat of paint.
- Let the adhesive set. Do not fill a joint that can still move.
- Fill the hairline. Use a filler suited to your material and press it into the seam with a flexible knife, taking off the excess as you go.
- Fill the edges. Run a thin bead of flexible decorator’s caulk along the top and bottom edges where the coving meets the ceiling and wall, smoothing it with a damp finger or a damp sponge.
- Sand lightly once dry. Use a fine sanding sponge, following the profile so you do not flatten its detail.
- Prime and paint. A coat of primer stops the filler flashing through the topcoat, and two thin coats of paint beat one thick coat.
The common mistake is over-filling. A heavy layer shrinks as it dries, leaving a dished line you then have to fill again. Several thin passes are quicker in the end.
Carl’s Installer Tip: In our experience, the best time to judge a joint is not when you finish filling but after the first coat of primer. Primer shows every ridge and hollow. Run a torch along the coving at a low angle, mark any flaws with a pencil, and fix them before the topcoat goes on.
Does the method change by material?
The 45-degree overlap is the same whatever the coving is made from, but the practical details vary.
| Material | Cutting | Joining | Finishing |
|---|---|---|---|
| Polyurethane | Fine-tooth saw in a mitre box; cuts cleanly and crisply | Bond with a suitable adhesive designed for the material; light, so little support is needed | Fill with a flexible filler, then prime and paint |
| Plaster | Fine-tooth saw; dusty, so clean down as you go | Bond with plaster adhesive; heavier, so support the joint while it sets | Fill with a setting filler, sand, then prime and paint |
| Timber or MDF | Power or hand saw with a fine blade | Glue both faces, and use angled pilot holes and fixings through the seam | Fill nail holes and seam, sand, then prime and paint |
For most homes, lightweight polyurethane is the easiest of the three to work with, which is why it is popular with DIYers and professionals alike. Our Cornice & Coving range covers traditional and contemporary profiles from Orac Decor and NOËL & MARQUET, and the lightweight material means the joint stays easy to support while it grips.
Profile matters too. A plain, simple cove is the most forgiving, because there are no fine details to line up. An ornate profile with repeating carved detail is harder: the pattern should flow across the joint, so try to cut where the pattern repeats. If you are mixing two different coving types, a scarf will not make them match. Join them at an internal corner or use a transition feature instead.
Scarf joint or butt joint?
| Scarf (angled) joint | Butt joint | |
|---|---|---|
| Visibility | Low when well fitted, as the seam is angled | Higher; any gap runs the full height |
| Skill needed | Moderate, with two matching cuts | Low, but both ends must be square |
| Tolerance to wall movement | Better | Poorer |
| Best for | Long visible walls and feature rooms | Hidden runs, or short lengths behind furniture |
For a feature room, a hallway or anywhere the coving is lit from the side, we recommend the scarf. For a short run behind a wardrobe, a neat butt joint is fine.
Our view: why joints are worth getting right
Coving does one job above all others: it softens the line where wall meets ceiling and frames the room. A joint that catches the eye undoes that work. Most of the joints we see on survey visits are not badly cut, they are badly planned: put in the middle of a wall, too close to a corner, or made with two pieces of different batches that were never dry fitted.
Because we both supply and arrange fitting of the full Orac Decor and NOËL & MARQUET range through our installer network, we see how the product and the technique work together. Lightweight polyurethane profiles are designed to make joints easier: they cut cleanly, they are simple to hold in place, and they take filler and paint well. Pair that with the right adhesive and a little patience at the planning stage, and a scarf joint becomes almost invisible.
If you would rather not do it yourself, that is a perfectly sensible choice. A long, joined run on a high ceiling is where a fitter earns their fee.
Carl
Need coving, adhesive or a fitter?
We supply over 500 Orac Decor and NOËL & MARQUET products, including coving, cornices, ceiling roses, skirting boards and LED lighting profiles, with fast UK delivery. Browse the Cornice & Coving range, pick the right adhesive and tools from our shop, and order everything for a single room in one go.

If you would prefer a professional finish, we can arrange fitting through our Elite Decor UK national installer network. Start at Coving.Online to find out more.
Common mistakes with coving scarf joints
- Cutting the coving the wrong way up. The profile must be upside down and back to front in the mitre box, in the position it will have on the wall and ceiling.
- Forgetting both pieces are opposite hands. The two cuts mirror each other. Two cuts in the same direction will not meet.
- Skipping the dry fit. A gap seen before the adhesive is a quick recut. A gap seen after is a repair.
- Placing the joint near a corner. It can read as a repair rather than a planned join.
- Using the wrong adhesive. A product not designed for the material or weight can fail at the seam first.
- Over-filling. Thin layers dry flatter and sand faster.
- Filling before it is set. A moving joint cracks the filler.
If you also fit skirting, the same logic of tight, well-planned joints applies, and our guide on how to cope skirting joints for tight internal corners is worth reading before you start.
FAQ
What is the best angle for a coving scarf joint?
Forty-five degrees is the standard. One cut is made at 45 degrees and the matching piece at the opposite 45 degrees, so the two faces lie flat against each other. Test the pair dry before you glue; the cutting guidance from This Old House recommends checking for a tight, seamless fit.
Where should I put a scarf joint on a long wall?
Place it where furniture, a door or a change in the room will draw the eye away from it. Keep it away from corners, as a seam too close can look like a repair. Avoid placing it above a window where side light will show it up.
Can I use a scarf joint on polyurethane coving?
Yes. Polyurethane cuts cleanly with a fine-tooth saw and mitre box, and the lightweight material is easy to hold while the adhesive grips. Use an adhesive suited to the material, fill the seam with a flexible filler and paint over it once it is smooth.
Do I need nails or screws in a scarf joint?
For lightweight polyurethane, adhesive and temporary support are usually enough. For heavier timber trim, angled pilot holes with nails through the seam, and sometimes a plate or gusset behind, give extra security. Always follow the manufacturer’s instructions for the product you are fitting.
Is a scarf joint better than a butt joint?
On a visible wall, usually yes. The angled seam hides small gaps and movement better than a square butt joint. A butt joint is acceptable for short, hidden runs where both ends are cut perfectly square.
Sources
- How To Cut Crown Molding, This Old House
- How to Make a Scarf Joint, Better Homes & Gardens
- Millwork Finishing guide
Recommended
- How to Cope Skirting Joints for Tight Internal Corners
- Coving Orientation: 5 DIY Steps to Avoid Reversed Mitres
- How to Cut Coving Corners – The Complete Beginner’s Guide
