

Home Decor
Coving End Stops: How to Finish Coving Neatly

Nov
A coving end stop is the neat finish where a run of coving ends in the middle of a wall instead of meeting a corner. You can buy a ready-made piece for some profiles, or make one by cutting the coving end as an external 45° mitre and fixing a tiny matching return piece to it. For most rooms, the second route gives you a stop end that matches your profile exactly. This guide shows how to cut it, fit it and fix gaps, and how to do it without a mitre box.
TL;DR
- An end stop (also called an end cap or stop end) closes the open end of coving where it finishes at a chimney breast, a doorway, an alcove or a change of ceiling height.
- The classic stop end is an external 45° mitre plus a very short return piece, the same cut you make for an external corner.
- A ready-made end piece suits only profiles that have one. A cut-and-return stop end matches any profile you are fitting.
- You can cut coving without a mitre box using a fine-tooth saw, a mitre guide or template, and a sharp craft knife for foam or polyurethane, but you must test on offcuts first.
- Fix with the right adhesive, support long pieces while it sets, then fill and caulk the joints.
Table of Contents
- What coving end stops and end caps are
- When you need one
- Ready-made end stops or a cut stop end?
- How to make a stop end, step by step
- Cutting coving without a mitre box
- Fixing gaps and awkward walls
- Choosing coving that finishes well
- Our view on stop ends
- Buy the profile and plan the finish
- FAQ
- Sources
What coving end stops and end caps are
Coving normally runs from corner to corner, so every end disappears into a mitre or a wall. Sometimes it cannot. You may stop at a chimney breast that you are not wrapping, at the edge of a bulkhead, where a room opens into an archway, or where the coving finishes on a wall that continues into another space. Cut straight and the profile ends in a flat, open face: you see the hollow section, the thickness and every imperfection.
An end stop (some people say end cap) closes that face. It makes the coving look as though it was designed to finish there, with the profile curving back into the wall. It is a small detail, but on a visible end, such as a hallway end facing the stairs, it is the difference between a tidy finish and an obvious afterthought.

When you need one
You need a stop end when the coving ends away from a corner. Typical situations:
- Coving that stops at a doorway or archway without turning a corner.
- A run that ends against a chimney breast or alcove you have chosen not to wrap.
- A boxed-in beam or bulkhead where the coving meets a different ceiling level.
- Open-plan spaces where coving defines one zone and stops.
You do not need one where coving meets a corner. Internal and external corners use mitres, and there are separate guides for those: see how to cut coving corners and our guide to coving mitre angles.
Ready-made end stops or a cut stop end?
There are two routes.
| Ready-made end piece | Cut-and-return stop end | |
|---|---|---|
| What it is | A moulded piece shaped to close the end of a specific profile | An external 45° mitre on the coving, plus a short mitred return |
| Best for | Profiles that have a matching piece | Any profile, any size |
| Match to profile | Only if the piece is made for it | Exact, because it is cut from the same coving |
| Skill needed | Low | Moderate, practise on scrap first |
| Finish | Depends on the piece | Seamless when filled and painted |
A UK forum thread on terminating plaster coving describes both: cut the end as an external 45° mitre, cut a very short external mitre as a return, trim it flush with the back of the first piece and fix it to make a blanking return, or simply buy a ready-made stop end. Because the cut-and-return method uses your own coving, it matches whatever profile you choose, including the deeper and more decorative ones.
A square cut is possible, but on an end that people will see, the mitred return gives a much neater finish. Experienced fitters in the same thread describe the stop end as effectively a zero-length external mitre. Once you can cut an external corner, you can cut a stop end.
How to make a stop end, step by step
1. Measure and plan the end
Mark where the coving will finish on the wall. Allow for the return: it is only a few millimetres to a couple of centimetres of material, depending on the profile, but it takes up room. Plan the run so the stop end falls where you want it, not where the length happens to run out.
2. Work out which way up the coving sits
Most cutting errors come from orientation. Coving is cut upside down and back to front relative to how it sits on the wall and ceiling. For an external cut, the long point of the mitre sits at the top, against the ceiling. Supercove’s trade tips say internal corners have the long end of the cut at the bottom, and external corners have the long end at the top. If you are unsure, see our guide to which way round coving goes.
3. Cut the main piece as an external mitre
Cut the end of the coving at 45° as you would for an external corner, so the cut face angles away from the wall and faces the room. Use a fine-tooth saw in a mitre box, or one of the alternatives below.
4. Cut the return
From an offcut, cut a very short piece with the matching external mitre. This is the little wedge that closes the open end. Its mitre should face the same way as the one on the main run, so that the two cut faces meet cleanly.
5. Trim the return flush at the back
Hold the return against the cut end of the main piece and mark where the back of the return meets the back of the coving. Trim it so that the back is flush and sits tight against the wall and ceiling.
6. Dry-fit before you glue
Homebuilding’s installation guide, quoting installer Mark Irving, advises dry-fitting before fixing any length. Do it for the stop end too. Hold the pieces in place, check the profile lines up across the join and look at it from where people will actually stand.
7. Bond the return, then fix the run
Bond the return to the main piece with joint adhesive, then fix the main run to the wall and ceiling with coving adhesive. Wipe off squeezed-out adhesive straight away. The adhesive matters: general grab adhesive is often the wrong choice for coving, and installation adhesive and joint adhesive do different jobs.
8. Support while it sets
Homebuilding’s guide suggests temporary pins under the coving at 600mm intervals while the adhesive dries, removed afterwards and the holes filled. On a stop end, make sure the return is not pushed out of line by the pin or by your hand pressure.
9. Fill, caulk and paint
Fill the joint between return and main piece, and any tiny gap along the wall and ceiling. Let it dry, sand lightly and paint. Done properly, the stop end reads as one continuous piece of moulding.
Cutting coving without a mitre box
A mitre box is the easiest way to hold a consistent angle, but it is not the only one. Supercove’s trade tips say a fine-tooth saw is the easiest way to cut coving, because its blade can be set against a mitre guide for the correct angle, and that a sharp craft knife gives a clean line that does not need sanding. Options without a box:
- A plastic mitre template or guide. A triangular guide sits on the coving and gives you a line to follow with the saw.
- A powered or hand mitre saw. Homebuilding lists an optional mitre saw alongside the clamping mitre box and a fine-tooth saw such as a 305mm tenon saw.
- Marked lines and a steady hand. Draw the 45° on the coving, support it firmly, and cut slightly outside the line. Then trim back to it with a knife or file.
Whichever you choose, cut the first stop end from a scrap length. Because a stop end is only two small cuts, it is the best place to practise before you cut your good lengths.
Carl’s Installer Tip
In our experience, the most common stop-end mistake is cutting the return the wrong way round, so that the pieces make a notch instead of a closed end. Hold the two offcuts against the wall and ceiling in their real positions before you cut the good piece. We’ve found that cutting the return a fraction long and trimming it back to fit is far easier than trying to rescue one cut too short. Always cut two or three spare returns from offcuts, because the first is rarely the best.
Fixing gaps and awkward walls
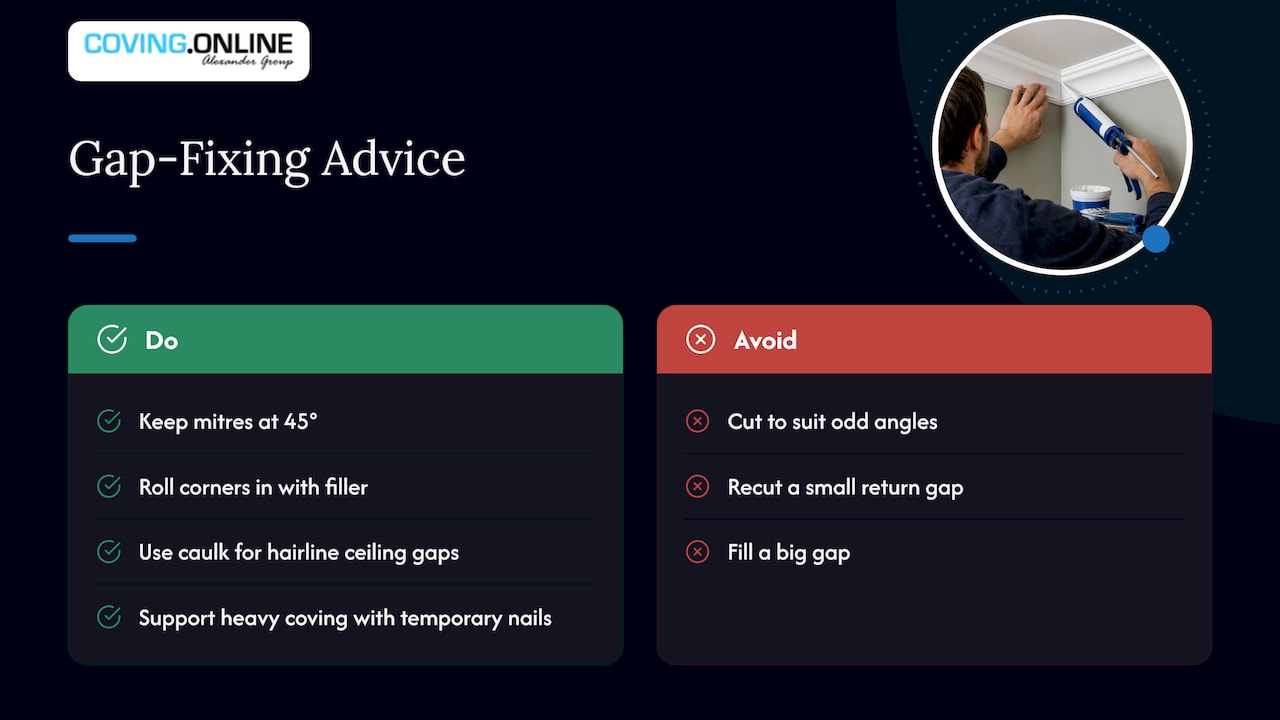
Rooms are rarely perfectly square, and stop ends show every imperfection. Supercove’s advice for corners that are not exactly 90° is to stick to 45° mitres and gently roll the corners in with filler so the mitre closes up, rather than cutting to suit the odd angle. The same applies to a stop end: keep the cut at 45° and let filler take up small differences.
Where the return does not quite meet the main piece, fill rather than recut. A hairline gap along the ceiling edge is a job for decorators’ caulk, not another cut. A big gap usually means the first cut was at the wrong angle or the coving was upside down, so it is cheaper to recut than to fill.
For heavier coving, long pieces may sag before the adhesive sets. DIYData’s guide recommends temporary nails under the bottom edge, with a couple in the ceiling to stop the moulding rolling forward, removed after the adhesive has set. Heavy plaster coving may need screws at about 1 metre spacing, with countersunk holes and filled heads.
Choosing coving that finishes well
The stop end is only as good as the coving behind it. Lightweight polyurethane mouldings such as the Orac Decor and NOËL & MARQUET ranges are easier to handle on a ladder and to cut cleanly than heavy plaster. The better the profile is defined, the easier it is to get a crisp mitre and return. Choose the profile for the room and ceiling height first, then plan where it will start and stop. Our cornice and coving range covers traditional and modern profiles, and our guide to coving and cornice styles helps you narrow the choice.
If you are specifying for a larger project, such as a hotel corridor or a development with many identical rooms, decide the stop-end detail once, make a sample and use it for every room. That keeps the finish consistent across trades.
Our view on stop ends
We think the stop end is one of the details that tells you whether a job was planned or improvised. A run of coving that finishes neatly, with the profile turning back into the wall, looks deliberate. An open end looks like the length ran out.
Our advice is to plan the finish before you buy. Decide where each run begins and ends, work out how many external cuts and returns you will need, and order a little extra so that you can practise and recut. Polyurethane profiles are forgiving to cut and light to hold, which suits a first stop end.
If you would rather not do it yourself, our Elite Decor UK national installer network can arrange professional installation across the UK. We can coordinate the project from purchase through to fitting.
Carl
Buy the profile and plan the finish
We supply over 500 Orac Decor and NOËL & MARQUET products, including coving, cornices, ceiling roses, skirting and LED lighting profiles, and we can arrange fitting through our Elite Decor UK installer network. Browse the cornice and coving range to choose your profile, add the right adhesive, and if you want a fitter to handle the stop ends and corners, find out about installation.

FAQ
What is the difference between a coving end stop and an end cap?
In practice they mean the same thing: a piece or cut that closes the open end of a coving run. Some people use “end cap” for a ready-made piece and “stop end” for the mitre and return you cut yourself. Either way, the aim is a closed, profiled end.
What angle do you cut for a coving stop end?
Cut the end as an external 45° mitre, then cut a very short matching external mitre as the return. The DIYnot thread describes the return as trimmed flush with the back of the first piece. Test on offcuts first so you can see which way the cut faces.
Can I cut coving without a mitre box?
Yes. A fine-tooth saw set against a mitre guide works, and a sharp craft knife gives a clean line on suitable materials, as Supercove’s trade tips explain. Mark the 45° carefully, cut slightly outside the line and trim back. Practise on scrap first.
How do I hide gaps at a stop end?
Fill small gaps with filler and run decorators’ caulk along the ceiling and wall edges, then sand and paint. If a gap is wide, recut the return rather than filling it, since a large gap usually means the angle or orientation was wrong. Keep to 45° mitres and let filler take up small differences.
Do I need a stop end if the coving ends at a corner?
No. Where coving meets a corner you use an internal or external mitre instead. Stop ends are for runs that finish away from a corner, such as at an archway, a bulkhead or an unwrapped chimney breast. Our guide to cutting an internal corner covers that case.
Sources
- How to terminate coving? | DIYnot Forums
- Supercove How To: Trade Tips On Cutting And Coving
- How to install coving to add a touch of period charm | Homebuilding
- A guide to putting up coving and cornice | DIYData
Recommended
- Coving Finishes That Perfectly Complete Modern British Homes
- Preformed Coving Corners for Cleaner Finishes
- Coving Scarf Joints: How to Cut, Fit and Hide Them
- How to Cut Coving Corners – The Complete Beginner’s Guide
