

Home Decor
LED Coving Cost UK: Typical Fitted Jobs £350–£700
Sep
Supply-only LED coving kits start from around £50 for a short run of profile, strip and driver. A fully fitted job in a typical UK room, including basic electrical work, usually lands between £350 and £700, rising well beyond that for large rooms, plaster profiles or smart lighting controls. The biggest swing factors are material choice, perimeter length and how much electrical work the driver needs.
TL;DR:
- Polyurethane coving is the best middle-ground option, costing between £5 and £15 per metre supply and up to £50 fitted depending on complexity.
- Fitting a medium-sized room (around 20m perimeter) typically costs between £350 and £700, with higher prices for plaster profiles or smart lighting controls.
- Electrical work, especially new circuits or control integration, can add between £300 and £1,200 to the total project cost.
- Proper surface preparation and precise measurements are crucial for achieving a high-quality finish and avoiding costly rework.
- DIY fitting can save money if the room has straightforward geometry and the person is comfortable with basic tools, but guarantees and complex wiring should be handled professionally.
Table of Contents
- What does LED coving cost per metre and per room?
- What affects the final cost of LED coving?
- How much do LED coving materials and kits cost?
- How much does LED coving labour and electrical work cost?
- Is it worth fitting LED coving yourself, or paying for a professional install?
- Worked budget examples for small, medium and large rooms
- How do you get an accurate LED coving quote?
- Carl’s installer tip: why surface prep decides your finish
- Do you need permits or upgrades for LED coving?
- Comparing costs across LED coving styles and materials
- Where the real value in LED coving spending sits
- Get your LED coving priced properly with Coving.Online
- Sources
What does LED coving cost per metre and per room?
Before you request quotes, it helps to see supply and fitted prices side by side. The gap between “buying the parts” and “having it fitted properly” is where most homeowners underestimate their budget.
Supply-only pricing depends heavily on the coving profile you choose. Basic polystyrene coving with an LED channel sits at the cheap end, while polyurethane (also called duropolymer) profiles cost more but hold detail and paint finish far better. Plaster coving with an integrated LED rebate sits at the top of the range. LED strip, driver and connector costs then stack on top of the profile price.
| Item | Supply-only (per metre) | Fitted (per metre, incl. labour) |
|---|---|---|
| Polystyrene coving + basic LED strip | £2–£5 | £5 to £15 |
| Polyurethane/duropolymer profile + LED strip | £5–£15 | £15 to £50 |
| Plaster coving with LED rebate | £15–£50+ | £15 to £50 |
| Complete small kit (profile, strip, driver) | From £50 total | Add a half-day labour minimum charge |
For whole rooms, the figures look like this:
- Small bedroom (perimeter around 14m): roughly £250 to £450 fitted with a basic polyurethane profile and single-colour strip.
- Medium lounge (perimeter around 20m): typically £350 to £700 fitted, depending on strip tier and whether painting is included.
- Large reception or open-plan room (perimeter 25m+): often £900 to £1,600 or more, especially with plaster profiles, RGBWW strip and a smart controller.
A few things sit outside these headline numbers. Most tradespeople quote excluding VAT for domestic work unless they’re VAT-registered, in which case 20% gets added at invoice stage. Minimum call-out charges are common, so a tiny job in one room rarely costs less than a half-day rate. Scaffolding, tower hire or extended access equipment for high ceilings or stairwells adds a separate line that many quotes list apart from the coving work itself.
What affects the final cost of LED coving?
Four variables do most of the work in pushing a quote up or down, and understanding them helps you read a quote properly rather than just comparing bottom-line totals.
Material and profile complexity. A simple coved profile with a straight LED channel is quick to cut and fit. Ornate plaster cornice with an integrated light rebate takes longer to mitre, seat and finish, and the material itself costs more per metre before labour even enters the picture.
Perimeter length, corners and geometry. Every internal or external corner needs a mitred cut, and bay windows, chimney breasts or alcoves multiply the number of joints. A room with six corners costs noticeably more to fit than a similar-sized room with four, because each joint takes time to cut, fill and blend invisibly.
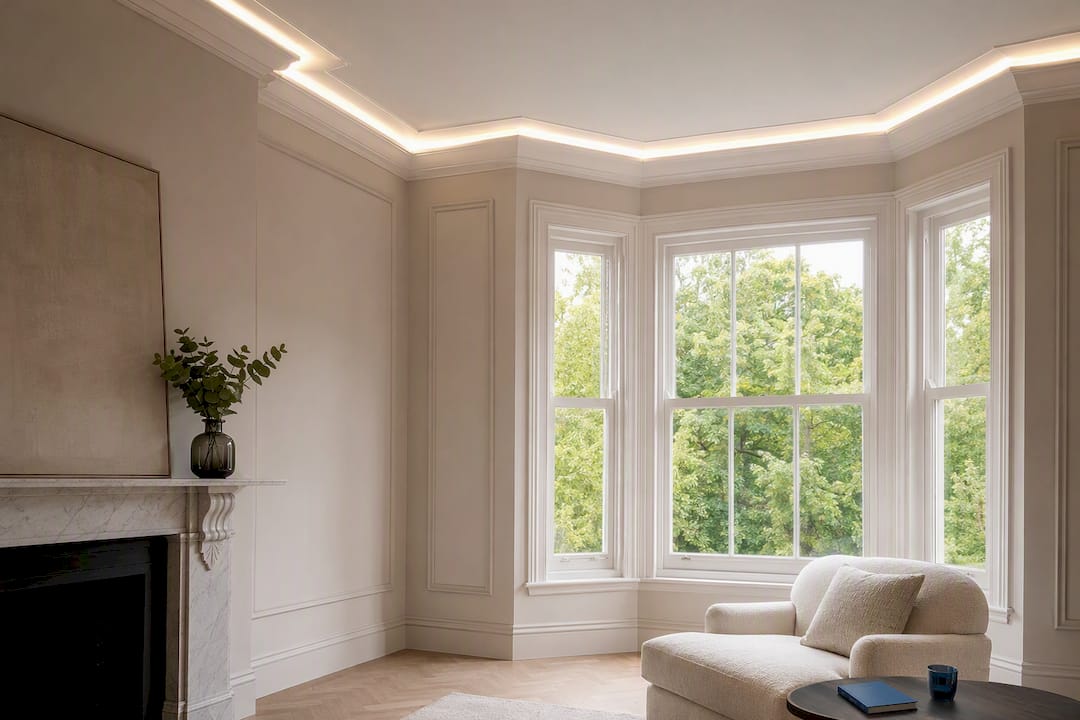
Ceiling height and access. Standard 2.4m ceilings are straightforward from a stepladder. Anything above that, particularly in period properties with 3m-plus ceilings, usually needs towers or scaffold hire, and that access cost sits on top of the coving work.
Finish level. There’s a real cost difference between three service tiers:
- Supplied only (you fit it yourself)
- Supplied and painted (ready to install, finish-ready)
- Supplied, fitted and painted (fully managed, walk-away finish)
Each step up typically adds a proportional labour charge rather than a fixed fee, since painting and finishing a plaster profile takes longer than a polystyrene one.
Pro Tip: Always ask whether a quote includes filling and caulking the coving-to-ceiling and coving-to-wall joints. This is the single most common omission we see in cheaper quotes, and it’s the difference between a crisp shadow line from your LED strip and a scruffy, gap-riddled one.
How much do LED coving materials and kits cost?
Material choice is the first decision that shapes your budget, and it’s worth understanding the three main coving substrates before you look at strip and driver pricing.
Polystyrene coving is the budget option, typically priced at £2 to £5 per metre. It’s light, easy to cut with a mitre saw, and forgiving for DIY fitting, but it dents easily and doesn’t hold crisp architectural detail the way denser materials do.
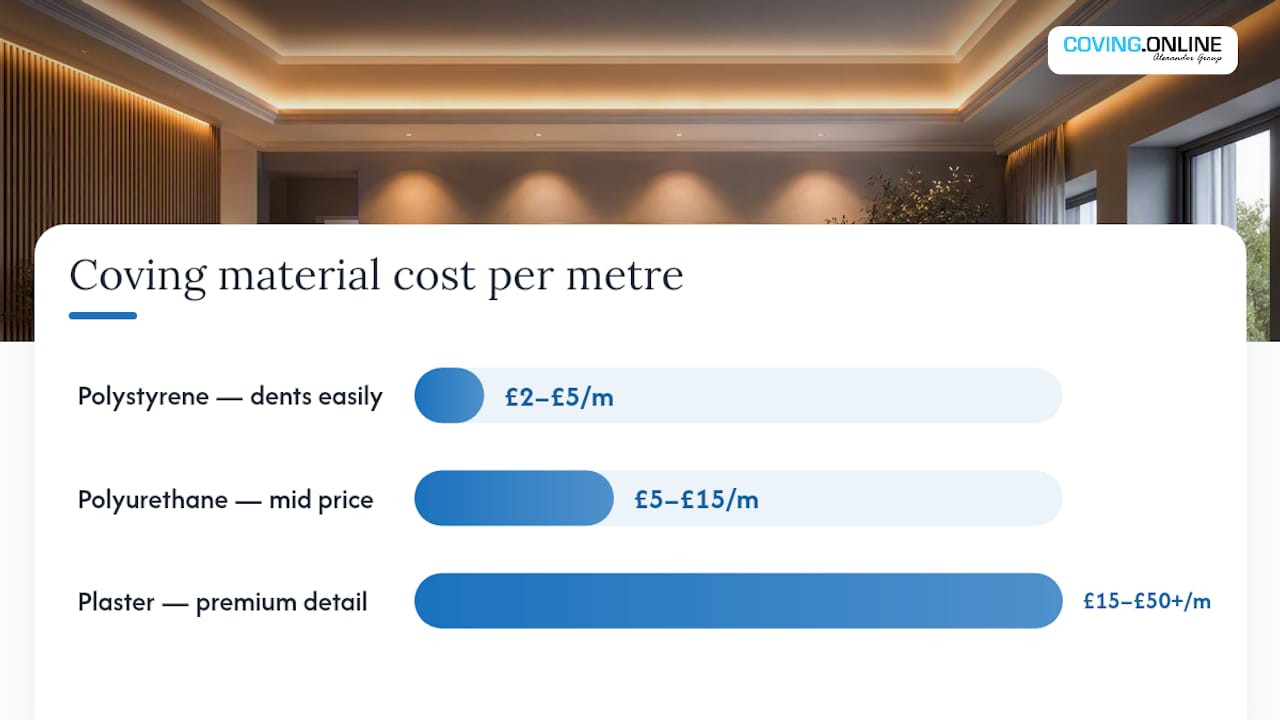
Polyurethane, sometimes sold as duropolymer, sits in the middle at roughly £5 to £15 per metre. Orac Decor’s polyurethane profiles fall into this category and are a strong balance of durability, fine detail and paintability, which is why they’re widely specified by interior designers who want a premium look without plaster’s weight or cost.
Plaster coving with an LED rebate is the premium tier, commonly £15 up to £50-plus per metre. It offers the sharpest detail and the most authentic period profile, but it’s heavier, more brittle in transit, and slower to fit.
LED strip itself comes in tiers that affect cost per metre:
- Basic single-colour warm or cool white strip: the cheapest option, suited to ambient wall-washing.
- Adjustable white (tunable CCT) strip: costs more but lets you shift colour temperature from warm evening light to cooler daylight tones.
- RGBWW or RGBWW+ strip: the most expensive tier, giving full colour control alongside white light, usually paired with a smart controller.
Complete kits bundling profile, strip and driver start from around £50 for short runs, and buying a kit rather than sourcing components separately tends to avoid small-order markups on connectors and end caps. Diffuser covers, which soften the LED line into an even glow rather than visible dots, typically add a modest per-metre cost but make a noticeable difference to finish quality. Smart controllers with app or voice control add material cost on top of a standard driver, usually justified only if you want zoning or scene control across multiple rooms.
How much does LED coving labour and electrical work cost?
Fitting cost is where quotes diverge most, because labour rates, minimum charges and electrician involvement all vary by region and by how the driver connects to your existing wiring.
Decorators and general fitters typically charge day rates that convert to a per-metre fitting cost once material handling, cutting and finishing are factored in. Specialist coving installers, who fit LED profiles regularly, often charge a slight premium over a general decorator but work faster and produce cleaner joints, which usually balances out the hourly difference. Most trades apply a minimum call-out or half-day charge, so a single small room rarely benefits from a “per metre” discount the way a whole-house job does.
Electricians bill separately from the coving fitter in most jobs. A simple driver tie-in to an existing switched circuit is usually the cheapest electrical task. New circuits, dedicated fused spurs or multi-zone dimmer integration cost considerably more, because they involve running new cable, potentially lifting floorboards, and certifying the work.
Wiring and control integration for LED coving can add £300 to £1,200 to a project’s total cost, depending on how much new electrical work is needed.
Contractors don’t simply add labour hours to material cost. Quotes commonly bundle five components: material, labour, a material markup (often 25 to 35% on specialist lighting parts), overhead recovery built into the labour rate, and a contingency margin of 10 to 15% for unexpected issues like uneven walls or hidden cabling. That loaded labour rate is why a tradesperson’s quoted hourly figure often looks higher than their take-home wage, since insurance, van costs and tool depreciation all sit inside it.
Regional variation matters too. London and the South East typically run 15 to 25% above national averages for both decorating and electrical labour, and difficult access, such as third-floor flats with no lift, adds time that gets reflected in the final bill.
Is it worth fitting LED coving yourself, or paying for a professional install?
DIY fitting can genuinely cut costs, but only for specific parts of the job. It’s worth being honest about where the savings are real and where they quietly disappear.
- What DIY realistically covers. Cutting and fixing polystyrene or polyurethane coving with adhesive is achievable for a confident DIYer with a mitre saw and steady hands. Running LED strip into the channel and connecting it to a plug-in driver is straightforward if you’re not tying into mains wiring.
- Hidden costs people forget. Adhesive, caulk, filler, sandpaper, paint, dust sheets and a mitre saw (if you don’t own one) add up quickly, often £50 to £100 before you’ve touched the coving itself. Factor in the time cost too: a first-timer’s small bedroom can easily take a full weekend.
- Warranty and compliance gaps. DIY installs typically carry no workmanship warranty, so mistakes are yours to fix. Anything beyond plugging into an existing socket, such as wiring a new switched live or installing a fused spur, falls under Part P of the Building Regulations and needs a qualified electrician or Building Control notification.
If your room has straightforward geometry and you’re comfortable with basic tools, DIY can save the labour portion entirely. For anything involving new circuits, multiple corners, or a finish you want to look flawless, professional fitting removes the risk of a visible mistake that’s expensive to redo.
Worked budget examples for small, medium and large rooms
Seeing full itemised breakdowns makes it much easier to map your own room onto a realistic number, so here are three worked examples covering the common room sizes homeowners ask about.
Small bedroom. This assumes a single accent run around the ceiling perimeter, a basic plug-in driver, and a minimal electrician allowance for connecting to an existing switch. It’s a realistic entry point for someone testing LED coving in one room before committing elsewhere in the house.
Medium lounge. The step up here comes from adjustable white strip (useful for a room used both day and evening) and a proper electrician visit to wire a switched live rather than relying on a plug transformer. Most three-bed semi lounges and open-plan kitchen-diners fall into this band.
Large reception. Plaster coving, RGBWW strip and a dedicated electrical circuit push this well past £2,000. Rooms with bay windows, high ceilings or multiple alcoves push it further still, since every extra corner adds a mitred joint and more fitting time.
To adapt these to your own room, measure your actual perimeter in metres, multiply by your chosen material’s per-metre rate, then add a flat allowance for driver, electrician work and contingency. A comparison of coving materials is worth a browse before you commit, since profile choice moves the total more than almost any other single decision.
How do you get an accurate LED coving quote?
Getting quotes that are genuinely comparable, rather than three different guesses at what you might want, comes down to giving installers the right information upfront.
Measure your room’s full perimeter in metres, note the ceiling height, count every internal and external corner, and flag any obstacles such as coving-mounted smoke alarms, curtain poles or built-in wardrobes that interrupt the run. Photographs of the ceiling-to-wall junction help installers spot potential prep issues before they arrive.
Ask for an itemised quote that separates material, labour, electrician work, access equipment and painting into distinct lines. A single lump-sum figure makes it impossible to see where your money is going or to negotiate on any one element.
- Confirm whether the price includes VAT.
- Check the installer holds public liability insurance and ask for two recent references.
- Ask what workmanship warranty applies, and get it in writing.
- Clarify the lead time from booking to completion.
- Agree a payment schedule (typically a deposit, with balance on completion).
- Establish a clear change-order process for anything discovered once work starts, such as unexpectedly uneven walls.
Pro Tip: We’ve found that asking one specific question filters out weaker quotes fast: “What happens if the wall behind the coving line isn’t flat?” A good installer already has an answer involving packing or additional filler allowance. If they haven’t considered it, that’s a sign the quote may grow once the tape measure comes out.
Carl’s installer tip: why surface prep decides your finish
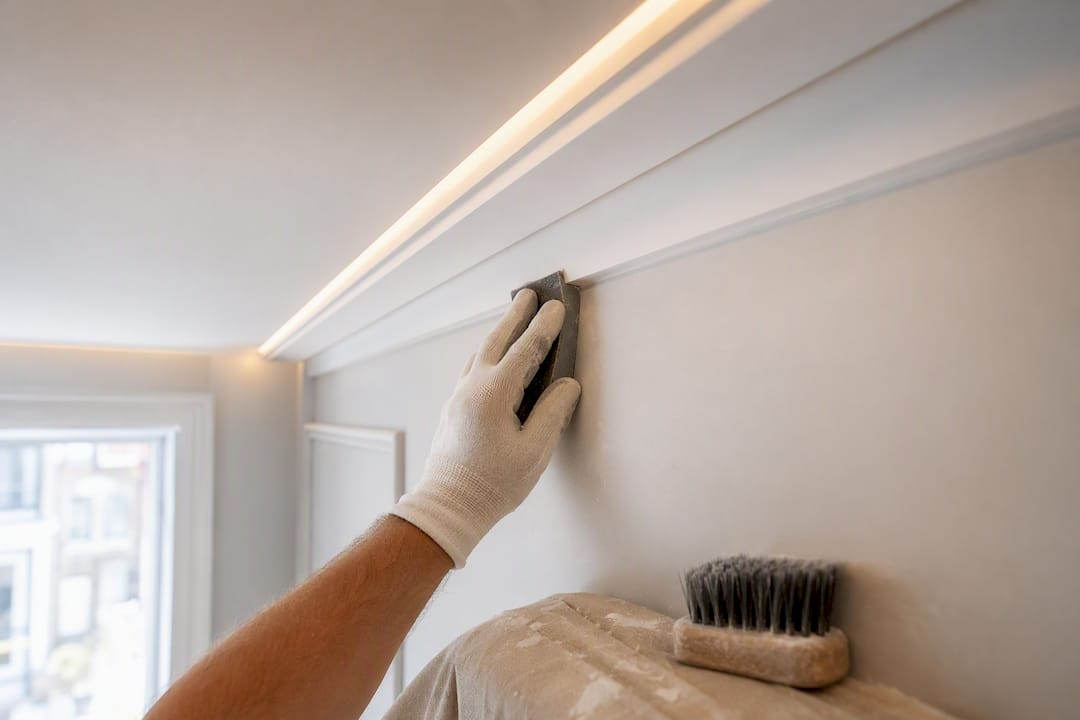
In our experience, most disappointing LED coving jobs trace back to skipped prep, not bad coving. Uneven plaster or flaky old paint causes visible shadowing and an uneven light line once the strip is switched on. Insist prep and priming sit inside the written scope, not as a vague “if needed” afterthought.
Do you need permits or upgrades for LED coving?
Most LED coving installs in a standard domestic room need no permits or planning permission whatsoever, since they’re an internal decorative and lighting change. The costs that catch people out sit elsewhere.
If your project involves a new electrical circuit rather than tying into an existing one, that work falls under Part P of the Building Regulations. A qualified electrician self-certifying the work, or notifying Building Control, typically adds a modest administrative cost on top of the electrical labour already discussed, rather than a separate permit fee in the planning sense.
Listed buildings and conservation areas are the exception. If you’re in a listed property and planning to remove or significantly alter existing period cornice to fit an LED profile, check with your local conservation officer first, since altering original decorative plasterwork can require listed building consent even for internal changes.
Consumer unit upgrades are the other hidden cost. Older properties with a dated fuse board sometimes need additional circuit capacity checked before an electrician adds a new lighting circuit, and if the consumer unit needs upgrading to accommodate it, that’s a separate cost outside the coving project entirely, usually running into several hundred pounds. It’s worth asking your electrician to check this during their initial site visit rather than discovering it mid-job.
Comparing costs across LED coving styles and materials
Choosing between polystyrene, polyurethane and plaster isn’t just an aesthetic decision. It changes your total budget more than almost any other variable in the project.
Polystyrene delivers the lowest entry cost and is genuinely serviceable for rental properties, temporary schemes or anyone testing whether they like LED coving before investing further. Its drawback is durability: it dents under light impact and doesn’t hold sharp architectural lines as convincingly as denser materials.
Polyurethane profiles, including the ranges Orac Decor supplies, sit at a cost point that reflects a real jump in quality. They resist knocks, take paint beautifully, and hold fine detail that mirrors traditional plaster coving at a fraction of the weight and installation complexity. For most homeowners wanting a premium look without plaster’s fragility, this is the sensible middle ground.
Plaster coving with an integrated LED rebate costs the most per metre and the most to fit, since it’s heavier, more brittle, and demands more skilled handling. It suits period properties and higher-specification renovations where matching existing plaster cornice matters more than cost efficiency.
Beyond the coving substrate itself, LED strip tier is a secondary cost lever. A basic single-colour strip on a mid-range polyurethane profile can cost less overall than a premium RGBWW strip on cheap polystyrene, so it’s worth balancing your budget across both decisions rather than maximising spend on one and cutting corners on the other.
Where the real value in LED coving spending sits
The conventional advice on this topic focuses almost entirely on material cost per metre, and that’s a mistake. Perimeter length and corner count decide far more of your final bill than whether you choose polystyrene or polyurethane, yet most cost guides barely mention geometry.
The other place conventional advice falls short is prep work. It gets treated as a footnote when it’s arguably the single highest-value spend in the whole project. A £200 allowance for levelling and priming a poor wall protects the entire visual impact of the LED strip above it. Skip it, and even premium plaster coving with RGBWW strip will show every ripple in the ceiling line.
If you’re budgeting for the first time, prioritise in this order: get an accurate perimeter measurement, ask every installer explicitly about surface prep, and only then start comparing strip tiers and smart control options. Get those three things right and the rest of the decision becomes far easier to price with confidence.
— Carl
Get your LED coving priced properly with Coving.Online
You can get access to premium materials used by trade installers without the markup of going through a general contractor first. Our range includes Orac Decor and LED profile kits, complete strip-and-driver bundles, and the polyurethane and plaster coving discussed throughout this guide, all despatched fast across the UK.

If you’d rather not manage fitting yourself, a specialist installer network covers the country and can quote your exact perimeter, corner count and electrical requirements properly, rather than working from a rough estimate. Browse the full Orac Decor coving and LED profile range to match a profile and strip tier to your room, or head to Coving to request a bespoke measurement and quote for a fully fitted install. Whether you’re speccing one bedroom or an entire house, getting the right kit costed properly from the start is the easiest way to avoid a budget surprise halfway through the job.
Sources
- Coving installation cost
- Coving installation cost in the UK: 2026 price guide
- How to Quote LED Lighting Projects: A Contractor’s Pricing Guide
- LED Strip Wall Mount Cove Coving LED Profile Strip Complete Kit
- Coving cost guide
